If you are using the Asset Manager to record and track maintenance tasks (and similar Jobs) for your Assets, then it is likely that many of your Jobs will need to be repeated on a regular or semi-regular basis, and that each new instance of these Jobs will be identical to the last. Because of this, Activ gives you the option to create Job Schedules, allowing you to create a single ‘master’ record that will subsequently be used to create a chain of Scheduled Jobs for your Engineers to complete. When you create (and subsequently activate) a Job Schedule, Activ will automatically:
- create a series of new Jobs at your specified frequency
- copy the Job details from the Schedule to each new instance of the Job
- copy the Completion Notes from each previous instance of the Job into each new instance of the Job (see View the Completion Notes of a Job for more information); and
- provide you with an easy-to-access record of all Job instances that have been created by the Schedule.
For convenience, Activ provides you with the option to:
- Create a Job Schedule from scratch;
- Create a Job Schedule using an existing schedule as a template; or
- Create a Job Schedule from an ad hoc Job
This article explains how to create a Job Schedule from scratch. See the above links if you wish to use an existing Job or Schedule as a template for a new Schedule.
*****
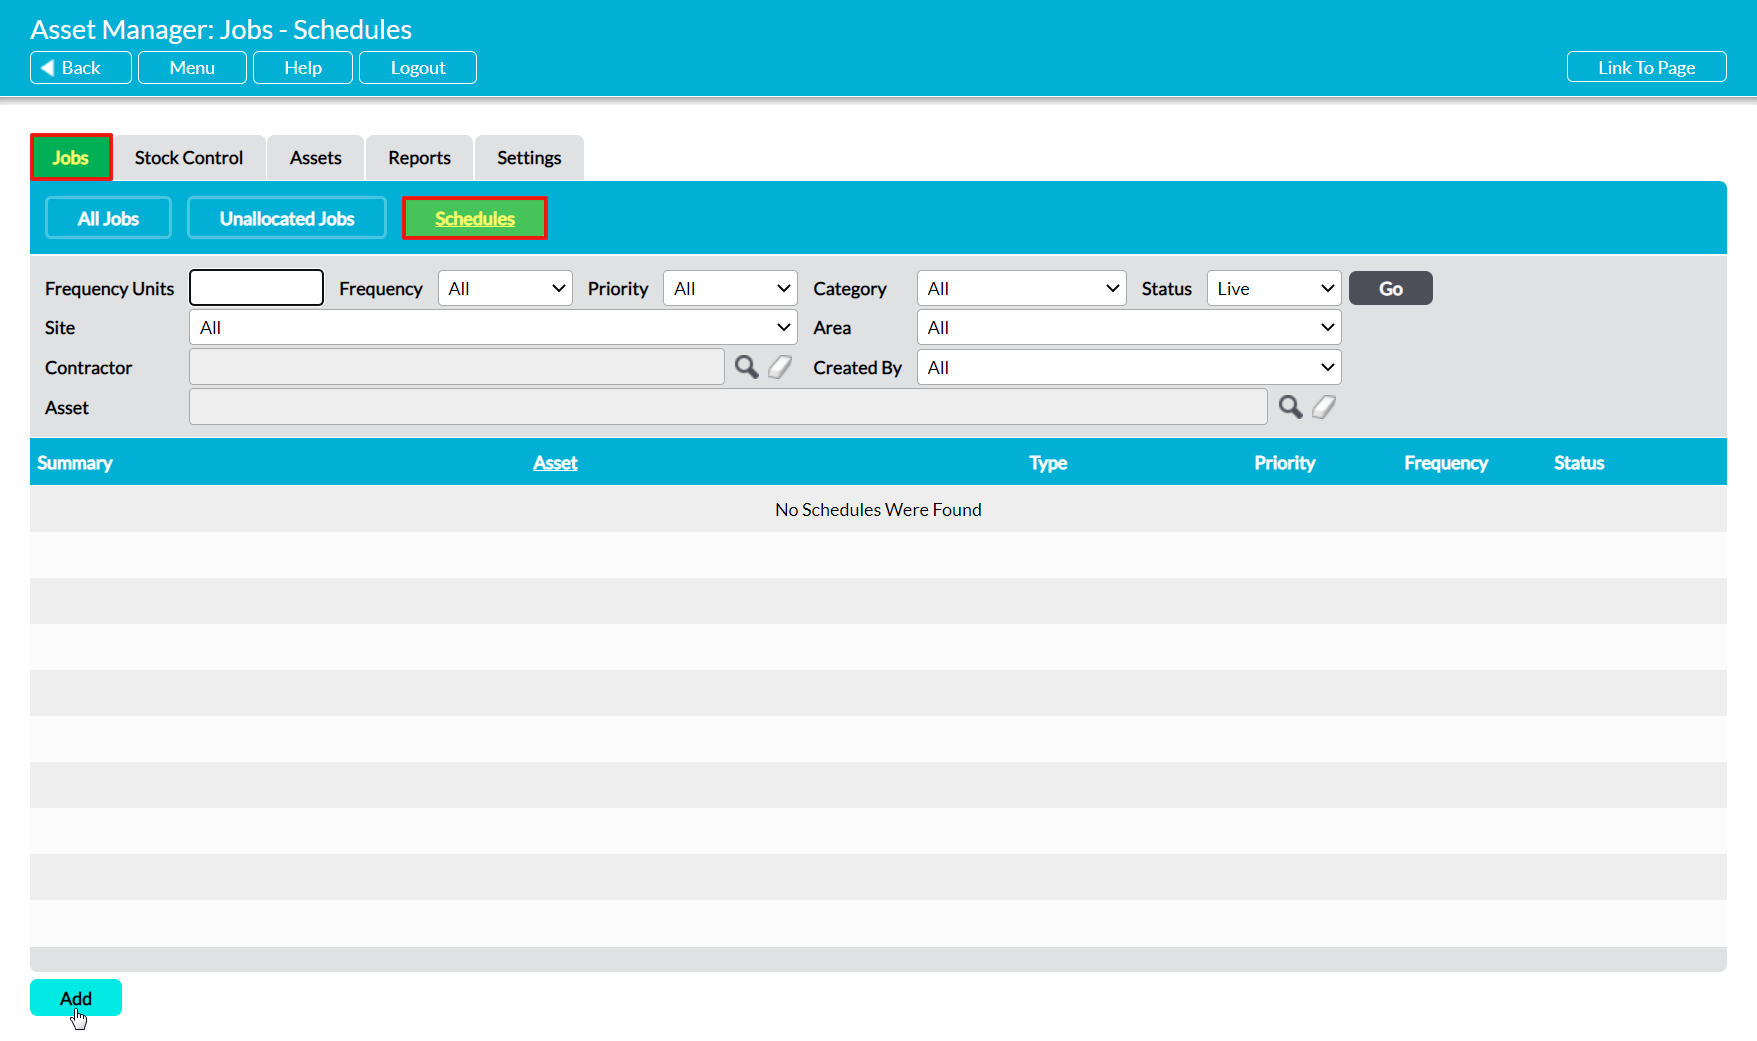
To create a new Job Schedule, open the Asset Manager on its Jobs tab, and then click on the Schedules button at the top of the screen. This will open the Job Schedules register, where all Job Schedules are recorded. Click on Add.
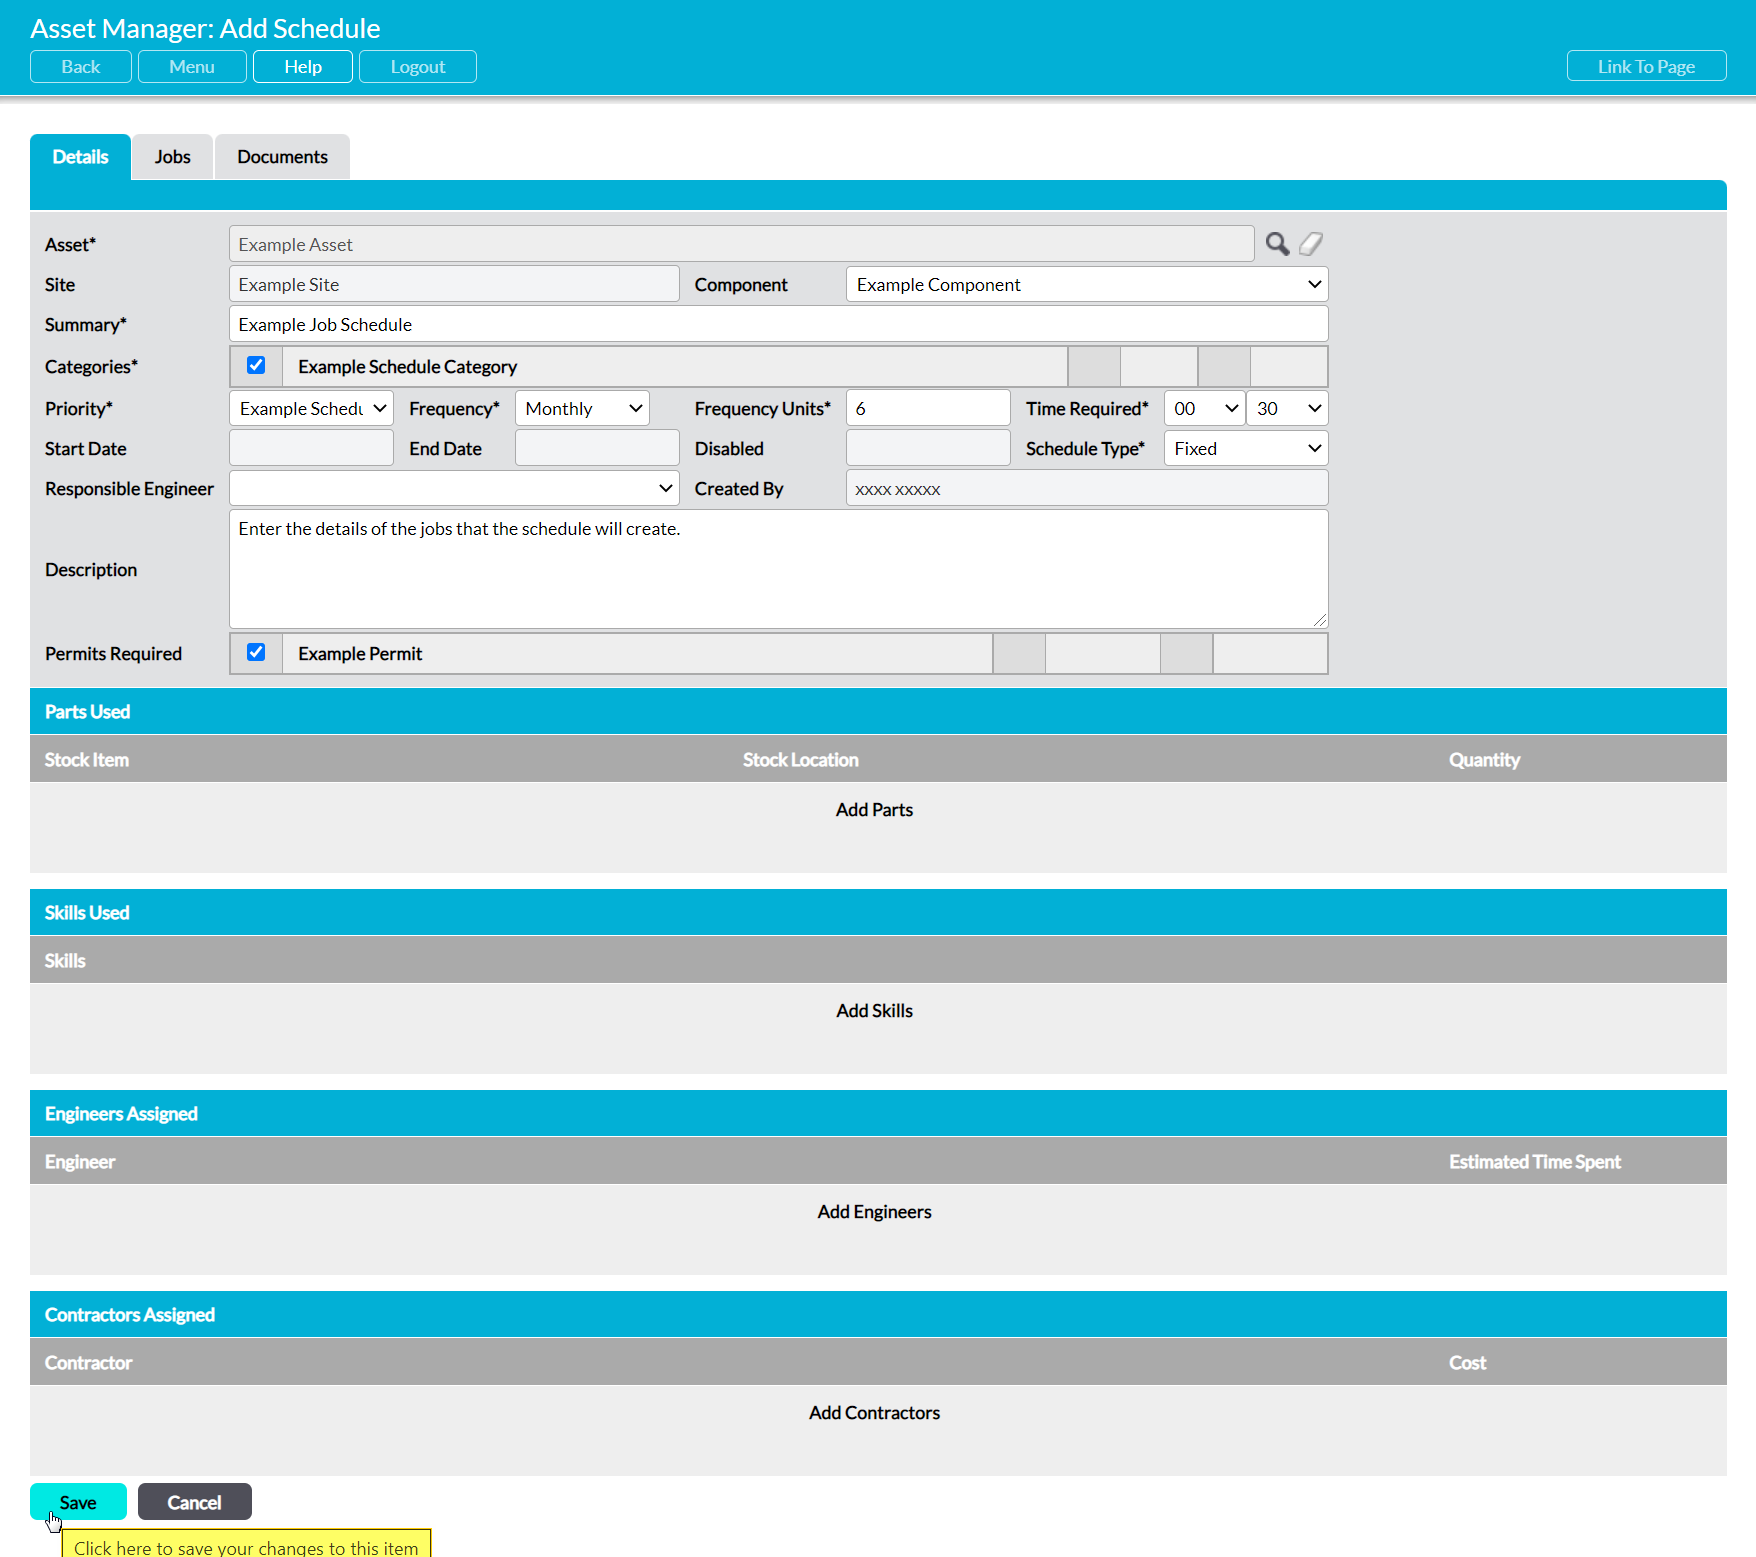
Activ will open a blank Details form for you to populate. This form contains up to five sections:
- an unnamed top section, which contains the Schedule’s key information.
- the Parts Used section, which is used to record the parts (Stock Items) that are required to complete the Schedule’s Jobs. Note that this is only relevant if you are using the Stock Control
- the Skills Used section, which is used to record the Skills that are required to complete the Schedule’s Jobs.
- the Engineers Assigned section, which can be used to assign multiple Engineers to the Schedule’s Jobs if required.
- the Contractors Assigned section, which can be used to assign one or more Contractors (i.e. third party companies) to the Schedule’s Jobs if required. Note that this section is only available if your system includes the Customers and Suppliers
The named sections are optional, and are typically completed when the Jobs that are generated by the Schedule are being closed (see Close a Job). However, the fields within the top section of the form contain the details that are required to describe and generate the Schedule’s Jobs, and should be completed at the time of the Schedule’s creation.
Up to seventeen fields are available for you to complete within the top section of the form:
Asset* – use the magnifying glass to select the Asset that the Schedule relates to. Note that the Asset must be recorded within your Asset Manager before you can select it (see Add an Asset).
Site – automatically filled with the Site that is associated with the Asset that has been selected within the Asset field.
Component – use the dropdown menu to select the specific component of an Asset that the Schedule relates to. Note that the Component must already have been recorded against the relevant Asset (see Add a Component to an Asset), and that options will only appear within this field once an Asset has been selected.
Summary* – enter a short title for the Schedule. Note that this title will be copied to all Jobs generated by the Schedule.
Categories* – use the checkboxes to select the categories that apply to the Schedule’s Jobs. Note that these options are configured within the Settings tab (see Configure Jobs).
Priority* – use the dropdown to select the priority level of the Schedule’s Jobs. Note that these options are configured within the Settings tab (see Configure Jobs).
Frequency* – use the dropdown menu to specify the frequency at which the scheduled Job should repeat. This can be set to daily, weekly, or monthly.
Frequency Units* – enter a number to specify how far apart each instance of a scheduled Job should be spaced. E.g. enter ‘2’ to schedule a Job for every two days/weeks/months.
Time Required* – use the dropdown menus to specify the number of hours and minutes that are likely to be required to complete each instance of the Job.
Start Date – automatically populated once the Job Schedule has been activated. This will display the date on which the Schedule was started (i.e. the date from which new Jobs will be created).
End Date – automatically populated once the Job Schedule has been activated, if the ‘End Date’ field is completed during the activation process. This will display the date on which the Schedule will end (i.e. stop generating new Jobs) if a date has been specified.
Disabled – automatically populated field that identifies whether the Schedule is live. This will be marked as ‘yes’ if the Schedule is currently deactivated, and ‘no’ if it is currently activated.
Schedule Type* – use the dropdown menu to specify whether the Schedule should be ‘fixed’ or ‘flexible’. If ‘Fixed’ is selected, the repeating Jobs will be scheduled at fixed intervals regardless of when the previous Job in the schedule was completed. If ‘Flexible’ is selected, the next Job will not be generated until the previous Job is closed, and it will be scheduled based on the previous Jobs’ completion date and the interval given in the Frequency and Frequency Units fields. For example: if these fields are set to 3 Months, the next Job will be created when the current Job from the schedule is marked as ‘closed’ and the new Job’s Due Date will be set 3 months on from its Completed Date.
Responsible Engineer – use the dropdown menu to assign the Engineer who is responsible for the Schedule and all Jobs generated by it. Note that individuals must be recorded as an Engineer within your Asset Manager before they will appear within this menu (see Manage Engineers). Note that you can also leave this blank until a later date if necessary.
Created By – automatically populated with the name of the person who created the Schedule.
Description – enter a description for the Jobs that the Schedule will generate, and any other relevant notes required to complete the Jobs.
Permits Required – use the checkboxes to select any permits that are legally required to complete the Schedule’s Jobs. Note that these options are configured in the Settings tab (see Configure Jobs).
Enter the necessary details, and then click Save.
You will be returned to the new Job Schedule’s Details tab, from which you can review the information you have just entered.


