
Some parameters used within the Business Risk Manager module are selected from pre-defined lists, which are created and managed from the module’s Settings tab. Most settings included within this tab are pre-populated with default options to allow you to begin using the module as soon as it is added to your system, but you also have the option to customise the existing options so that they can be adapted to your organisation’s specific needs.
The settings associated with the Business Risk Manager are:
- Affected Areas
- Categories
- Interested Parties
- Likelihoods (Opportunities)
- Likelihoods (Risks)
- Impacts (Opportunities)
- Impacts (Risks)
- Significance
- Sites
*****
Affected Areas
The Affected Areas parameter allows you to identify the broad areas of concern that may be affected by your business Risks/Opportunities, and that should be considered when you are evaluating the ‘context’ of your organisation and activities.
The area is pre-populated with six default options:
- Business
- Energy
- Environment
- Health and Safety
- Information Security
- Quality
To add a new Area, open the Settings tab and then select the Affected Areas item from the left-hand menu. Type the Area in the Display As* field at the top of the page, then use the dropdown fields to specify where in the list the new Area should be displayed (Order field), whether the option is to be Disabled?* (unavailable for selection), and whether it should be the Default?* (selected by default when a new Risk/Opportunity is added). Click on Add once you have completed your entries.
The newly added Area will be displayed in the list, in the position specified.
To edit an Affected Area, locate its record within the list and click on the Pencil Icon to open it for editing.
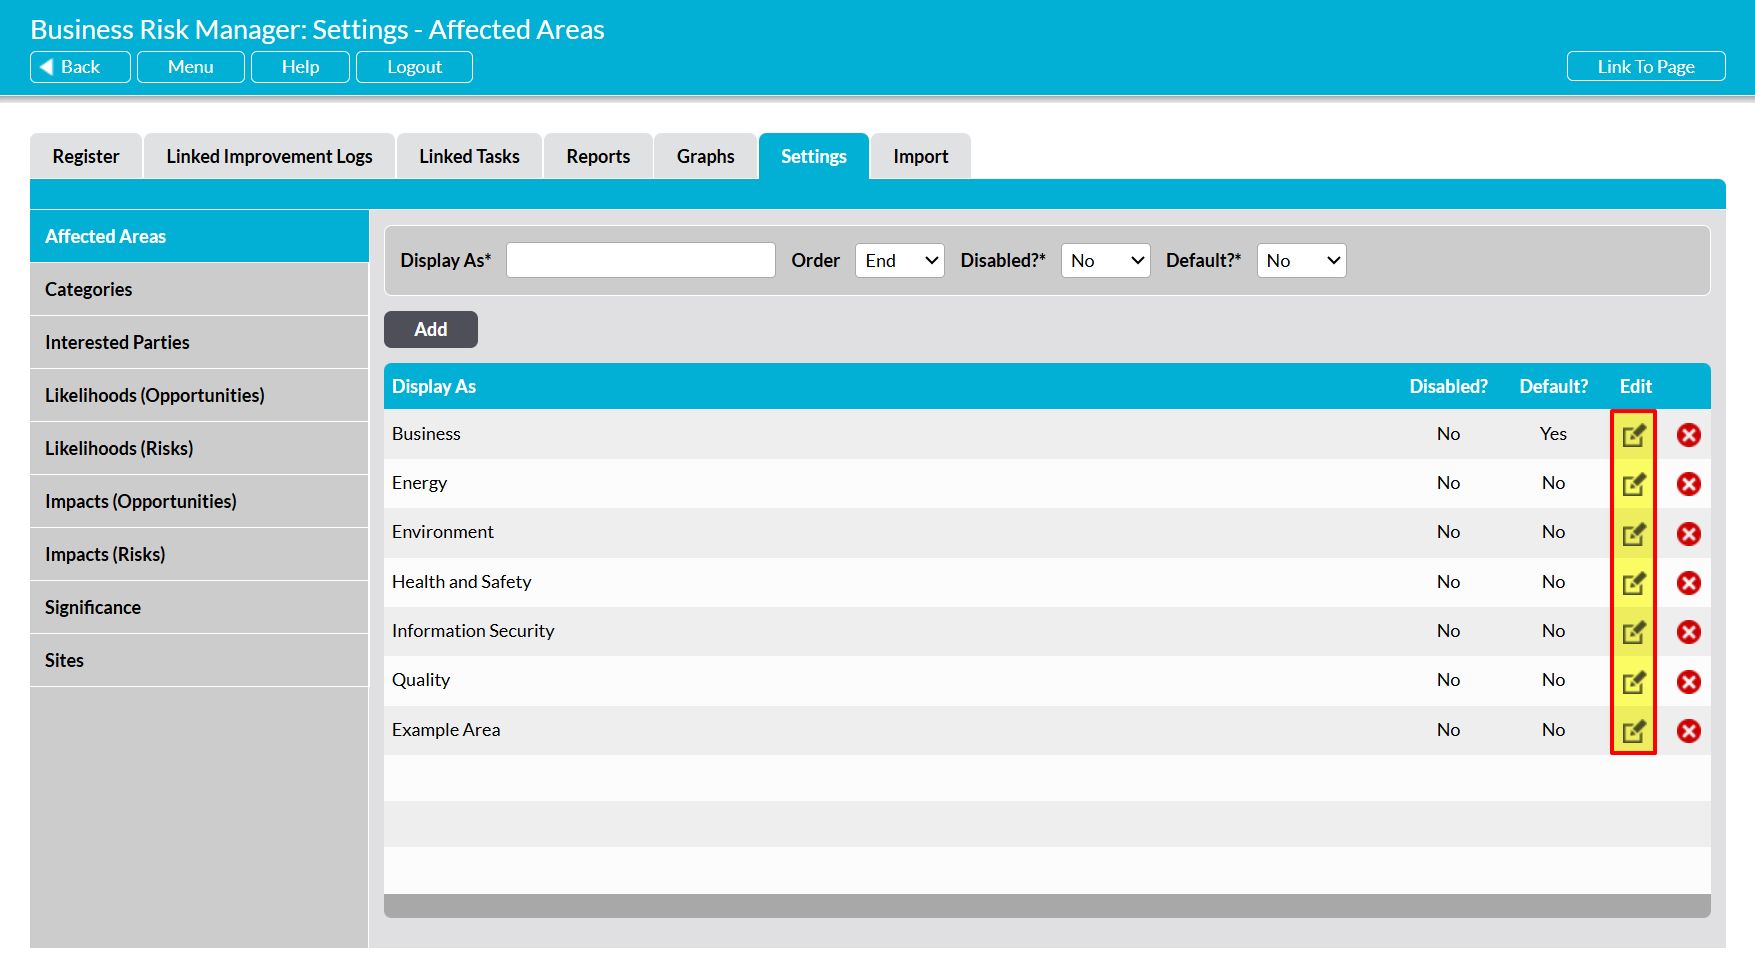
Make the necessary changes to the fields at the top of the page, and then click Save.

To delete an Area from the list, locate its record and click on the red cross displayed to its right.
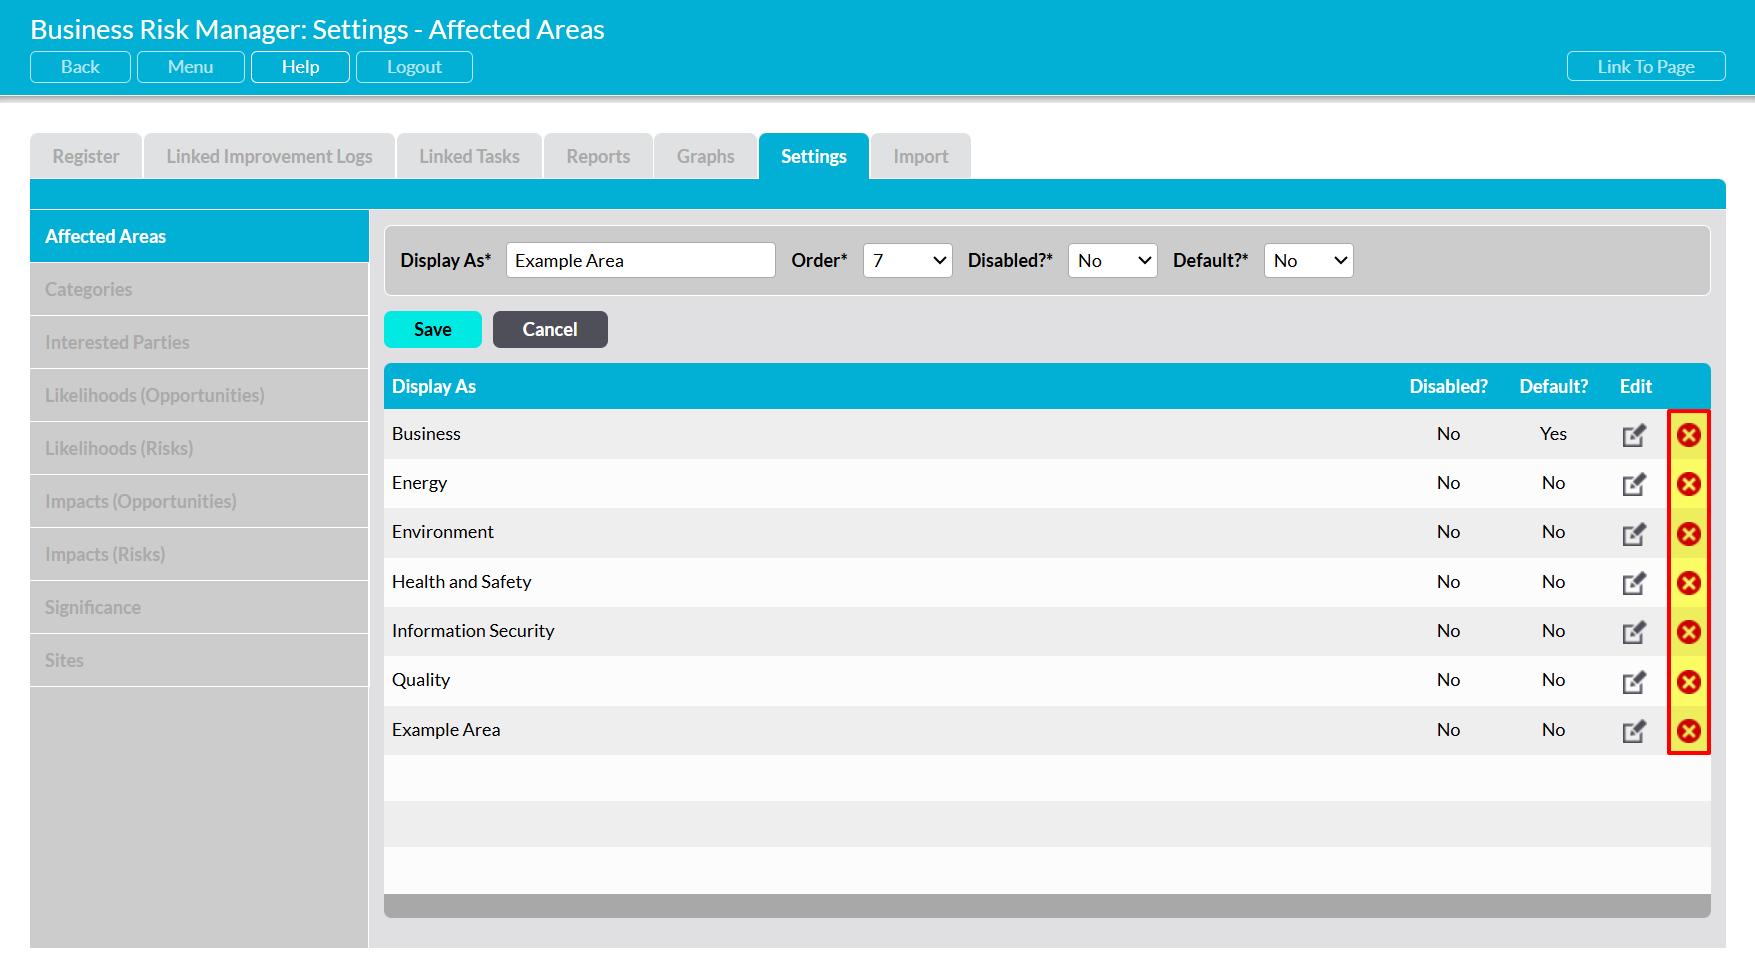
If the option hasn’t been used within the Business Risk Manager, then it will be removed from the list. However, you will not be able to delete an Area that has already been used within your system. Instead, you will need to disable the option to remove it from dropdown lists and prevent its future selection.
*****
Categories
The Categories parameter allows you to identify the general types of Risk/Opportunity that may affect your company and its activities, and is intended for high-level grouping of your records. For example, you might create a Category for ‘Competition’, but you would not typically create individual options for different forms of competition.
This area is pre-populated with sixteen default options:
- Competition
- Customer culture
- Customer requirements
- Economic environment
- Legal requirements
- Market dynamics
- Organisation knowledge
- Organisation structure
- Organisation culture
- Physical/natural environment
- Political environment
- Process/resource capability
- Social environment
- Supplier culture
- Supplier requirements
- Technology
To add a new Category, open the Settings tab, and then select the Categories item from the left-hand menu. Enter the Category into the Display As* field at the top of the page, then use the dropdown fields to specify whether the option is to be Disabled?* (unavailable for selection), and whether it is to be the Default?* (selected by default when a new Risk/Opportunity is added). Click on Add once you have completed your entries.
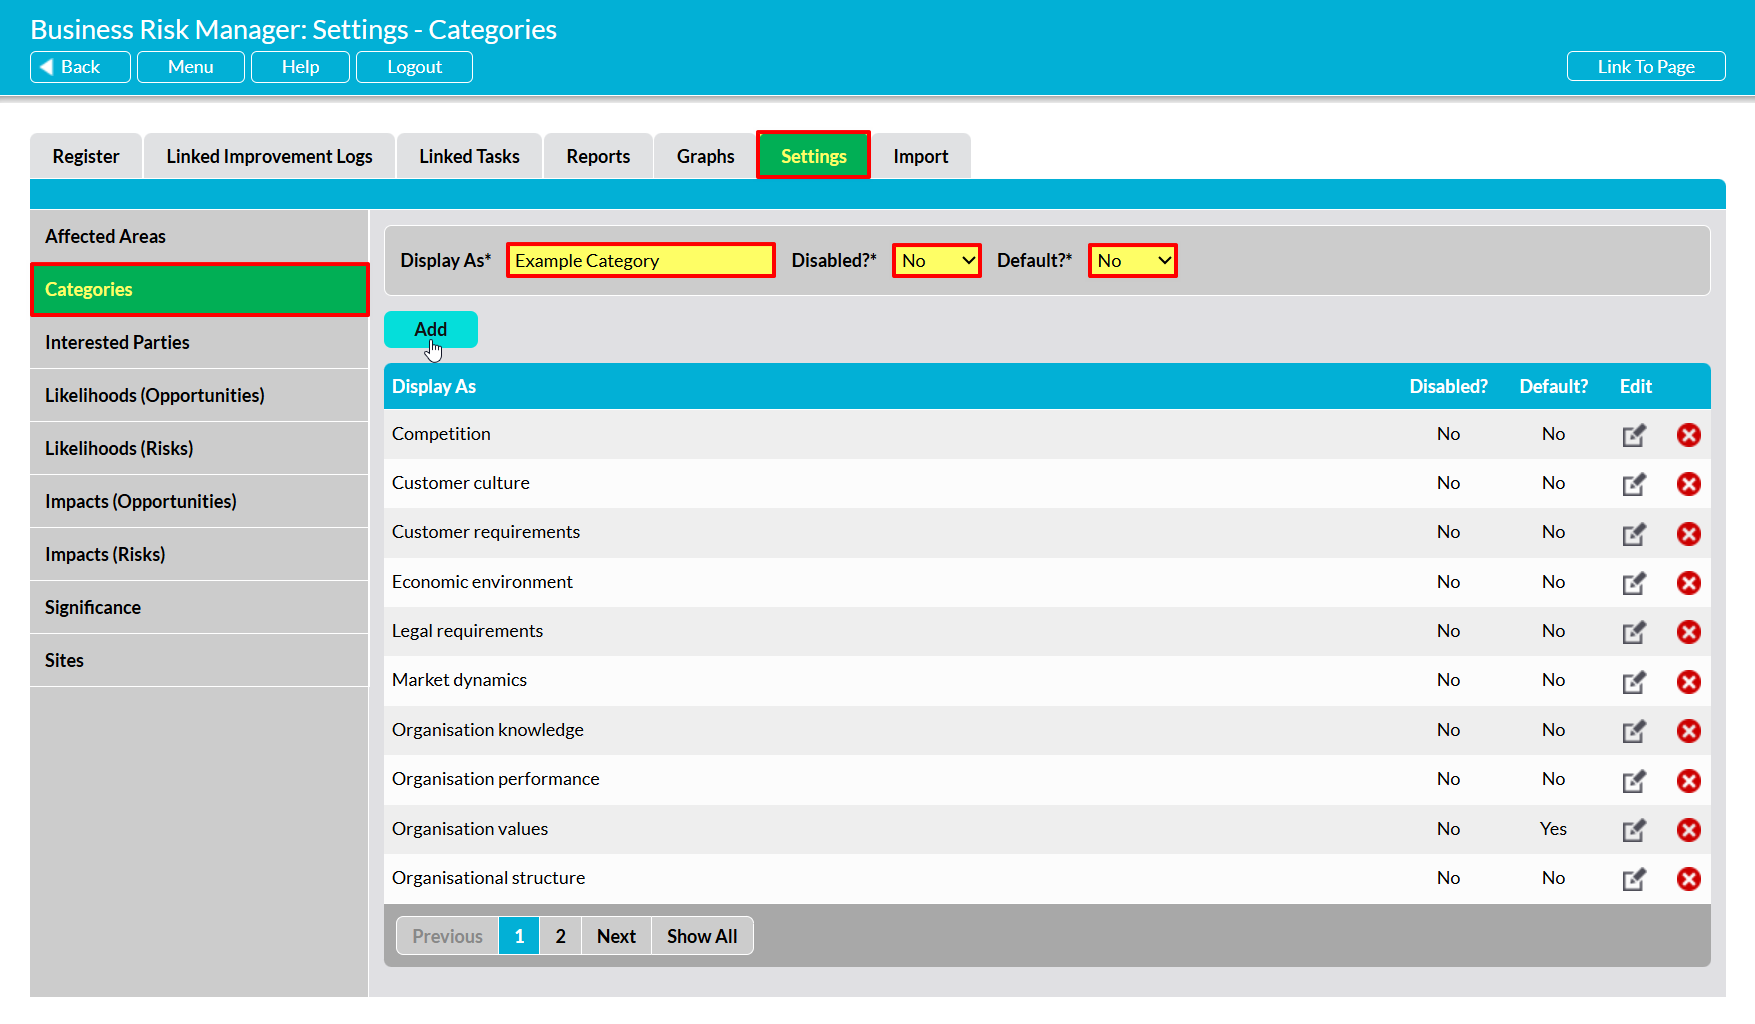
The newly added Category will now be displayed within the list. Note that Categories are displayed alphabetically.
To edit a Category, locate its record within the list and click on the pencil icon to open it for editing. Make the necessary changes to the fields at the top of the screen, and then click Save.
To delete a Category from the list, locate its record and click on the red cross icon displayed to its right. If the option hasn’t been used within the Business Risk Manager, then it will be cleared from the list. However, you will not be able to delete any Category that has already been used within your system. Instead, you will need to Disable the option to remove it from dropdown lists and prevent its future selection.
*****
Interested Parties
The Interested Parties parameter allows you to identify the internal and external Parties that are relevant to your organisation, and that may affect or be affected by your Risks/Opportunities.
This area is pre-populated with fifteen default options:
- Top Management
- Employees
- Shareholders
- Customers
- Suppliers
- Competitors
- Audit Bodies
- Government Bodies
- Law Enforcement
- Lobby Groups
- Local Authorities
- Neighbours
- Regulators
- Subcontractors
- Trade Associations
To add a new Interested Party, open the Settings tab, and then select the Interested Parties item from the left-hand menu. Type the Party in the Display As* field at the top of the page, then use the dropdown fields to specify where in the list the new Party should be displayed (Order field), whether the option is to be Disabled?* (unavailable for selection), and whether it should be the Default?* (selected by default when a new Risk/Opportunity is added). Click on Add once you have completed your entries.
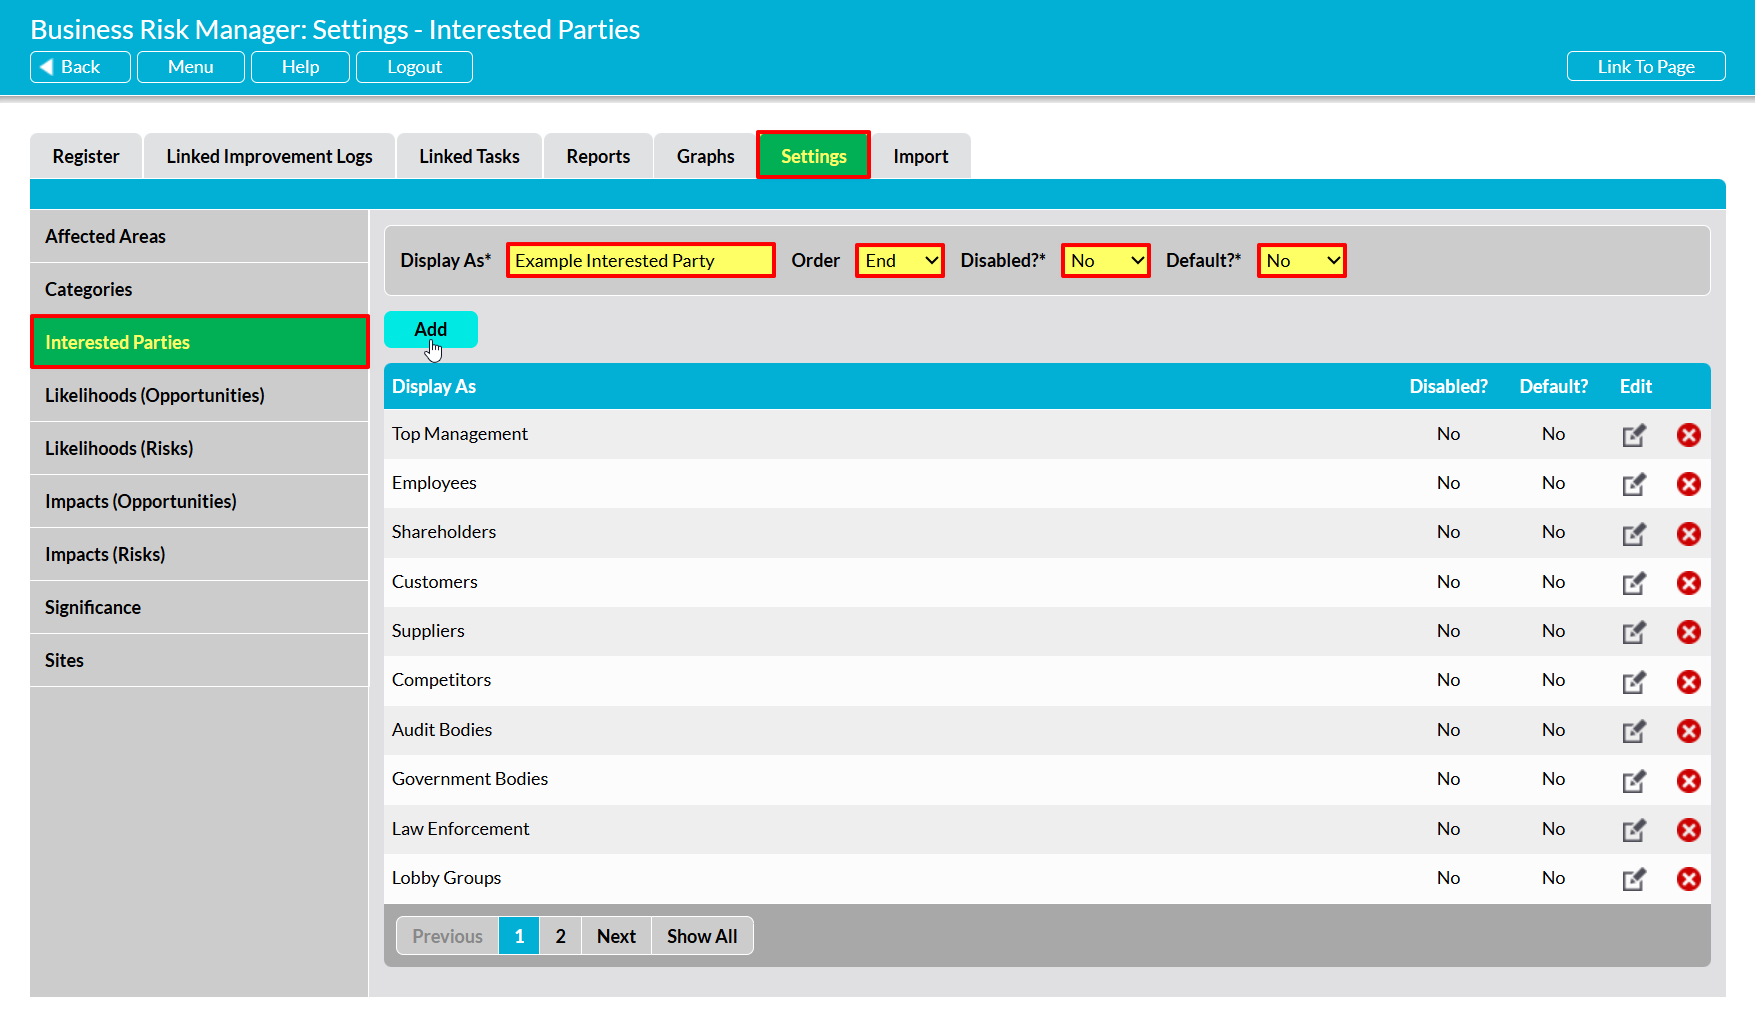
The newly added Interested Party will be displayed in the list, in the position specified.
To edit an Interested Party, locate its record within the list and click on the pencil icon to open it for editing. Make the necessary changes to the fields at the top of the page, and then click Save.
To delete a Party from the list, locate its record and click on the red cross icon displayed to its right. If the option hasn’t been used within your Business Risk Manager, then it will be cleared from the list. However, you will not be able to delete an Interested Party that has already been used within your system. Instead, you will need to Disable the option to remove it from dropdown lists and prevent its future selection.
*****
Likelihoods (Opportunities)
The Likelihoods (Opportunities) parameter allows you to identify the Likelihood Levels that your users will be able to select from when assessing the Opportunities that have been entered into your system (i.e. any BRM record with the ‘Opportunity’ Issue Type). For convenience, Activ allows you to specify your Opportunity Likelihoods separately from your Risk Likelihoods, enabling different option sets to be entered for each if required.
This area is pre-populated with five default options, each provided with a default Likelihood score for use within the BRM’s Significance calculations:
- Very Likely (Score: 1)
- Likely (Score: 2)
- Possible (Score: 3)
- Unlikely (Score: 4)
- Very Unlikely (Score: 5)
Note that all options entered into this area will be available against all Opportunities, meaning that your company will need to use the same Likelihood set regardless of the type of Opportunity being evaluated. As such, if you choose to use custom Likelihood options, then we strongly recommend that you either:
- disable the default options; or
- ensure that the default options are incorporated with your custom options
to avoid any potential for confusion amongst your users.
To add a new Opportunity Likelihood, open the Settings tab, and then select the Likelihoods (Opportunities) item from the left-hand menu. Enter the Likelihood into the Display Value* field at the top of the page, enter an appropriate score into the Score* field (this will be used in Activ’s Significance calculations), and then use the dropdown fields to specify whether the new option is to be the Default?* (selected by default when completing the record), and whether it is to be Disabled?* (unavailable for selection). Click on Add once you have completed your entries.

The newly added Likelihood will now be displayed within the list. Note that Likelihoods are displayed chronologically by Score, and will be arranged in ascending order.
To edit a Likelihood, locate its record within the list and click on the pencil icon to open it for editing. Make the necessary changes to the fields at the top of the page, and then click Save.
To delete a Likelihood from the list, locate its record and click on the red cross icon displayed to its right. If the option hasn’t been used within any of your Opportunities, then it will be cleared from the list. However, you will not be able to delete a Likelihood that has already been used within your system. Instead, you will need to Disable the option to remove it from dropdown lists and prevent its future selection.
*****
Likelihoods (Risks)
The Likelihoods (Risks) parameter allows you to identify the Likelihood Levels that your users will be able to select from when assessing the Risks that have been entered into your system (i.e. any BRM record with the ‘Risk’ Issue Type). For convenience, Activ allows you to specify your Risk Likelihoods separately from your Opportunity Likelihoods, enabling different option sets to be entered for each if required.
This area is pre-populated with five default options, each provided with a default Likelihood score for use within the BRM’s Significance calculations:
- Very Unlikely (Score: 1)
- Unlikely (Score: 2)
- Possible (Score: 3)
- Likely (Score: 4)
- Very Likely (Score: 5)
Note that all options entered into this area will be available against all Risks, meaning that your company will need to use the same Likelihood set regardless of the type of Risk being evaluated. As such, if you choose to use custom Likelihood options, then we strongly recommend that you either:
- disable the default options; or
- ensure that the default options are incorporated with your custom options
to avoid any potential for confusion amongst your users.
To add a new Risk Likelihood, open the Settings tab, and then select the Likelihoods (Risks) item from the left-hand menu. Enter the Likelihood into the Display Value* field at the top of the page, enter an appropriate score into the Score* field (this will be used in Activ’s Significance calculations), and then use the dropdown fields to specify whether the new option is to be the Default?* (selected by default when completing the record), and whether it is to be Disabled?* (unavailable for selection). Click on Add once you have completed your entries.

The newly added Likelihood will now be displayed within the list. Note that Likelihoods are displayed chronologically by Score, and will be arranged in ascending order.
To edit a Likelihood, locate its record within the list and click on the pencil icon to open it for editing. Make the necessary changes to the fields at the top of the page, and then click Save.
To delete a Likelihood from the list, locate its record and click on the red cross icon displayed to its right. If the option hasn’t been used within any of your Risks, then it will be cleared from the list. However, you will not be able to delete a Likelihood that has already been used within your system. Instead, you will need to Disable the option to remove it from dropdown lists and prevent its future selection.
*****
Impacts (Opportunities)
The Impacts (Opportunities) parameter allows you to identify the potential Impact levels that your users will be able to select from when assessing the Opportunities that have been entered into your system (i.e. any BRM record with the ‘Opportunity’ Issue Type). For convenience, Activ allows you to specify your Opportunity Impacts separately from your Risk Impacts, enabling different option sets to be entered for each if required.
This area is pre-populated with five default options, each provided with a default Impact score for use within the BRM’s Significance calculations:
- No Impact (Score: 1)
- Low Impact (Score: 2)
- Moderate Impact (Score: 3)
- High Impact (Score: 4)
- Major Impact (Score: 5)
Note that all options entered into this area will be available against all Opportunities, meaning that your company will need to use the same Impact set regardless of the type of Opportunity being evaluated. As such, if you choose to use custom Impact options, then we strongly recommend that you either:
- disable the default options; or
- ensure that the default options are incorporated with your custom options
to avoid any potential for confusion amongst your users.
To add a new Opportunity Impact, open the Settings tab, and then select the Impacts (Opportunities) item from the left-hand menu. Enter the Impact into the Display Value* field at the top of the page, enter an appropriate score into the Score* field (this will be used in Activ’s Significance calculations), and then use the dropdown fields to specify whether the new option is to be the Default?* (selected by default when completing the record), and whether it is to be Disabled?* (unavailable for selection). Click on Add once you have completed your entries.
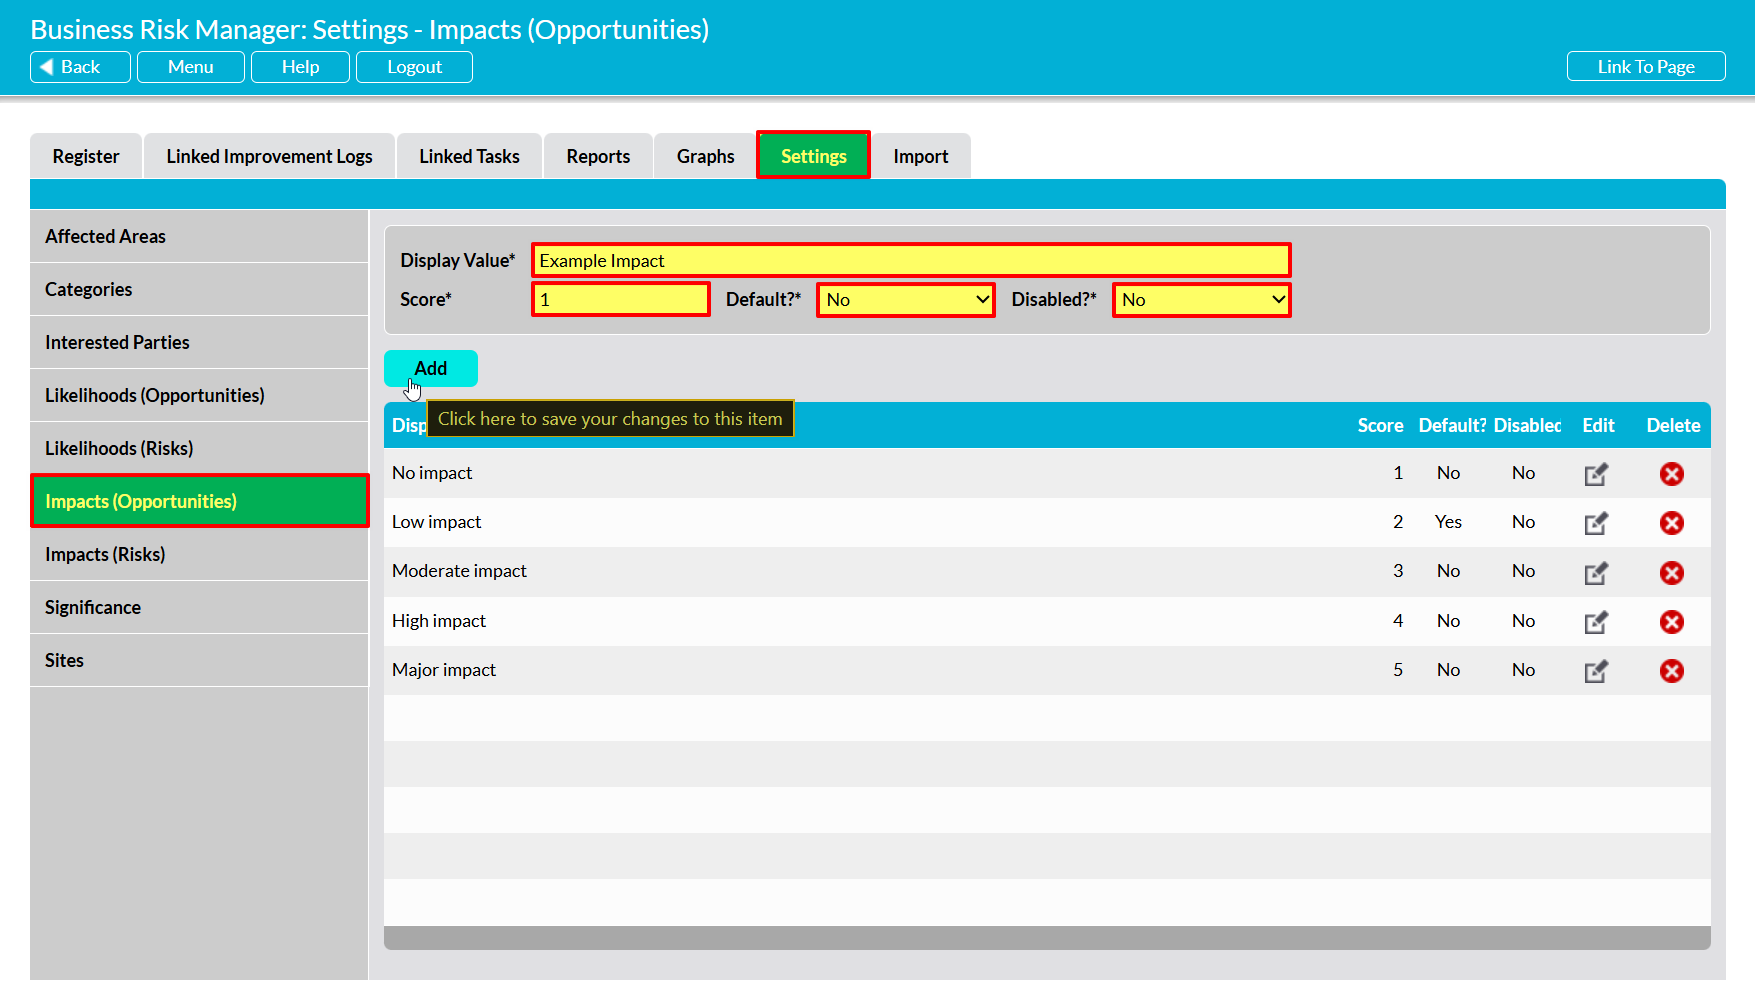
The newly added Impact will now be displayed within the list. Note that Impacts are displayed chronologically by Score, and will be arranged in ascending order.
To edit an Impact, locate its record within the list and click on the pencil icon to open it for editing. Make the necessary changes to the fields at the top of the page, and then click Save.
To delete an Impact from the list, locate its record and click on the red cross icon displayed to its right. If the option hasn’t been used within any of your Opportunities, then it will be cleared from the list. However, you will not be able to delete an Impact that has already been used within your system. Instead, you will need to Disable the option to remove it from dropdown lists and prevent its future selection.
*****
Impacts (Risks)
The Impacts (Risks) parameter allows you to identify the potential Impact levels that your users will be able to select from when assessing the Risks that have been entered into your system (i.e. any BRM record with the ‘Risk’ Issue Type). For convenience, Activ allows you to specify your Risk Impacts separately from your Opportunity Impacts, enabling different option sets to be entered for each if required.
This area is pre-populated with five default options, each provided with a default Impact score for use within the BRM’s Significance calculations:
- No Impact (Score: 1)
- Low Impact (Score: 2)
- Moderate Impact (Score: 3)
- High Impact (Score: 4)
- Major Impact (Score: 5)
Note that all options entered into this area will be available against all Risks, meaning that your company will need to use the same Impact set regardless of the type of Risk being evaluated. As such, if you choose to use custom Impact options, then we strongly recommend that you either:
- disable the default options; or
- ensure that the default options are incorporated with your custom options
to avoid any potential for confusion amongst your users.
To add a new Risk Impact, open the Settings tab, and then select the Impacts (Risks) item from the left-hand menu. Enter the Impact into the Display Value* field at the top of the page, enter an appropriate score into the Score* field (this will be used in Activ’s Significance calculations), and then use the dropdown fields to specify whether the new option is to be the Default?* (selected by default when completing the record), and whether it is to be Disabled?* (unavailable for selection). Click on Add once you have completed your entries.
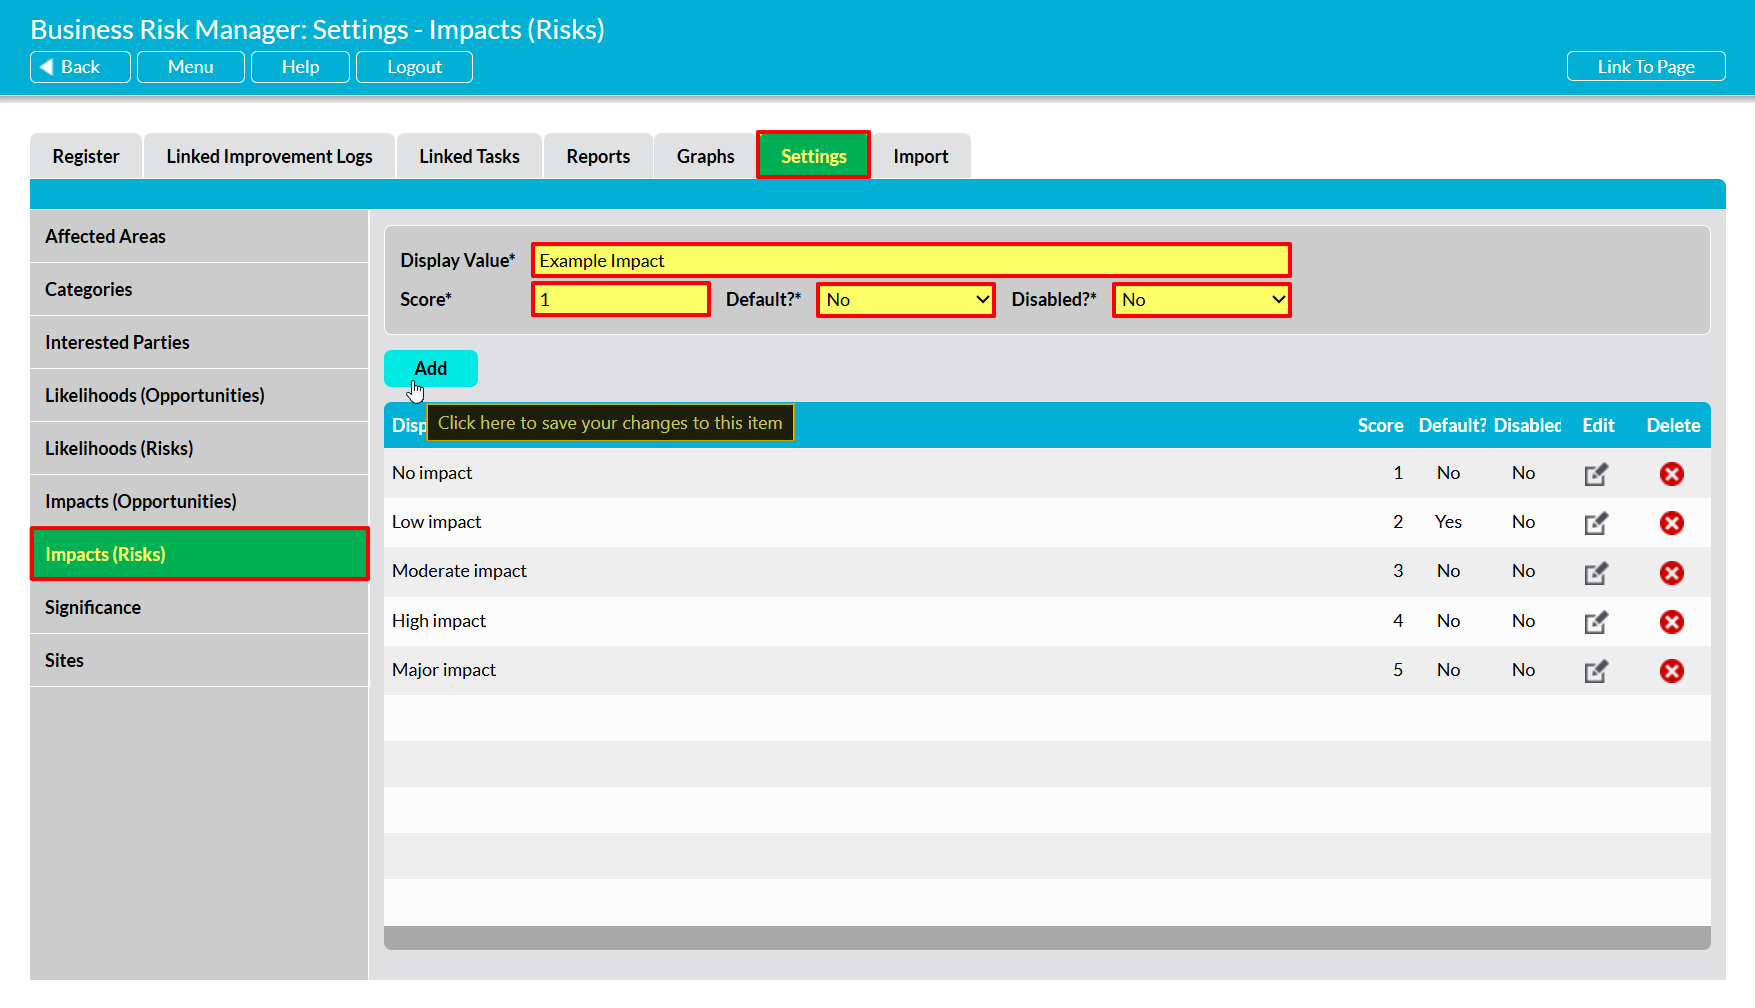
The newly added Impact will now be displayed within the list. Note that Impacts are displayed chronologically by Score, and will be arranged in ascending order.
To edit an Impact, locate its record within the list and click on the pencil icon to open it for editing. Make the necessary changes to the fields at the top of the page, and then click Save.
To delete an Impact from the list, locate its record and click on the red cross icon displayed to its right. If the option hasn’t been used within any of your Opportunities, then it will be cleared from the list. However, you will not be able to delete an Impact that has already been used within your system. Instead, you will need to Disable the option to remove it from dropdown lists and prevent its future selection.
*****
Significance
The Significance parameter allows you to specify the Score Thresholds that are used to determine whether your Issues will be of Low Significance, Medium Significance, or High Significance should the Risk occur or Opportunity be fulfilled. By default, these thresholds are set as follows:
- Scores from 1 to 5 will be considered Low Significance;
- Scores from 6 to 14 will be considered Medium Significance; and
- Scores of 15 and higher will be considered High Significance.
Note that Significance Scores themselves are calculated automatically by your Activ system, using the methodology outlined in our Business Risk/Opportunity Significance Ratings – Calculation Methodology article.
To update your system’s Significance Thresholds, open the Settings tab, and then select the Significance item from the left-hand menu. You will be presented with your system’s current Thresholds. These will automatically be opened for editing.
Enter your new Threshold Scores, and then click Save to finalise your changes.

Your changes will automatically be applied to all Issues within your system, and their current Significance Ratings will be adjusted according to your new specifications.
*****
Sites
The Site parameter allows you to identify the Sites that your organisation operates at, and provides you with the option of marking your Issues as Site-specific and of specifying precisely which Site each Risk/Opportunity relates to. Note that Sites is a ‘global’ setting parameter, meaning that the list of Sites recorded within your Business Risk Manager is shared by most other modules that include a Site parameter (the most notable exception being the Asset Manager). As such, it is important to remember that changing your BRM Sites will also change the Sites of all other modules (excluding Asset Manager).
This area is not pre-populated with any default options (unless enabled within another module), as your Sites are unique to your company. However, note that you may find it useful to add options such as ‘All Sites’, ‘Client Site’, and ‘Off-Site’ to your Sites list if using this parameter, to cover cases when an Issue may be relevant for your entire organisation (e.g. cloud security Risks), occur at a client Site (if you provide Contractors, etc), or occur ‘between’ Sites (e.g. if your employees travel between different offices).
To manage your Business Risk Manager’s Sites, open the Settings tab, and then select the Sites item from the left-hand menu. You will be presented with either:
- the Enable Sites for this module field, and no other data, if Sites is currently disabled for this module; or
- the above field, plus a register of Sites, if Sites is currently enabled for this module.
To enable Sites for the BRM, set the Enable Sites for this module field to Yes. Alternatively, to disable Sites (removing the Sites field from your Risks/Opportunities), change this field to No.
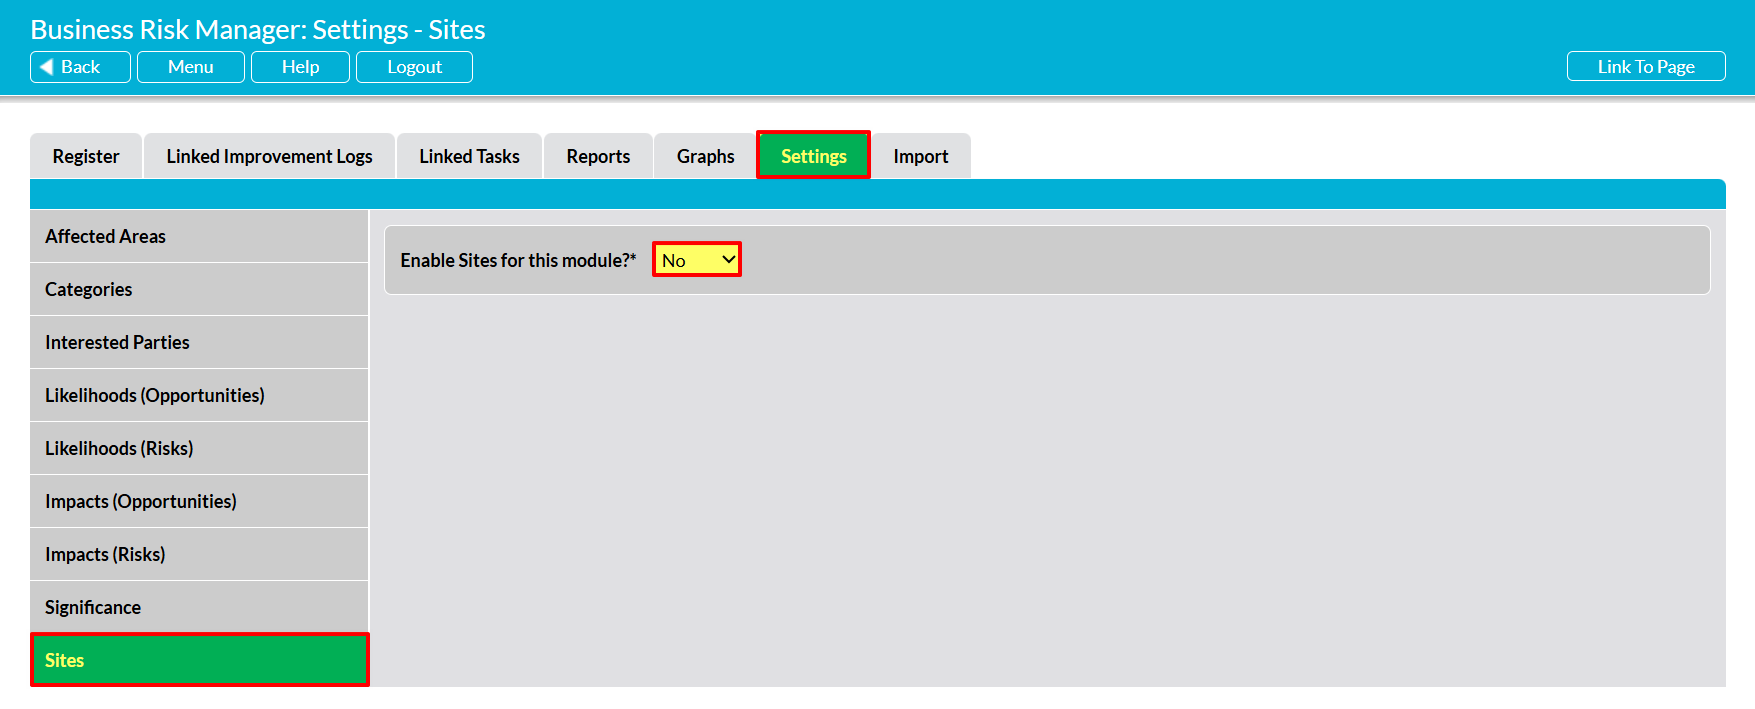
Activ will automatically save your selection.
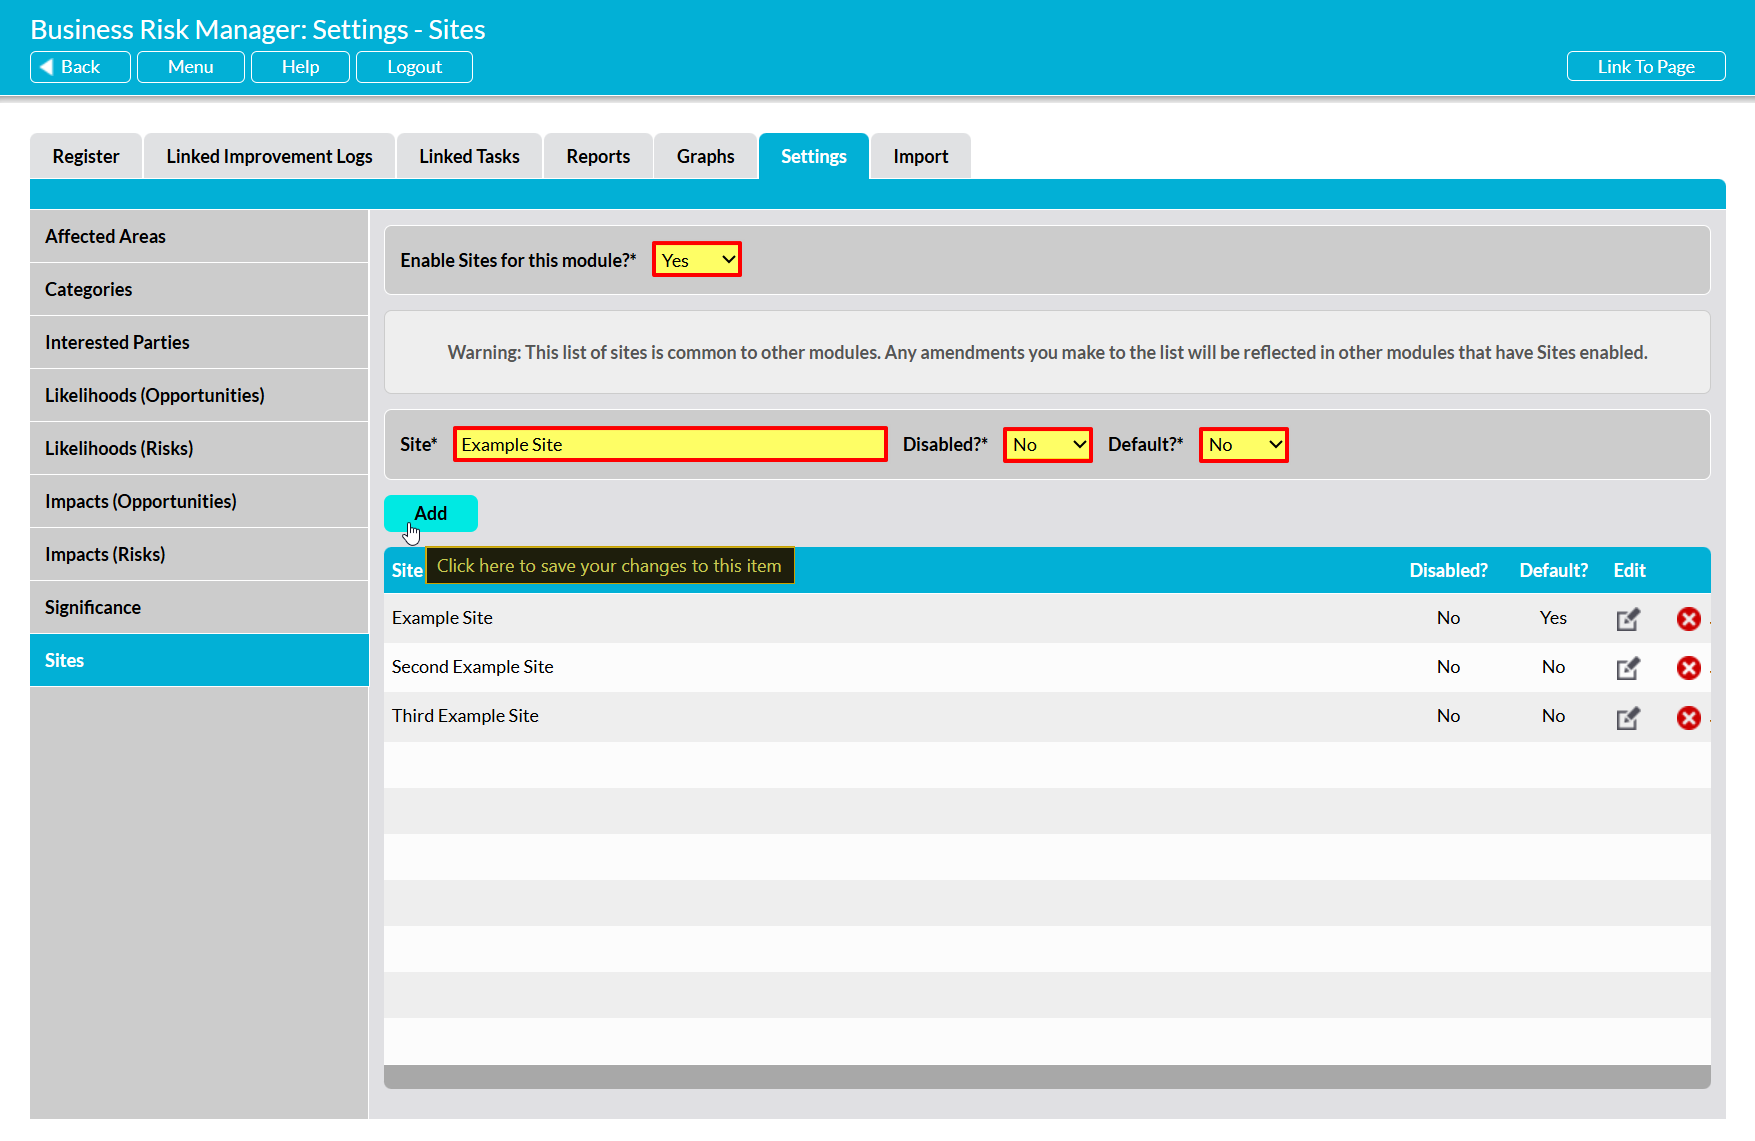
To add a new Site, enter the Site into the Site* field at the top of the page, then use the dropdown fields to specify whether the option is to be Disabled?* (unavailable for selection) and whether it is to be the Default?* (selected by default when a new Incident Log is added). Click on Add once you have completed your entries.
The newly added Site will now be displayed within the list. Note that Sites are displayed alphabetically.
To edit a Site, locate its record within the list and click on the pencil icon. Make the necessary changes to the fields at the top of the page, and then click Save.
To delete a Site from the list, locate its record and click on the red cross icon displayed to its right. If the option hasn’t been used within any of your records then it will be cleared from the list. However, you will not be able to delete a Site that has already been used within your system. Instead, you will need to Disable the option to remove it from dropdown lists and prevent its future selection.
