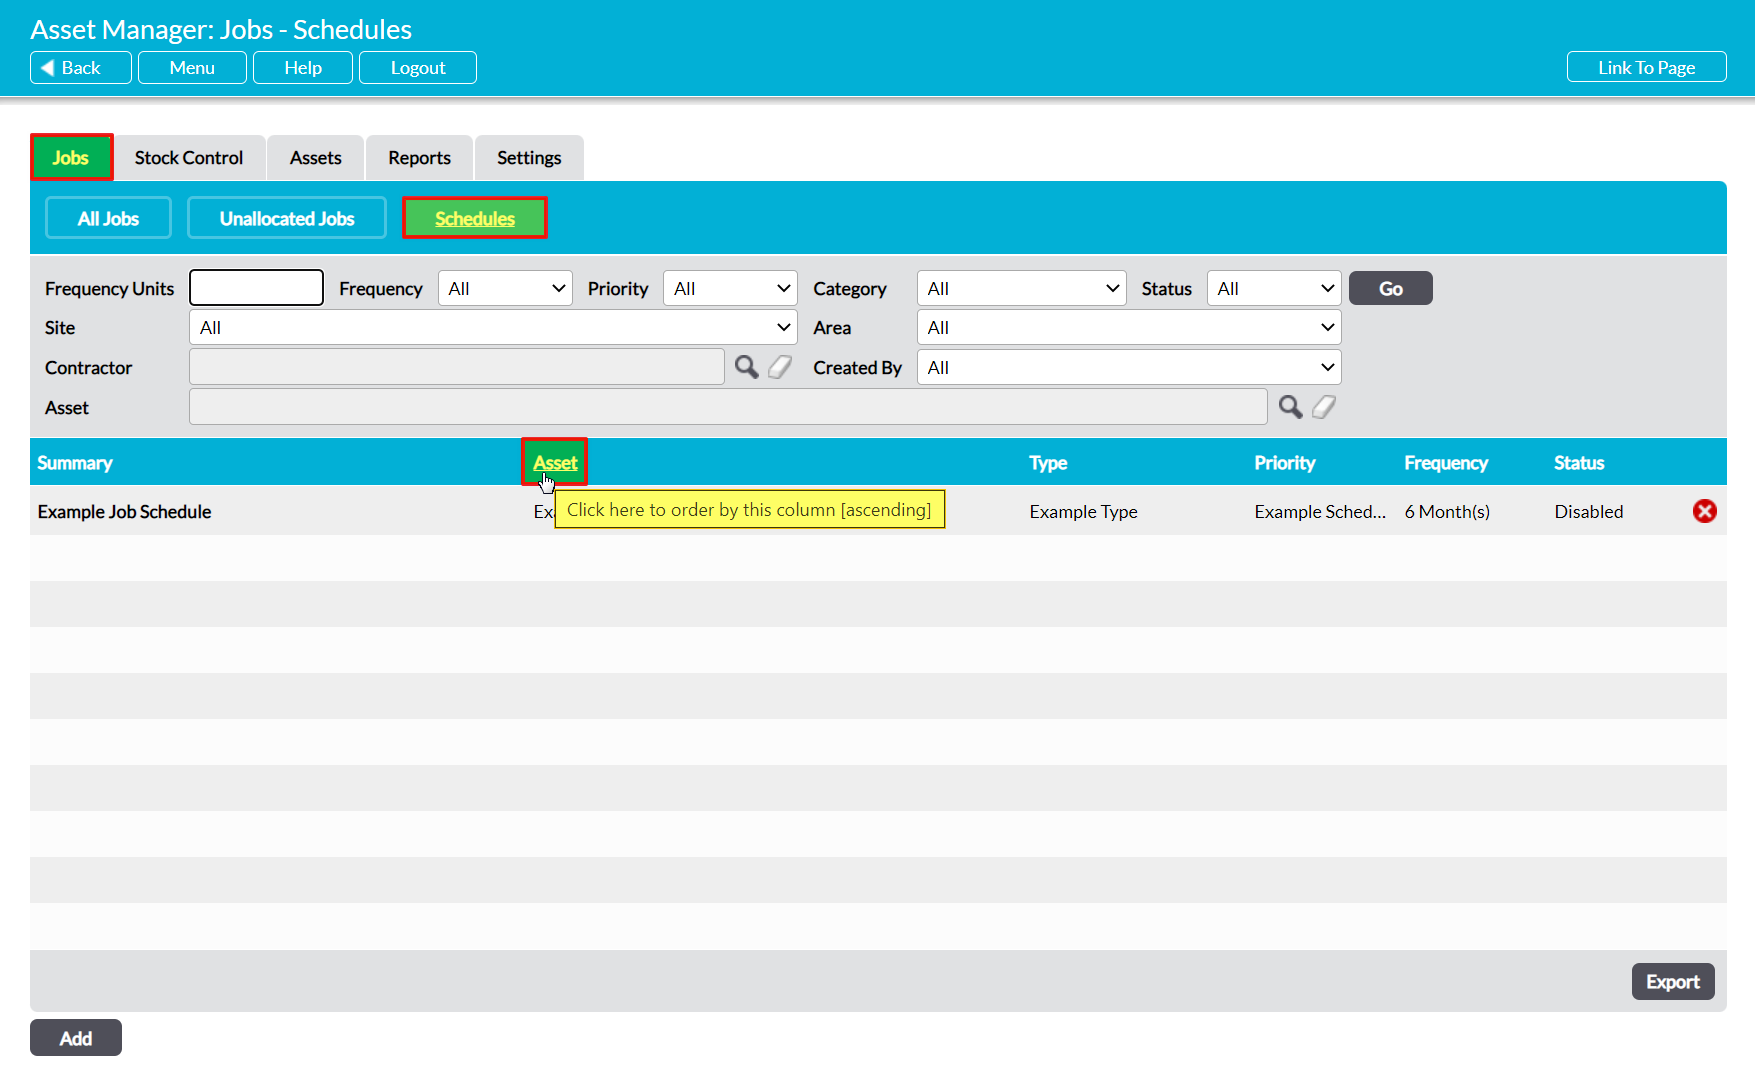
To view a Job Schedule, open the Asset Manager on its Jobs tab, and then click on the Schedules tab at the top of the screen. This will open a register of all Job Schedules that have been recorded in your system. Each Job Schedule will be displayed on its own row alongside key information relating to that Schedule, and it is important to be aware that the Asset column for each Schedule will display up to two pieces of information:
- The name of the Asset that the Schedule relates to – this will be displayed against every record.
- The name of the specific Asset Component that the Schedule relates to – this will be displayed directly beneath the Parent Asset’s name, if the Schedule was set up against an Asset Component instead of the Parent Asset itself.
By default, Job Schedules are listed chronologically by their Start Date (as displayed in their Details form), but you can also order them by Asset by clicking on the corresponding column heading.
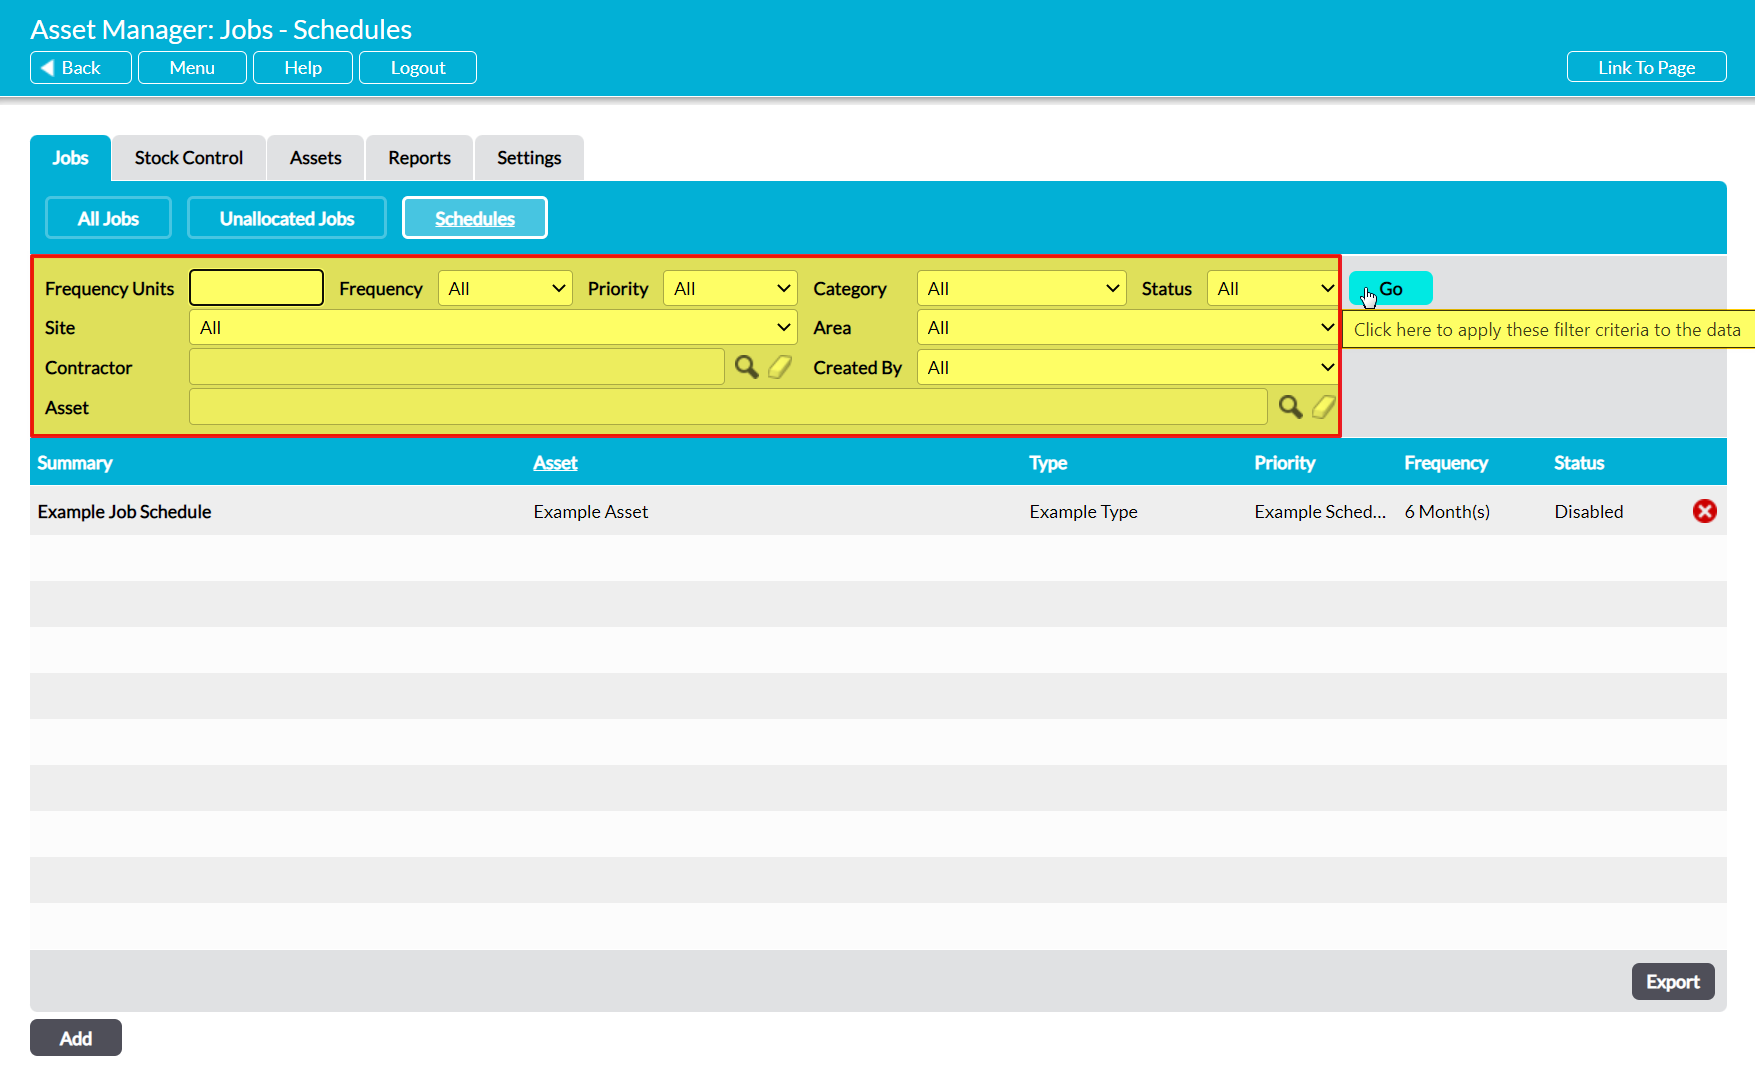
In addition, by default all Live Schedules (i.e. those that are currently generating Jobs) are displayed within the register. However, you can use the search options at the top of the screen to narrow the list of Job Schedules shown, or to view disabled Schedules.
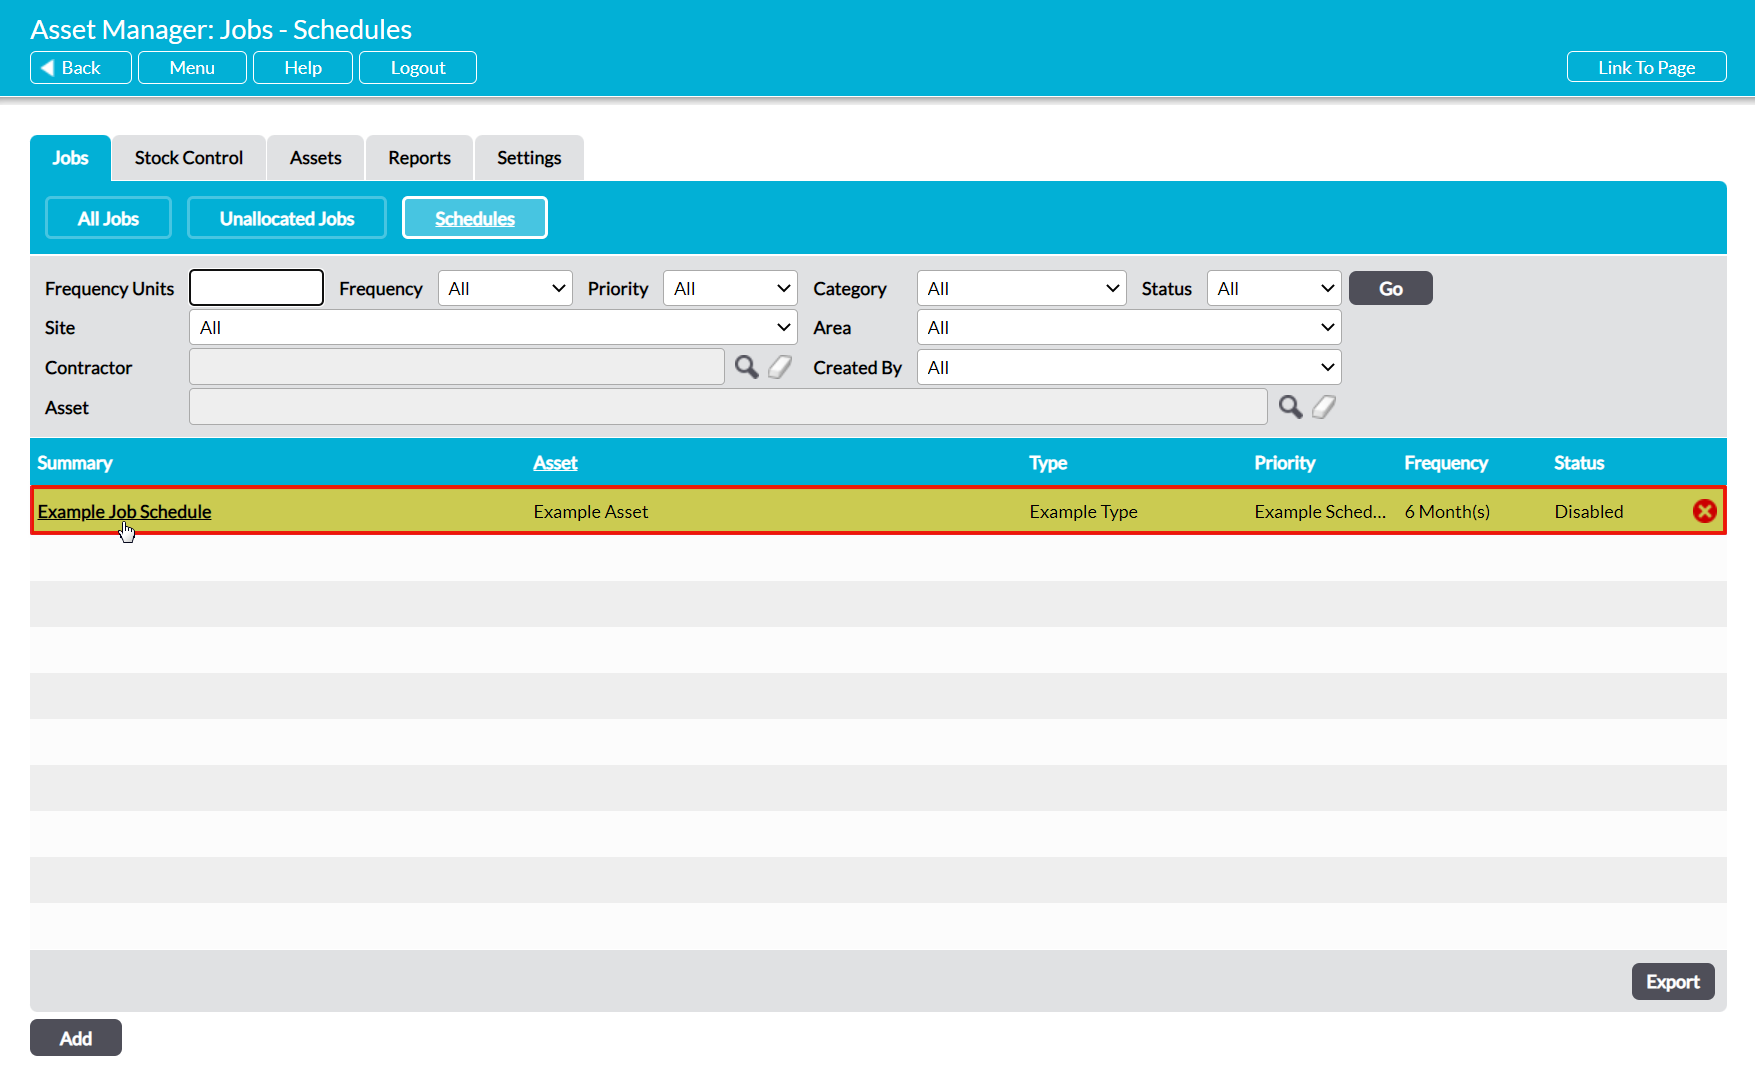
To view a Job Schedule, click on its Summary.
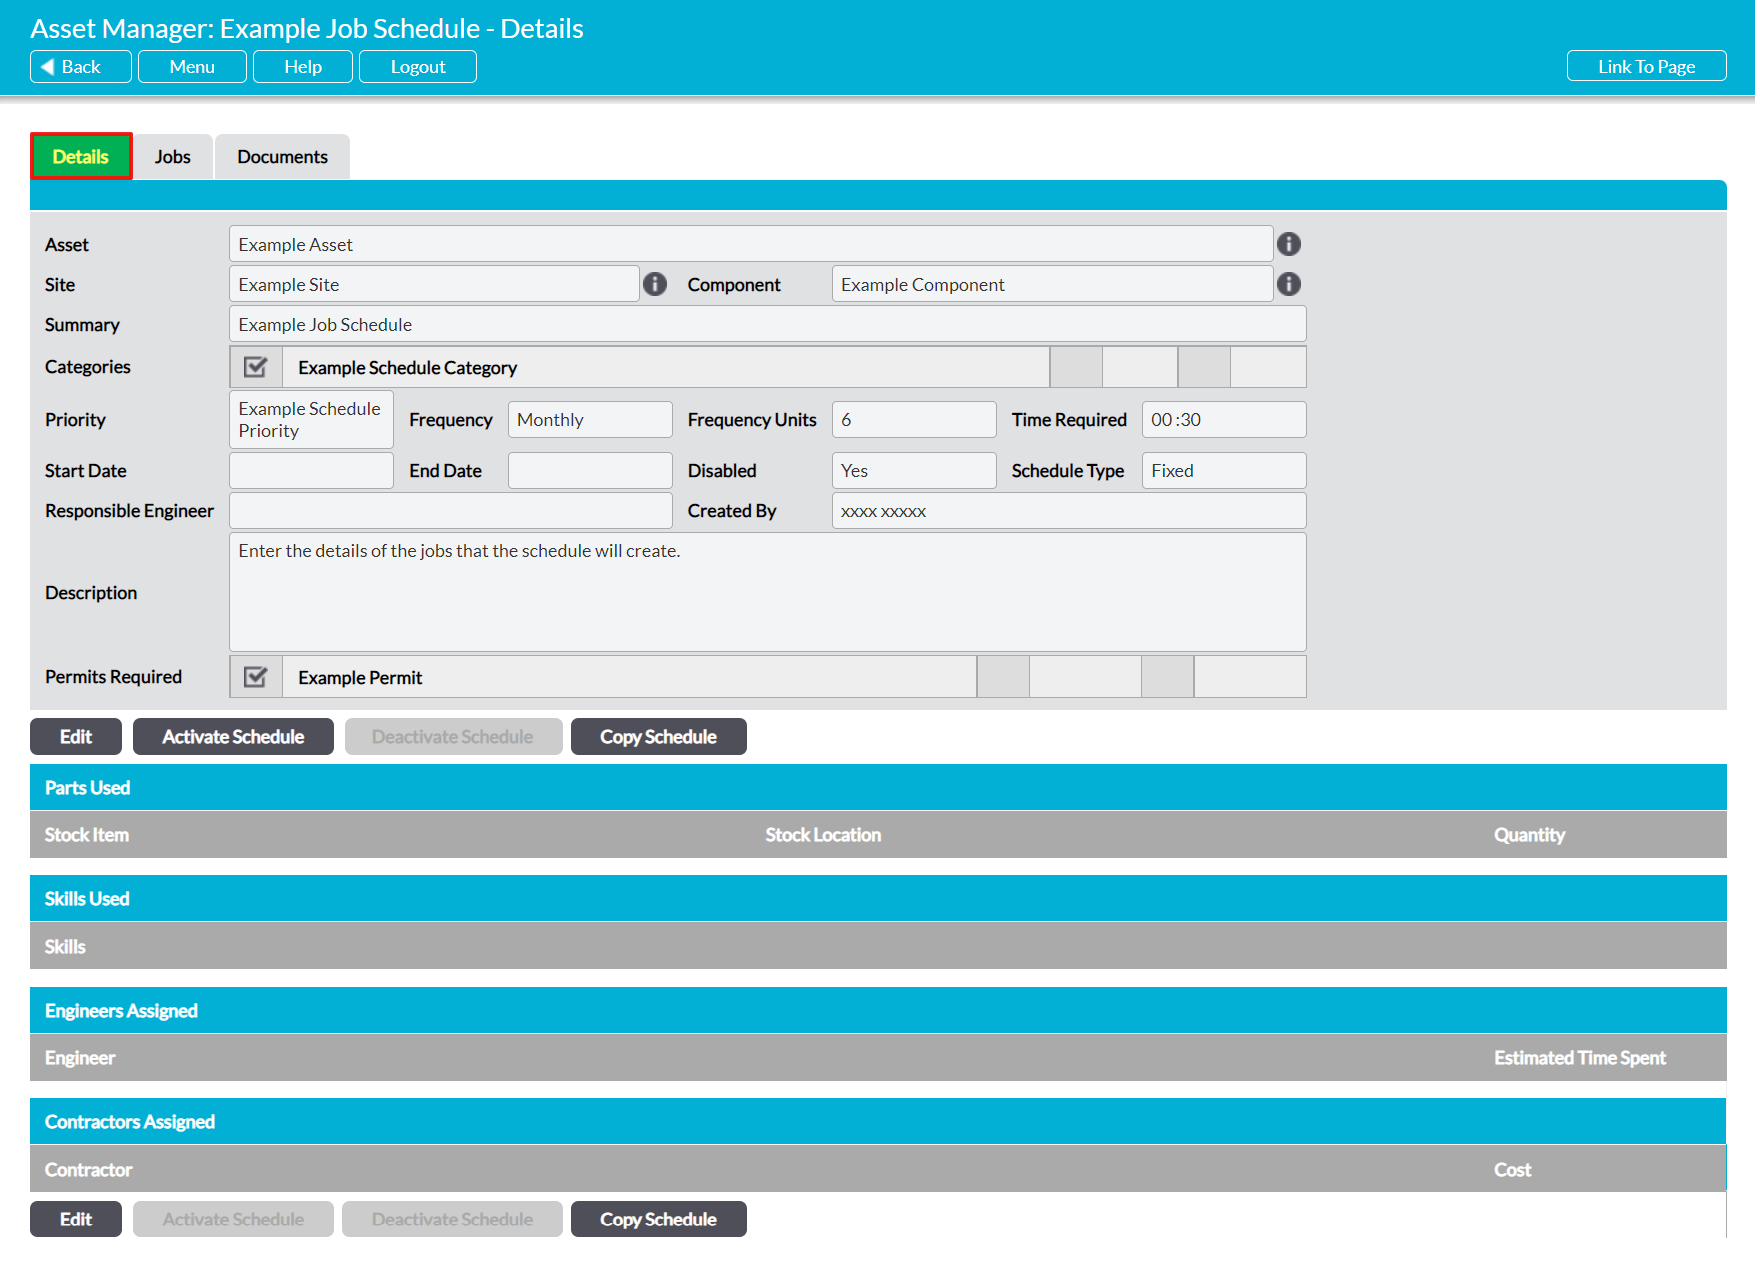
The Schedule’s record will open on its Details tab, which will detail all key information that has been recorded against the Schedule, and that will be displayed within all Jobs generated by the Schedule.