Open Communications can be managed from three areas of your system:
- Directly from the Customers & Suppliers: Communications area
- From an individual company’s Communications tab
- From an individual contact’s Communications tab
In all cases, individual open Communications are managed in the same manner and share the same appearance. A notepad icon will be displayed alongside all open Communications in each of these registers, and overdue Communications will be shown in red text to enable their ready identification.
See View a Scheduled Communication, View Company Communications, and View Contact-Specific Communications for guides on locating Communications within each of the above areas.
There are two options available for closing an open Communication:
*****
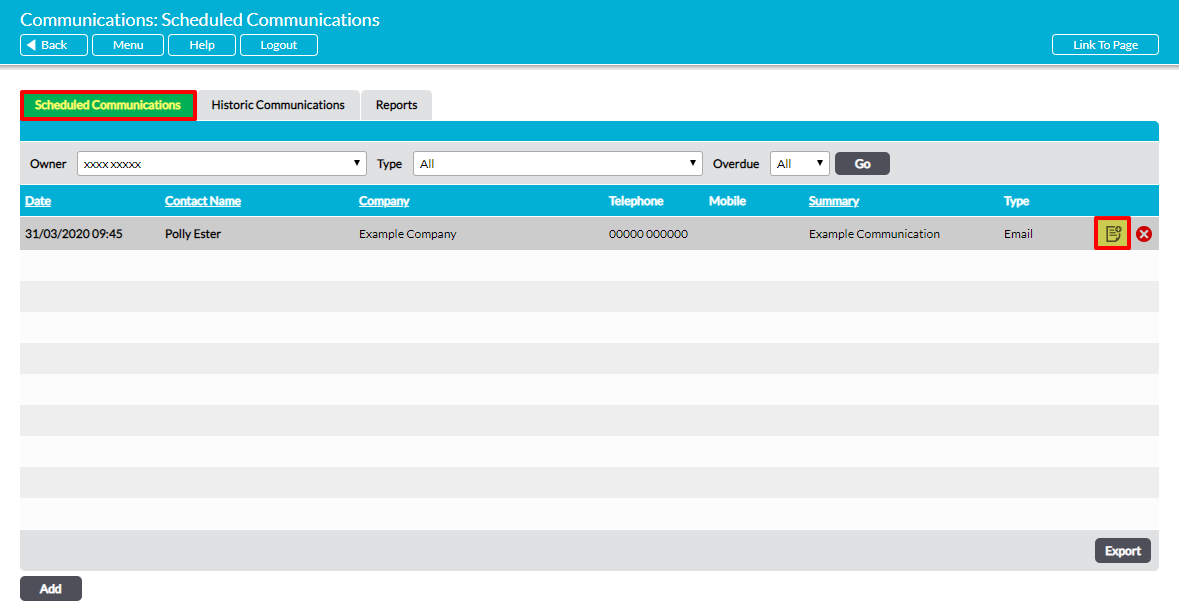
Closing Communications from the Register
To update or close an open Communication, locate the Communication within your chosen register and click on the notepad icon to the record’s right.
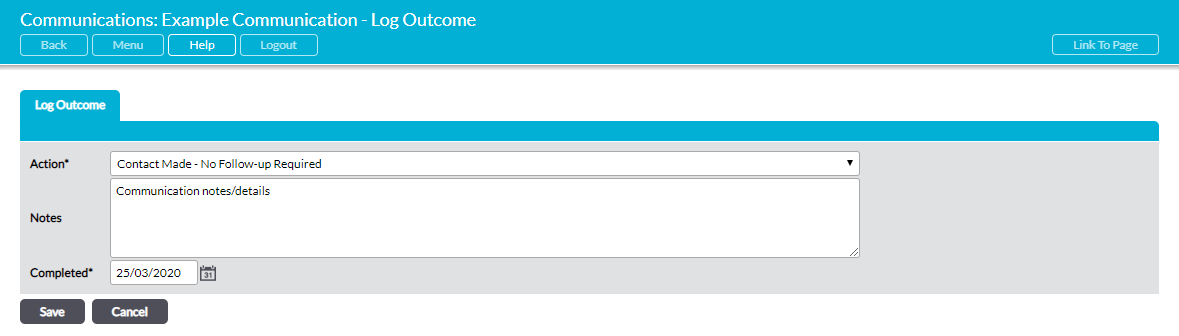
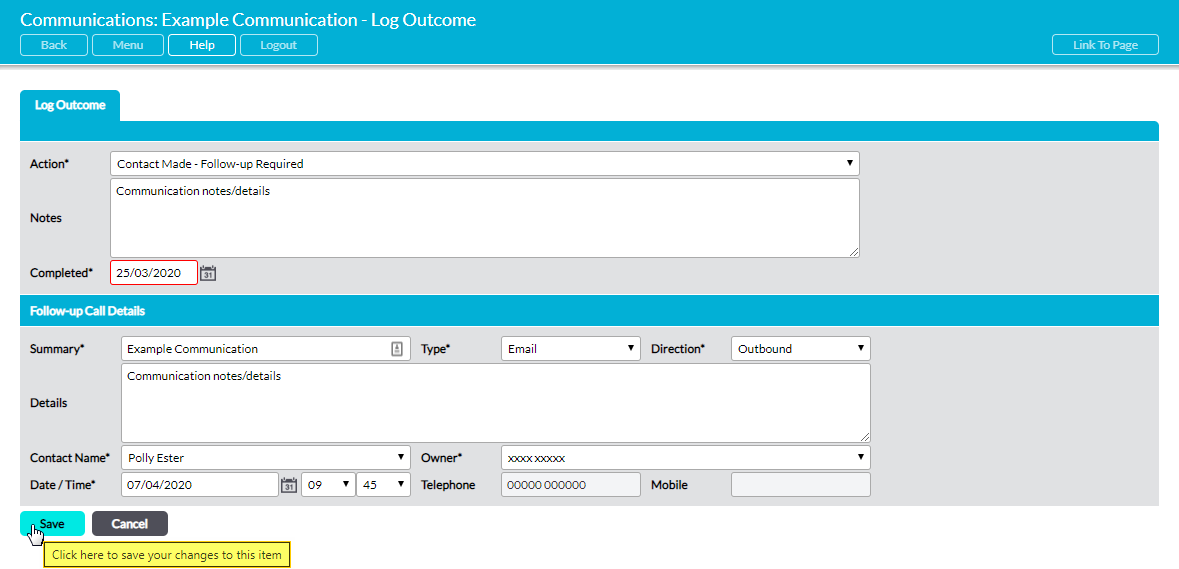
This will open the Log Outcome page for the selected Communication. Three fields are available for editing, and fields marked with an asterisk are required. The available fields are:
Action* – a dropdown menu that allows you to log whether contact was made and follow-up is required. Four options are available: Contact Made – No Follow-up Required; Contact Made – Follow-up Required; No Contact – No Further Action; and No Contact – Reschedule.
Notes – enter any additional notes here.
Completed* – use the Calendar icon to select the date that the Communication was completed. This can be set to the past if necessary.
A new section of the form will automatically be opened if you select Contact Made – Follow-up Required or No Contact – Reschedule within the Action* field. This section enables you to enter the details of the next Communication, which will be added as a new record when the Communication is saved.
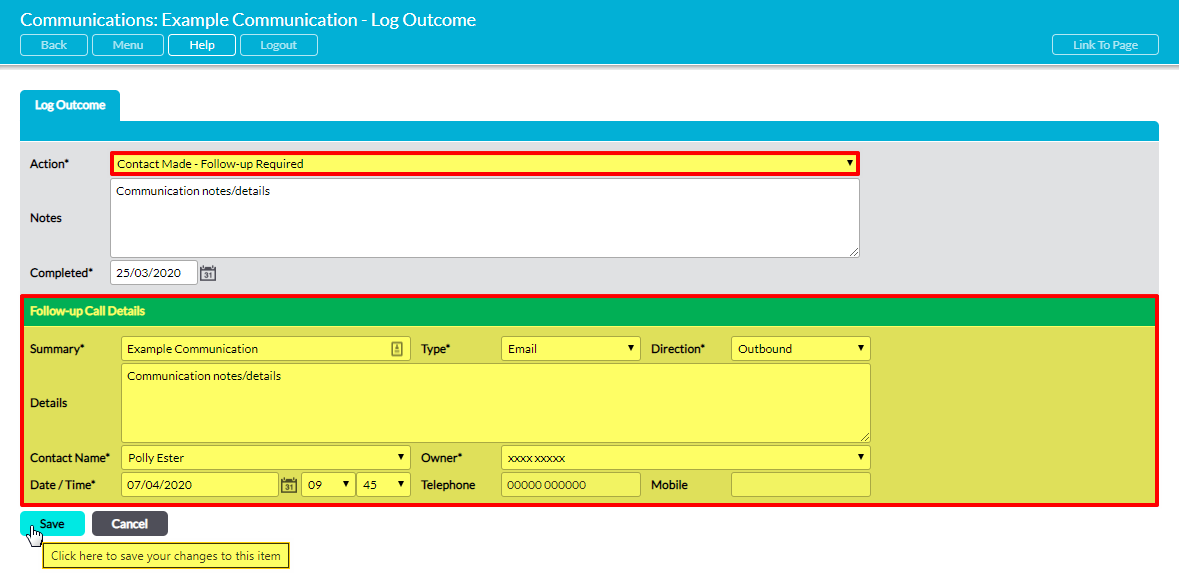
Enter the necessary details, and then click Save to finalise your changes. The closed Communication will automatically be moved to the Historic Communications register, and its Details will be updated to include the Completed field and any notes you added. In addition, if you created a follow-up Communication this will now be displayed as a new Communication within the Scheduled Communications register.
*****
Closing Communications from within the Communication’s Record
To close a Scheduled Communication from within its record, open the Communication and click on the Log Outcome button.
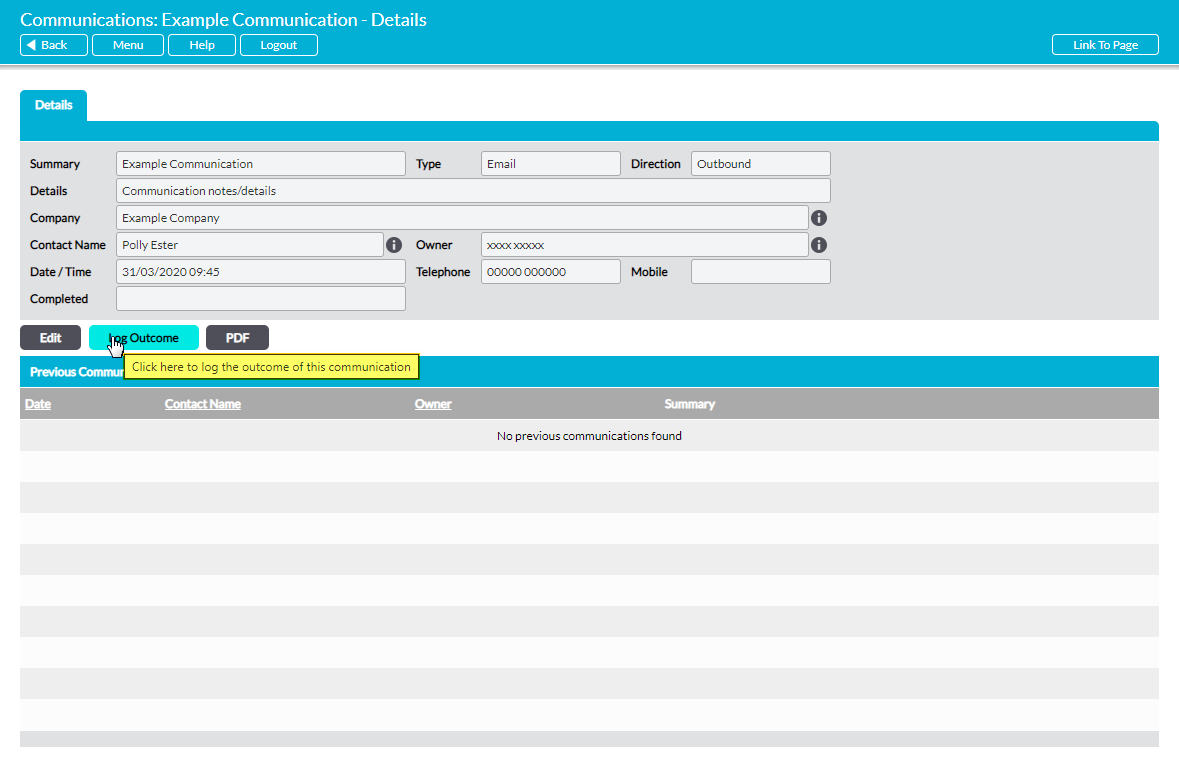
This will open the Log Outcome form for the chosen Communication. Update the form details as described above, and then click Save.
The closed Communication will automatically be moved to the Historic Communications register, and its Details will be updated to include the Completed field and any notes you added. In addition, if you created a follow-up Communication this will now be displayed as a new Communication within the Scheduled Communications register.
