In some cases, you may find that your Automatic Document Stamping (ADS) settings fail to appear on one or more of the files within your system (i.e. that your header and/or footer is blank). Alternatively, and more rarely, you may find that it is not present on the file’s first page, but is shown on all other pages. There are eight known causes for these issues, which are as follows:
- the file existed before ADS was enabled, and no new version has been uploaded;
- ADS is not enabled for the affected file type;
- ADS has been disabled or is unavailable for that specific file;
- the file has not been uploaded to the Controlled Documents Library;
- the file contains page or section breaks;
- the file has the ‘different first page’ setting enabled;
- (Excel) headers/footers are not enabled for the file; or
- the file was created using a pre-2007 version of Microsoft Office
Each of these is explained in more detail below, alongside their corresponding fixes.
*****
File created before ADS was Enabled
During normal usage, stamping will be applied to the files within your system at the point of upload – i.e. when you click on the ‘Save’ button to add your new file or new version to Activ. This means that updates made to your ADS settings will not be reflected within your existing files until you upload a new version to those files, or choose to ‘push’ the change out to all of your files. Similarly, enabling ADS will not automatically stamp your existing files: it will only ensure that stamping is applied to future uploads.
If you wish to apply ADS (or changes to your ADS) to all existing files within your system without individually uploading new versions, then you can do so by opening the File Manager’s Settings tab on its Automatic Document Stamping menu item and clicking on the Update All button displayed at the bottom of the page.
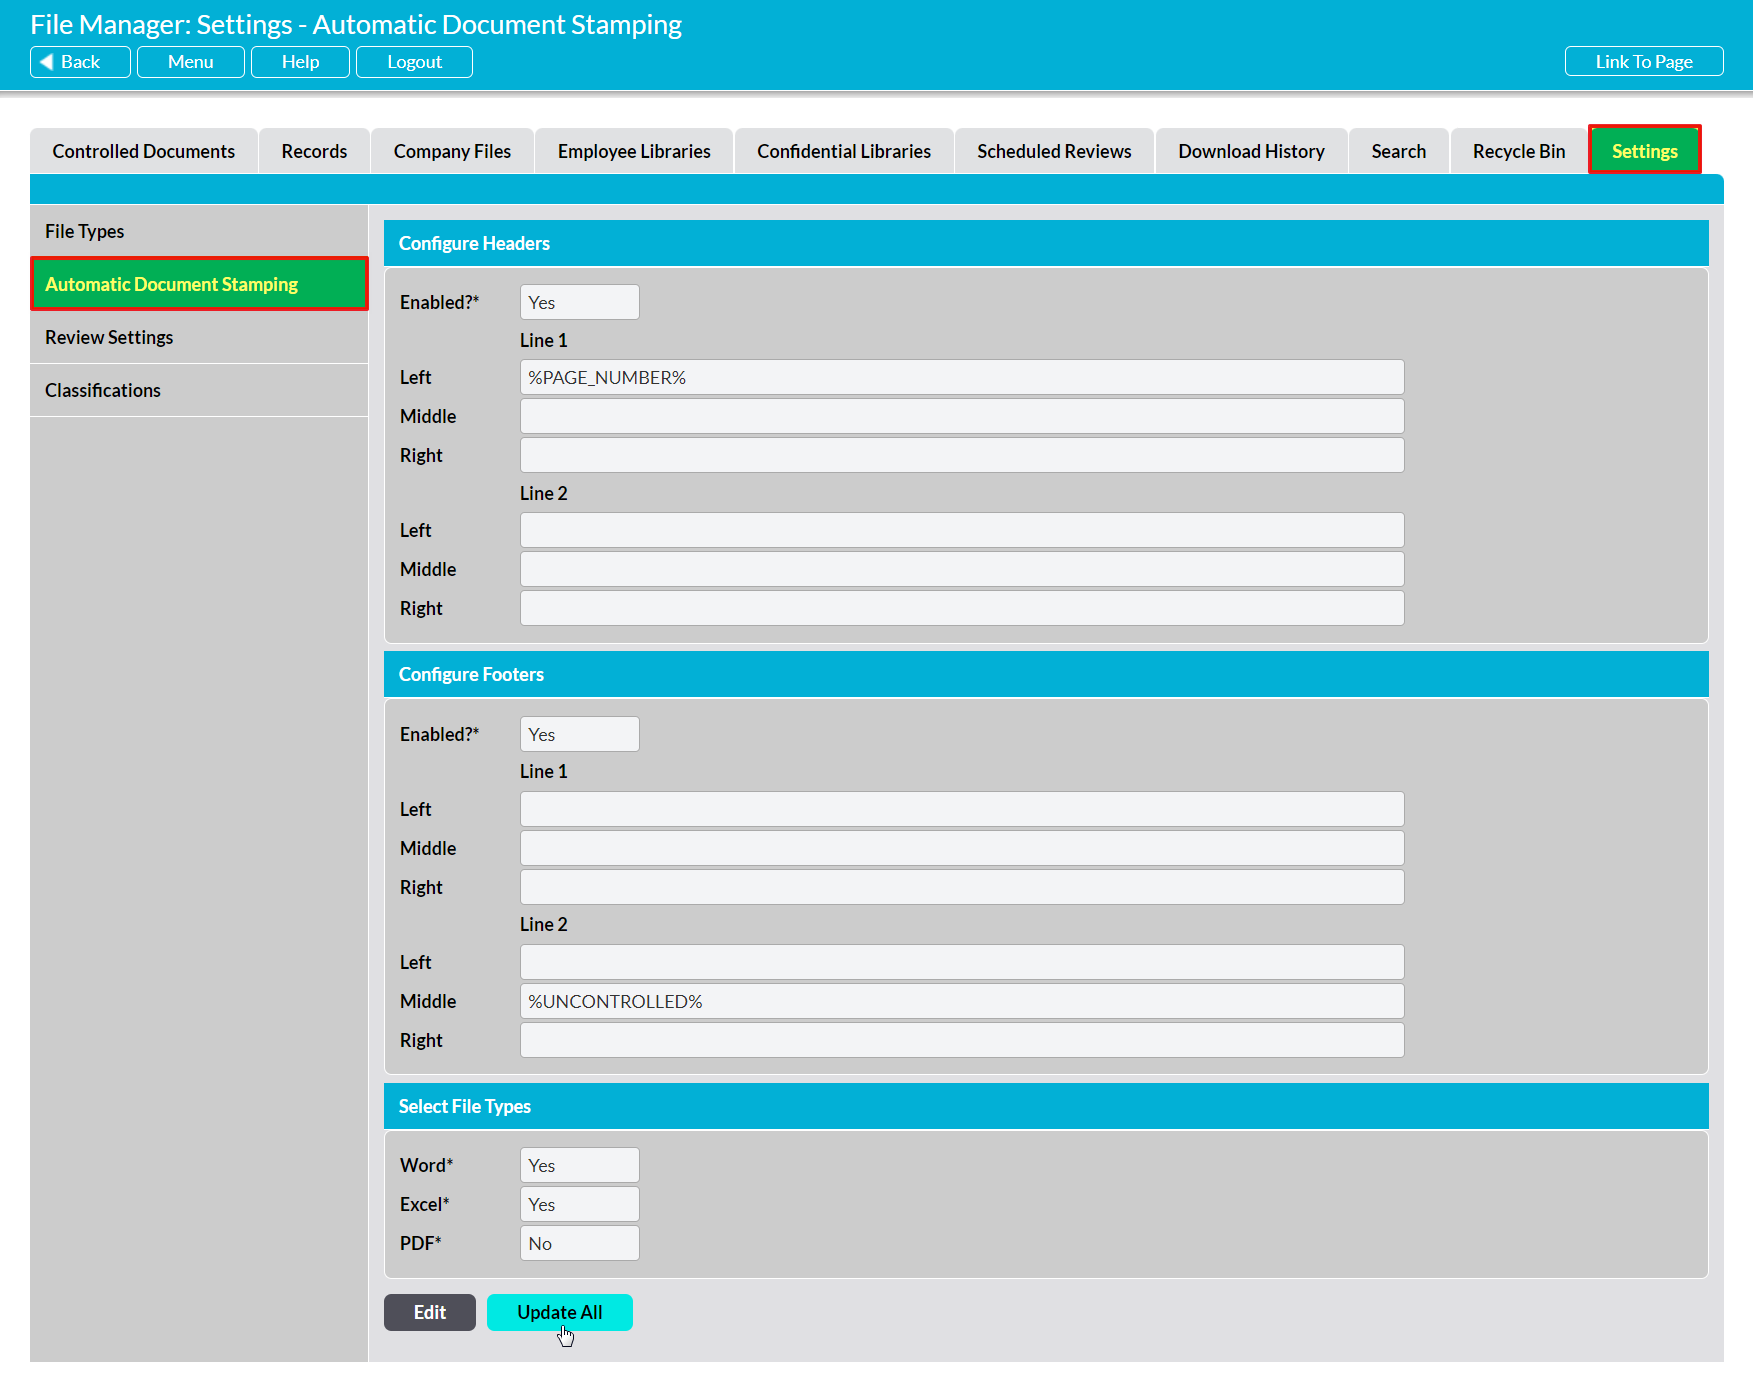
When used, this will apply your current ADS settings to all files within your Controlled Documents Library, as long as:
- ADS has been enabled for each file’s corresponding file type; and
- ADS has not been disabled for a specific file.
Alternatively, if you only wish to apply the stamping to specific existing files, then you can do so by uploading a new version (or re-uploading the current version) to the file.
*****
ADS Disabled or Unavailable for the Affected File Type
To enhance the flexibility of ADS, and enable you to adapt it more readily to your company needs, stamping is separately controlled for each of the compatible file types. This allows you to specify which types of file should be stamped with your ADS settings, and which should not be stamped. Currently, ADS is available for three file types:
- Word Documents (automatically enabled when ADS is turned on)
- Excel Documents (automatically enabled when ADS is turned on)
- PDF Documents (disabled by default when ADS is turned on)
All other file types are unstampable, meaning that ADS cannot be applied to them.
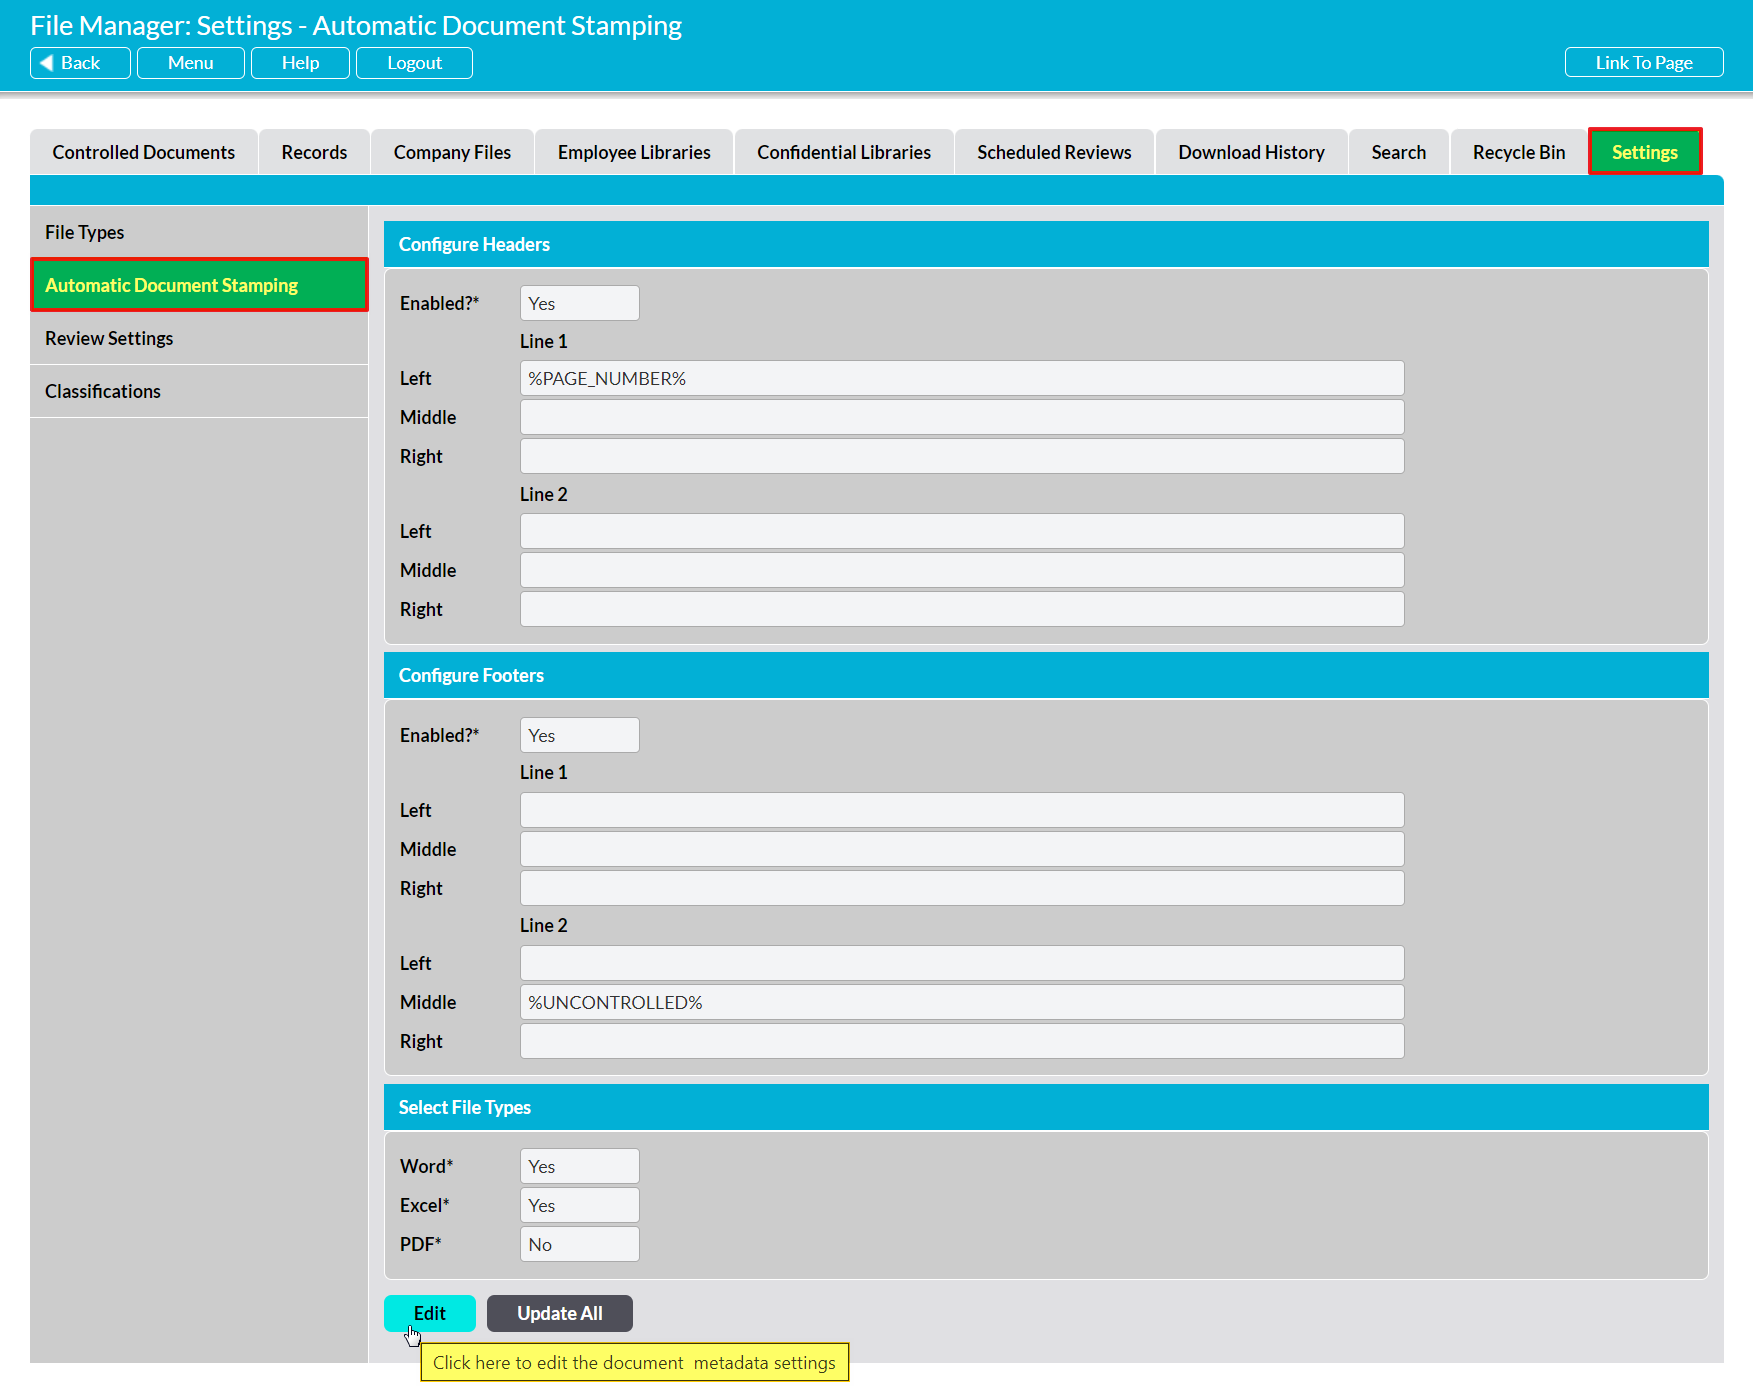
If the file you are uploading is of a file type for which ADS has not been enabled, or a type that is not stampable, then Activ will not apply your ADS settings to the file. In the case of file types that are not stampable (i.e. those not listed above), this cannot be changed as it is not possible to apply ADS to those file types. However, if your file is of one of the stampable types (i.e. a word, excel, or PDF document), then you can resolve this issue by enabling stamping for the affected file type. To do this, open the File Manager’s Settings tab on its Automatic Document Stamping menu option, and then click on the Edit button at the bottom of the screen.
The settings area will open for editing. Locate the Select File Types panel towards the bottom of the page, and use the dropdown menus against each file type to specify whether they should be enabled. Note that:
- ‘Yes’ means that ADS is enabled for this file type; and
- ‘No’ means that ADS is disabled for this file type, and that files of this type will not be stamped.
See Enable Automatic Document Stamping for guidance if you wish to make any other changes to your current ADS settings.
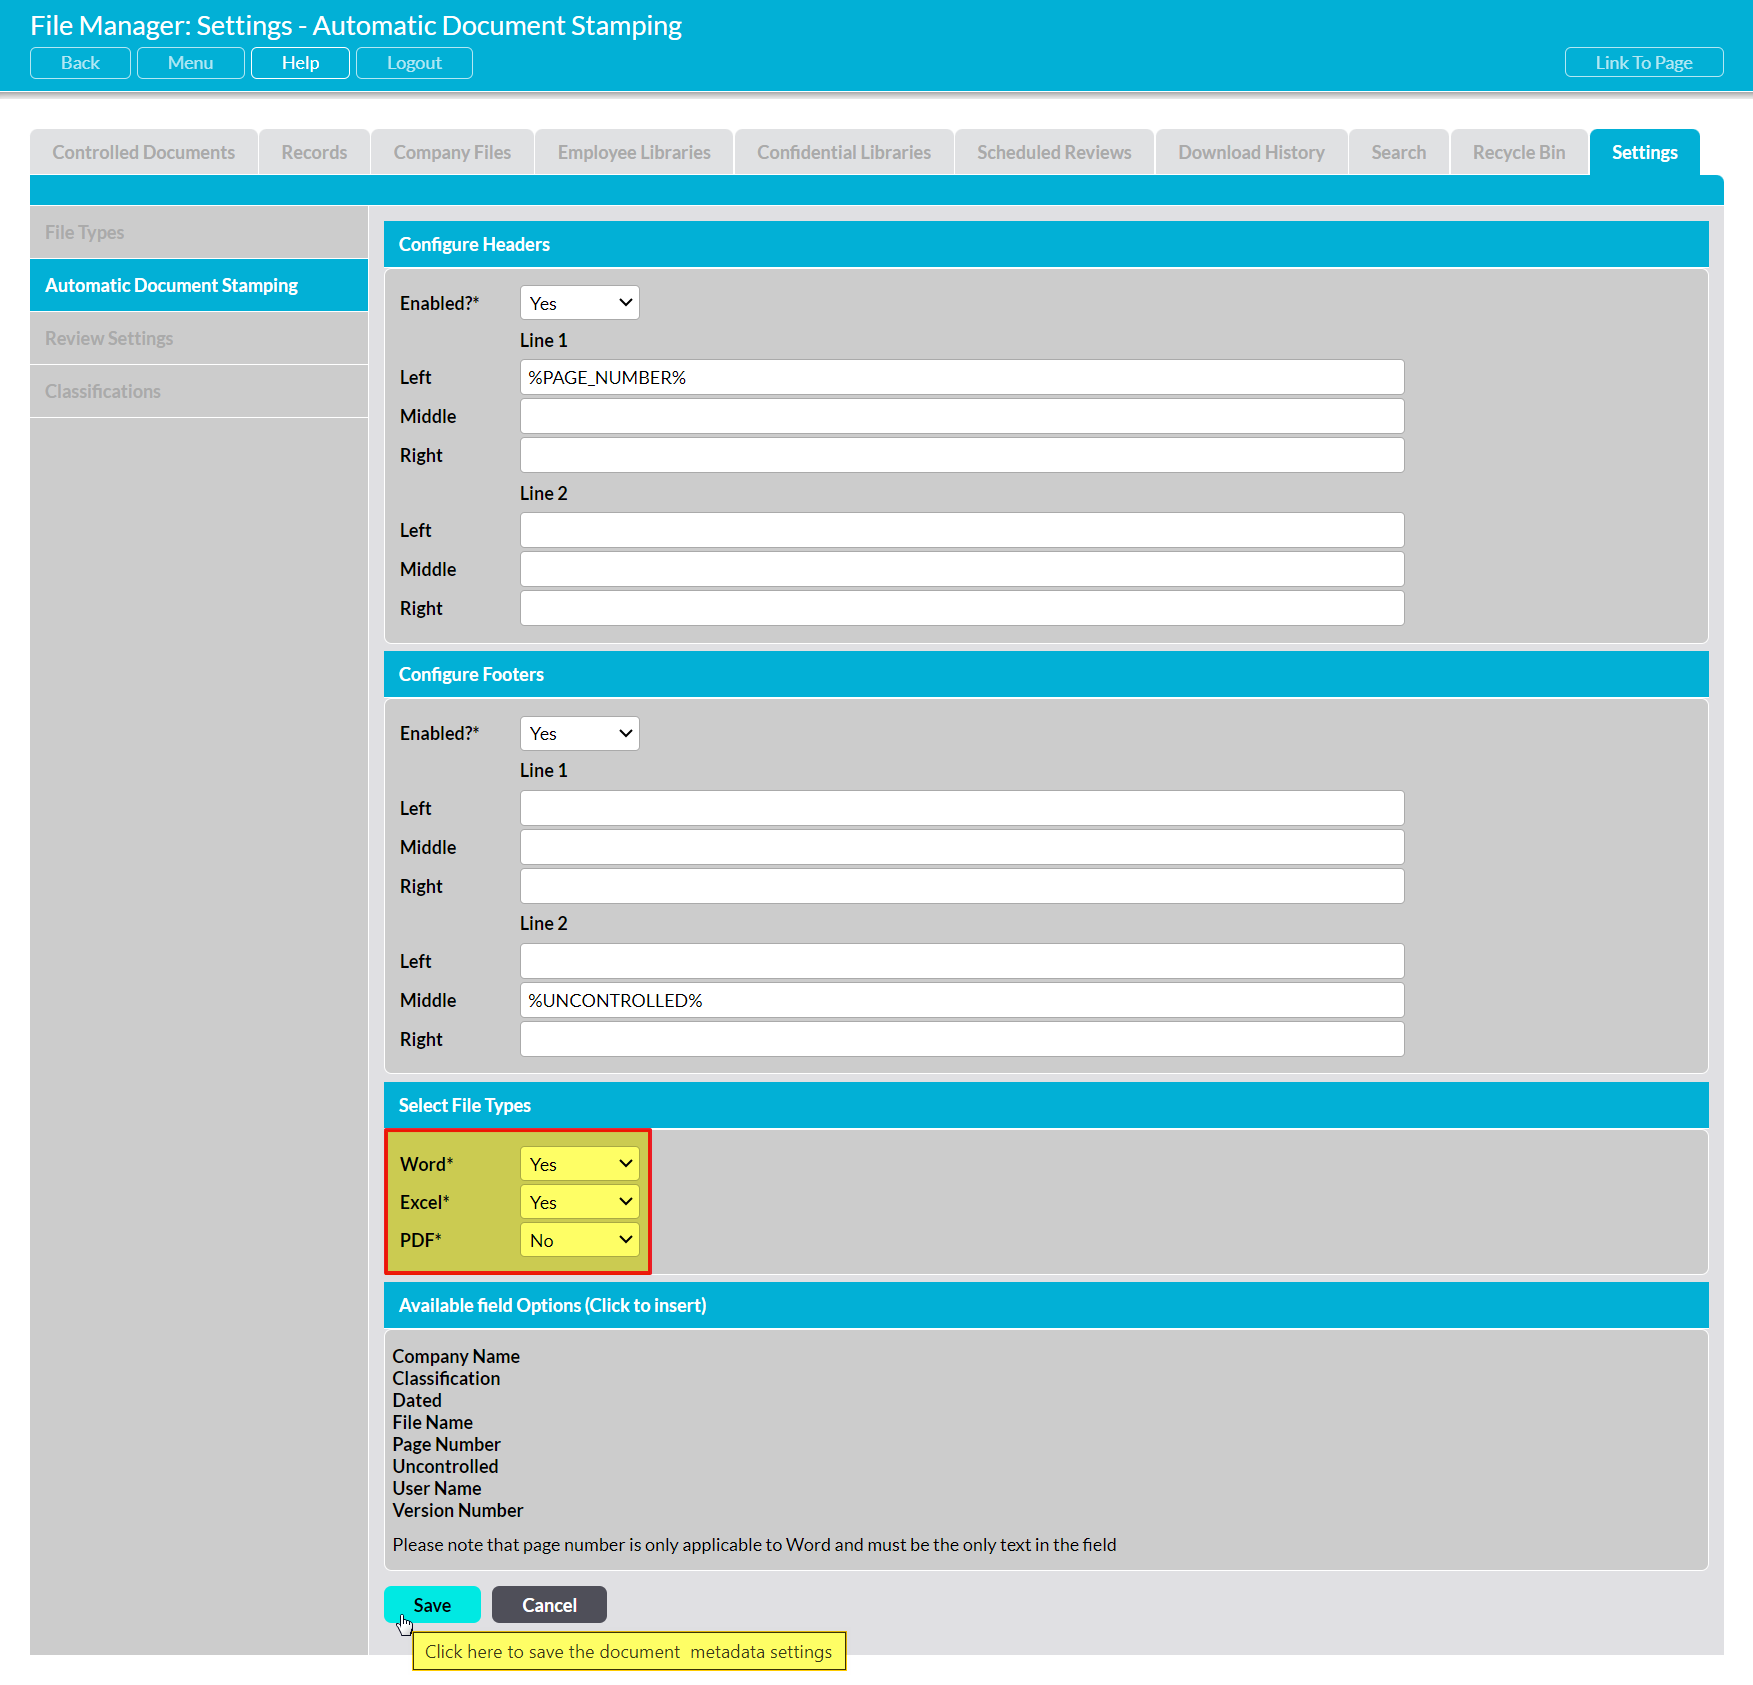
Click on Save to confirm your changes.
Note that ADS will not be applied to existing files within your system when you make this change, but will be applied to any relevant file you upload after the setting is enabled. See the above section for an explanation of why this occurs, and the options available for applying ADS to your existing files.
*****
ADS Disabled for the Affected File
For enhanced flexibility, Activ provides you with the option to disable ADS for individual files within your system. This allows you to apply ADS whilst retaining the ability to upload certain files without stamping, if specific content should not be stamped.
The following will occur when ADS is disabled for a specific file:
- when ADS is disabled for an individual file at the point of its initial upload (i.e. when it is first uploaded to Activ), it will be left fully unstamped until such time as ADS is re-enabled.
- when ADS is disabled on a file that was previously ADS-enabled (i.e. that has already been stamped), Activ will stop updating the stamping information, but will not remove it as it is not capable of removing stamping information. It can only add or update, and then only when a new version is uploaded. (Note that if you wish to remove old stamping from a document once ADS has been disabled, you will need to manually delete the data from its header and footer and then re-upload it as a new version).
To check whether ADS is currently disabled for a specific file, open the file on its Properties (see View a File’s Properties) and locate the Apply ADS to this Field? field. This will display as either:
- Yes – ADS is enabled for this file, and all new versions will be stamped; or
- No – ADS is disabled for this file, and new versions will not be stamped.
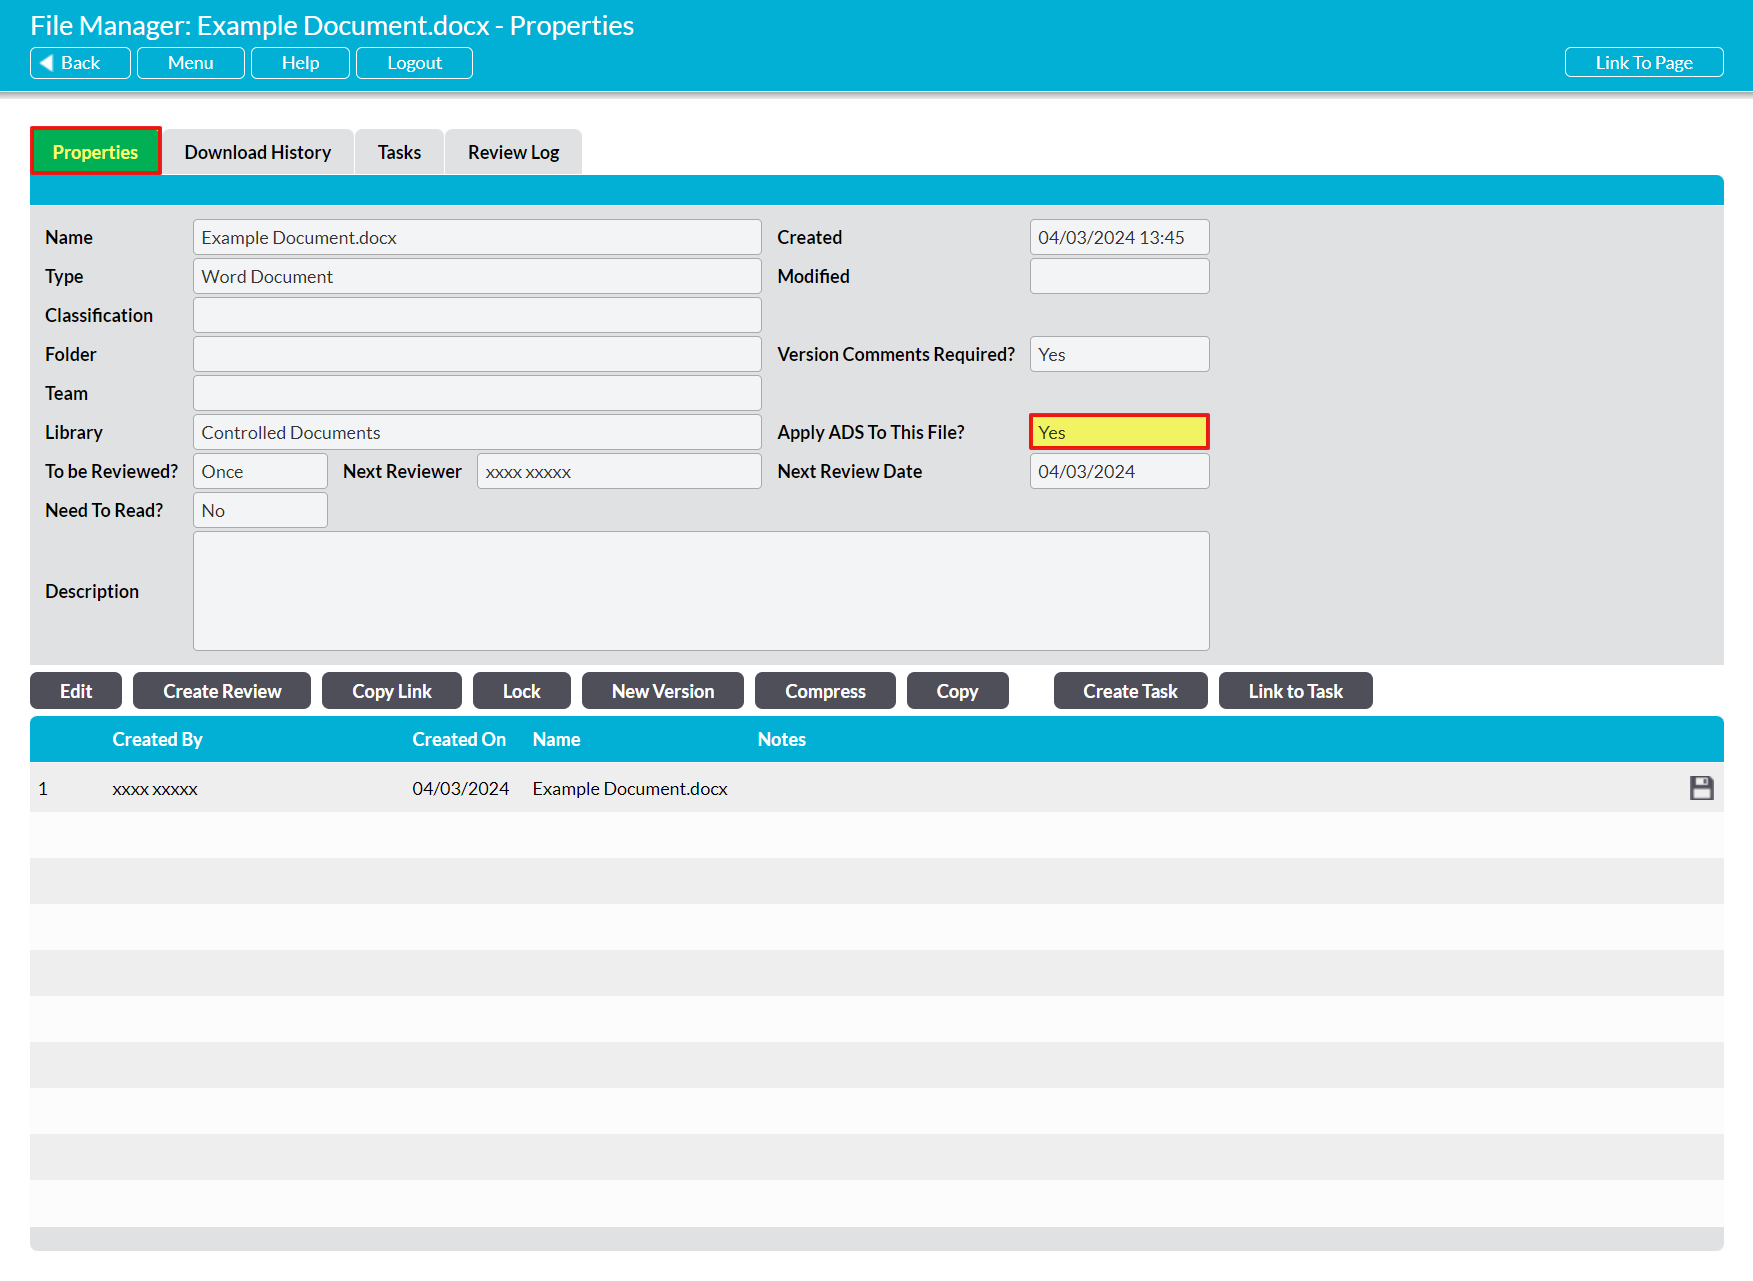
If ADS is disabled for the file when it should not be, then you can re-enable it by clicking on the Edit button and changing the dropdown against this field from ‘No’ to ‘Yes. Once you have saved your changes, upload a new version and this version will automatically be stamped in accordance with your current ADS settings.
*****
File Not Uploaded into Controlled Documents
Automatic Document Stamping is only available to files that are stored within the Controlled Documents Library, meaning that files uploaded to other Libraries will never be stamped. If the file is stored within another Library and should be stamped, then you will need to move the file to the Controlled Documents Library. This can be done by either:
- Removing the file from Records, and then re-uploading to Controlled Documents (stamping will be applied to the uploaded file); or
- Moving the existing file from one Library to the other following the steps outlined below (stamping will not be applied until a new version is uploaded).
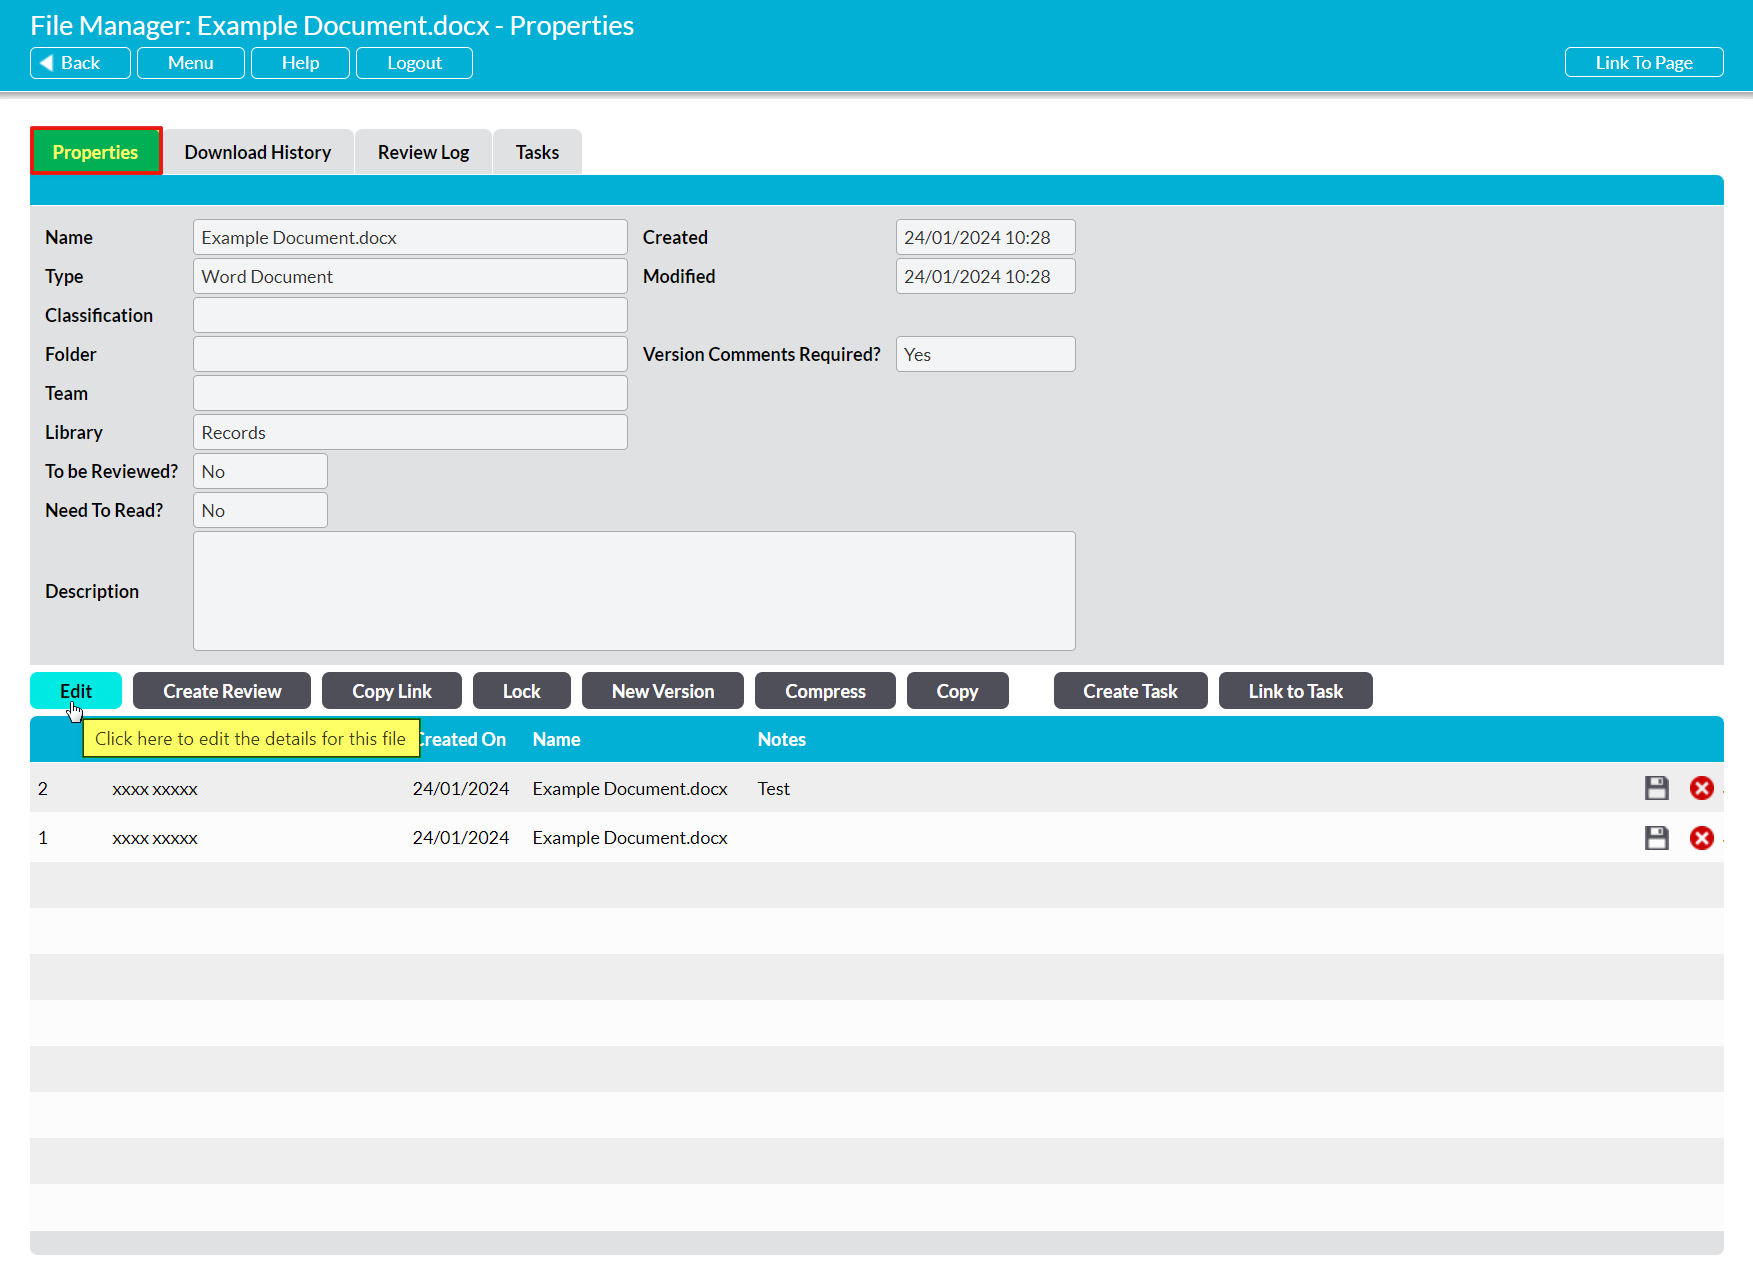
To move a file within Activ, open the file on its Properties page and click on the Edit button.
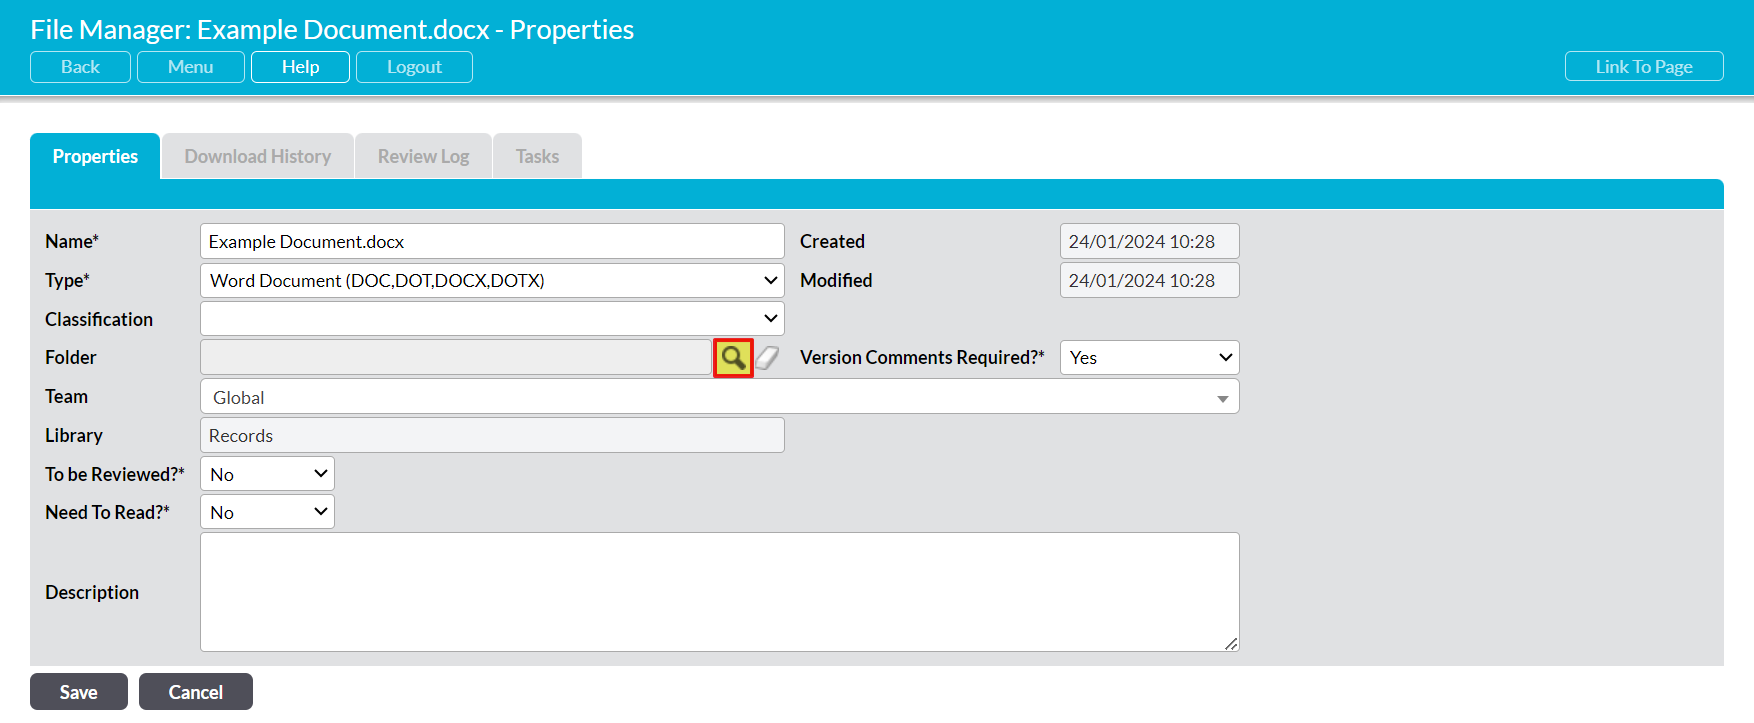
All fields will be opened for editing. Locate the Folder field, and click on the Magnifying Glass icon displayed alongside it.
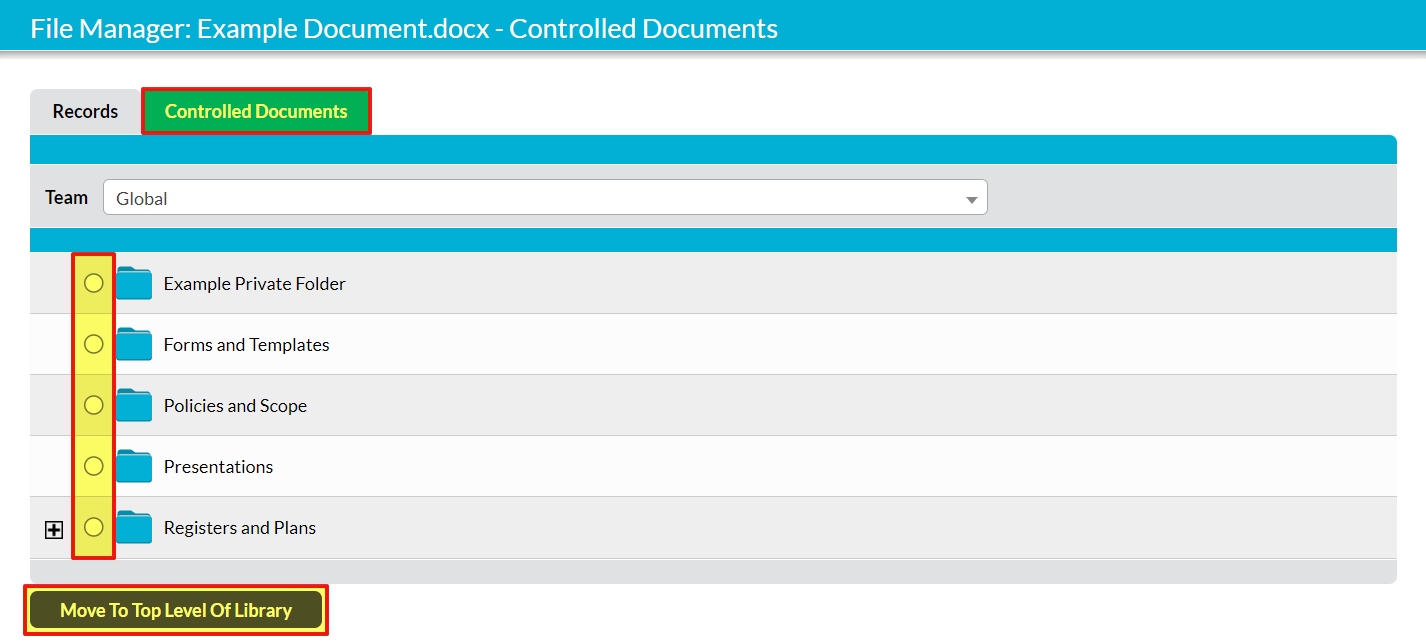
A popup window will appear, displaying the Libraries and folders that the file can be moved to (i.e. those that you have access to). Select the Controlled Documents tab, and then use the radio buttons to specify which folder the file should be moved into, or use the button at the bottom of the screen to move it into the ‘root’ of the Library.
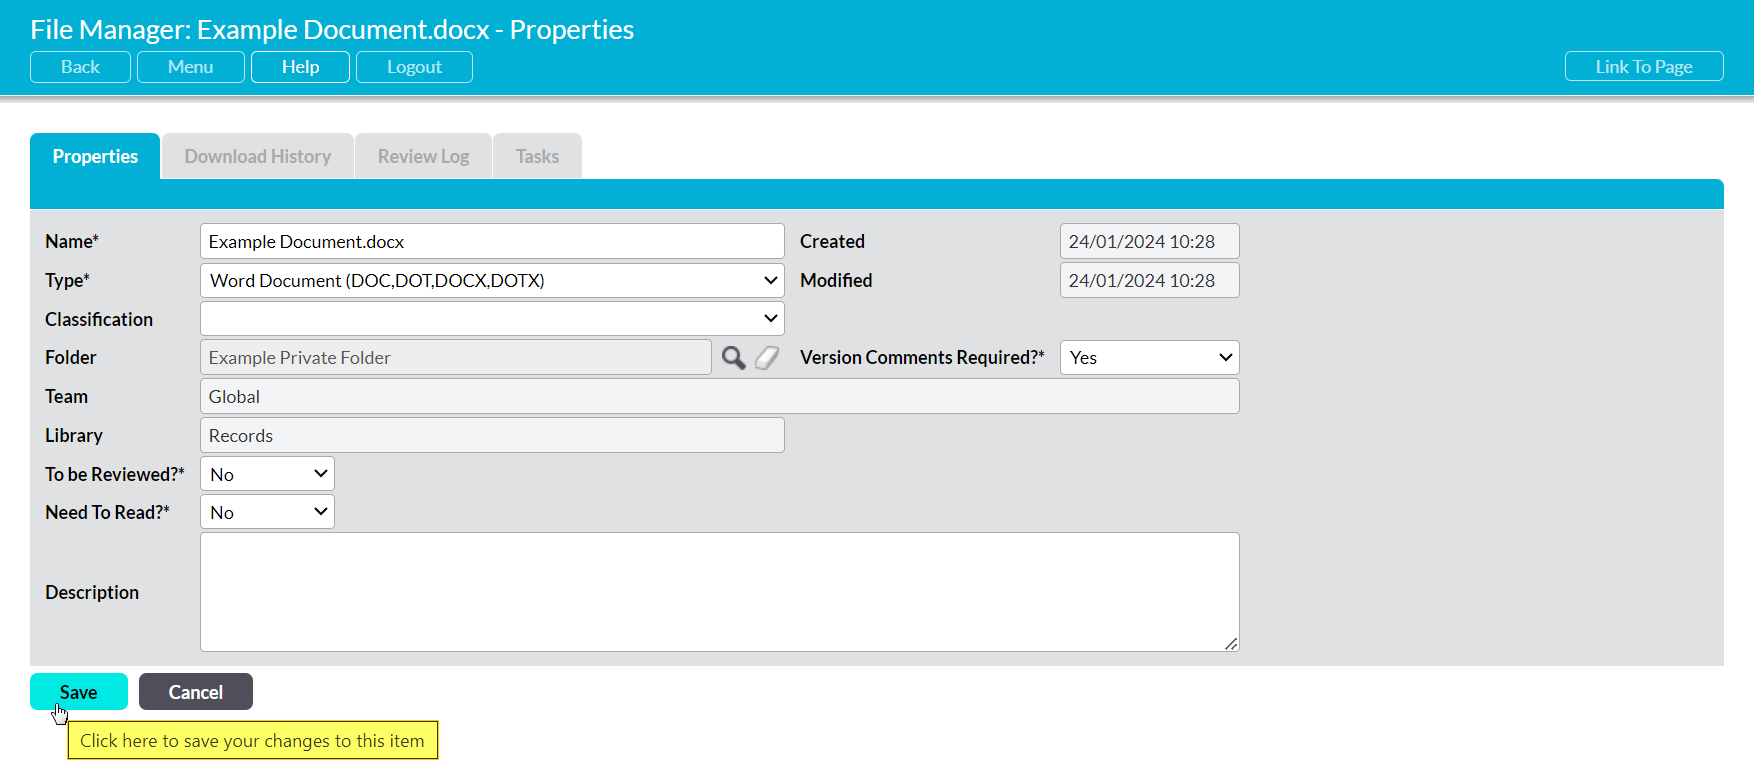
Click on Save once you have made your selection within Controlled Documents. Your file will now be stored within the appropriate area of Controlled Documents.
*****
File Contains Page or Section Breaks
ADS is not compatible with page or section breaks, and will fail to appear in any file that contains them. When this is the cause of the issue, the file will be ADS-enabled and will contain the information required to apply the stamping, but your headers and footers will be blank. In effect, the page/section breaks ‘block’ the stamping, preventing it from appearing within your file.
This issue is resolved by removing all of the page and section breaks within the file: once this has been done, your ADS information will automatically re-appear within the file’s headers and/or footers (dependent on your current ADS settings). Once you have corrected the file, you will need to re-upload it to Activ to ensure that the fixed, correctly stamped, version is available to your users.
The simplest way to identify page and section breaks within a file is to click on the Show Hidden Formatting button within MS Office’s toolbar (‘ribbon’). This will typically be shown in the toolbar’s Paragraph section.

MS Office will automatically update the file to show all hidden formatting symbols. Page and Sections breaks will typically be displayed as:

Or

Note that there may be some variation depending on the version of MS Office that the document was created in.
*****
File has ‘Different First Page’ Setting Enabled
If you have enabled the ‘Different First Page’ setting within the affected file, then the file will ‘know’ that its first page’s headers and footers should be managed separately to the rest of the file’s headers/footers, and it will automatically force Activ’s ADS to ‘skip’ the first page. In single-page files, this will make it seem like no ADS has been applied at all, whilst in multi-page files this will result in your ADS appearing on every page except the first.
To resolve this issue, you will need to open your File’s Header and Footer settings, and then deselect the Different First Page option. This is most easily done by double-clicking on a header or footer to open it for editing, as the corresponding settings options will automatically open within your toolbar whilst the header/footer is in this view. Typically, you will find the Different First Page option within the Options section of this toolbar, and it will appear as a tick box. Deselect the tick box to remove the setting, and your ADS will automatically appear on the file’s first page.

Note that you will need to re-upload your file once it is has been corrected, to ensure that the fixed, correctly stamped version is available to your users.
*****
(Excel) Headers / Footers are not Enabled for the File
By default, most Excel files will be set to hide headers and footers whilst you are working on the file within the program. This means that your stamping will not appear whilst you are in the ‘normal’ view of the file, but will be shown if you print the file, print preview the file, or view the file in its Page Layout view.
If you want your stamping to be visible within an Excel file when it is opened on a laptop or desktop, you will need to change the file’s view mode to the ‘Page Layout’ option. To do so, open the View toolbar and then click on the Page Layout button. This will typically be shown in the toolbar’s Workbook Views section.

The file’s content will be displayed in its page layout view, which is the same format that would be used if the file was printed. In addition, the file’s headers and footers will be displayed, and your stamping will now be visible. Save the file so that it will be displayed in this mode the next time it is opened, and then re-upload it to Activ.
*****
File Created Using a Pre-2007 Version of Microsoft Office
Due to the technical limits of older programs and the files created within them, Activ is unable to apply ADS to any file that is created using a pre-2007 version of Microsoft Office. As a result, if your file was created using an old version of Microsoft Office, you will need to convert it to a newer format before it will take the stamping. Two options are available for this:
- Create an entirely new file within MS 2007 or a later version, and copy your content into this new file; or
- Use MS Office’s inbuilt tools to convert the file to your current MS Office version (if it is MS 2007 or later). Note that this may cause layout changes, as MS Office cannot always ‘translate’ old formatting into its newer styles.
Once you have converted or re-created the file, upload it into Activ and ADS will be applied as normal.
