The workflow of conducting a legal compliance audit is a simple three-step process: 1 – Set Up, 2 – Complete Questionnaire, 3 – Review, Evaluate and Record. This article deals with Step 3.
Based on your responses to the questionnaire completed in Step 2, Activ generates your bespoke, up-to-date legal register.
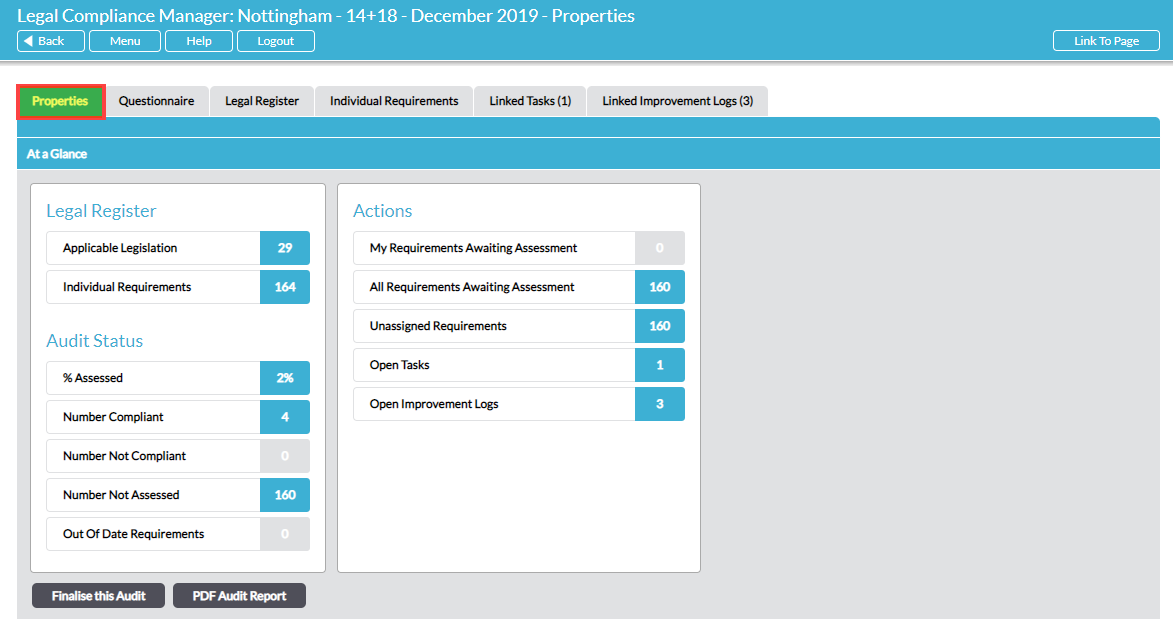
An overview of the Legal Register, Audit Status and associated Actions is presented on the audit’s Properties tab:
Click on any item within At a Glance to shortcut direct to the related information or action.
The output of the questionnaire is housed on two tabs:
Legal Register – this tab displays the list of legislation that is applicable to your organisation, with hyperlinks through to each source.
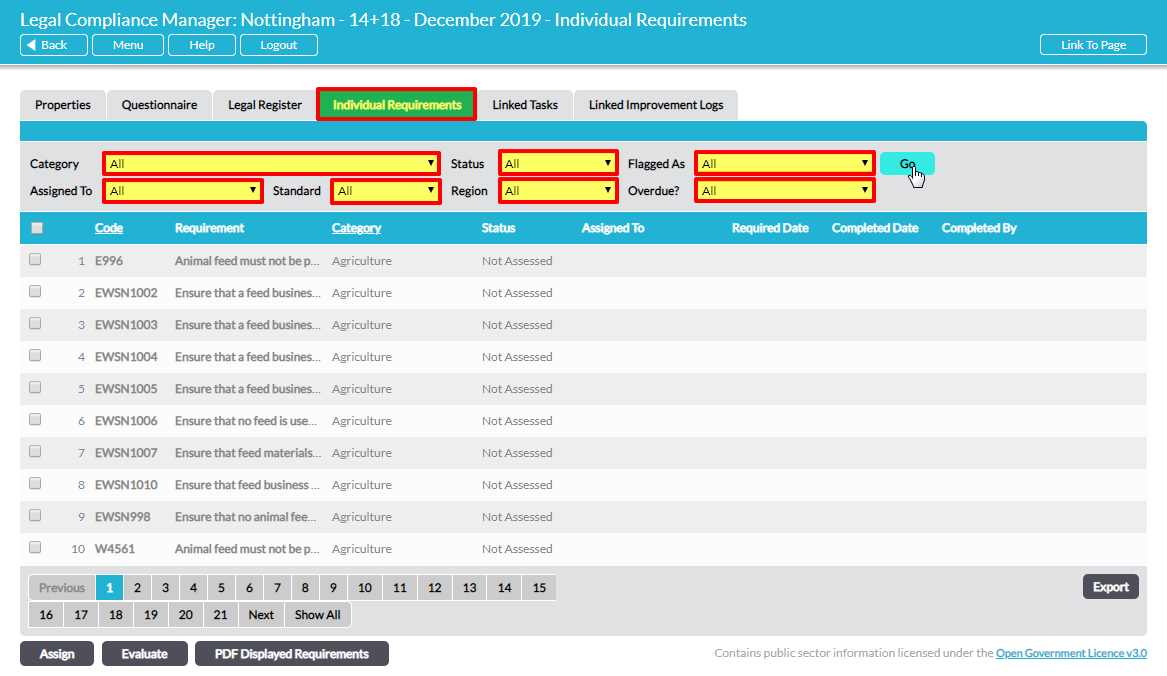
Individual Requirements – from the legislation listed on the Legal Register tab, Activ extracts the specific legal requirements applicable to your organisation and lists these requirements individually on the Individual Requirements tab:
If the list of requirements is long, you can use the filters at the top of the tab to narrow the list by Category, Status, Flagged As (changed or new since last audit ), person Assigned To, Standard, Region, and whether Overdue or not. Select the criteria and click on Go to apply the filter.
There are three action buttons at the bottom of the Individual Requirements tab: Assign, Evaluate and PDF Displayed Requirements.
Assign – check-box individual requirements and click on Assign to batch-assign them to a chosen person to evaluate compliance. See Assign Responsibility to Other Users for Evaluating Legal Compliance.
Evaluate – check-box individual requirements to select them as a group, then batch-record identical compliance evaluation for them all simultaneously. See Batch Evaluate – Record Compliance Evidence for a Batch of Requirements.
PDF Displayed Requirements – if you have applied a filter you can create a PDF file of only the filtered requirements using this button. If you have not applied a filter this button will produce a PDF file of all requirements.
*****
Review Legal Requirements
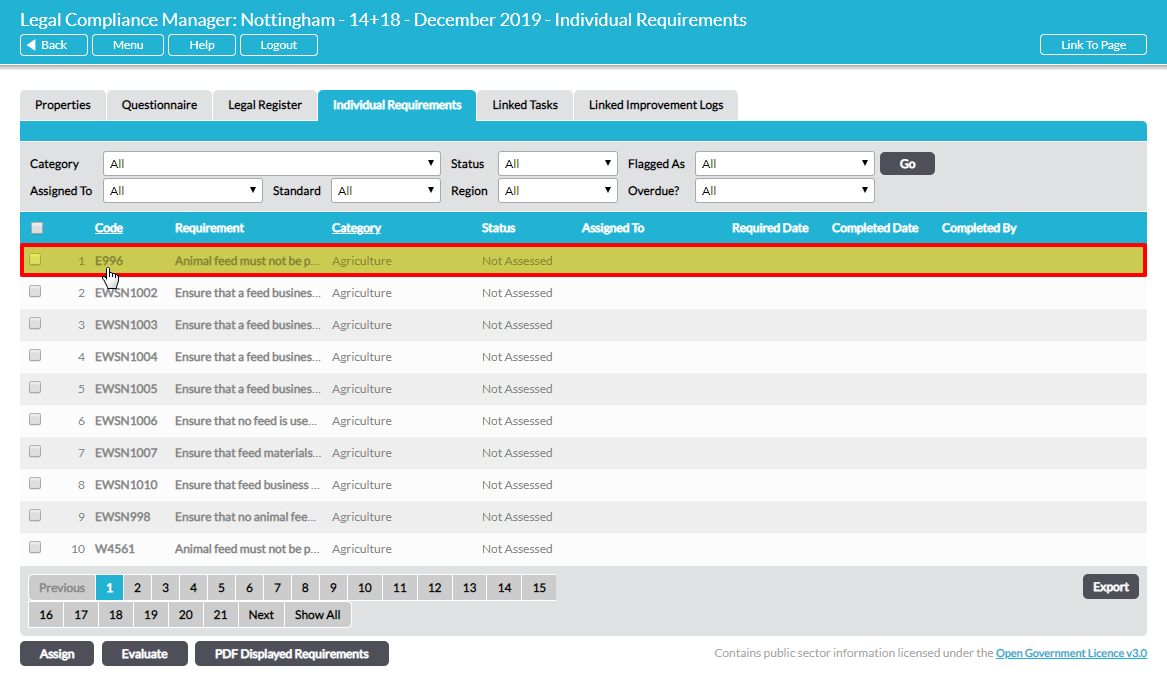
You can preview the first few lines of a requirement by hovering over the requirement in the list. To view the full requirement, click on it to open:
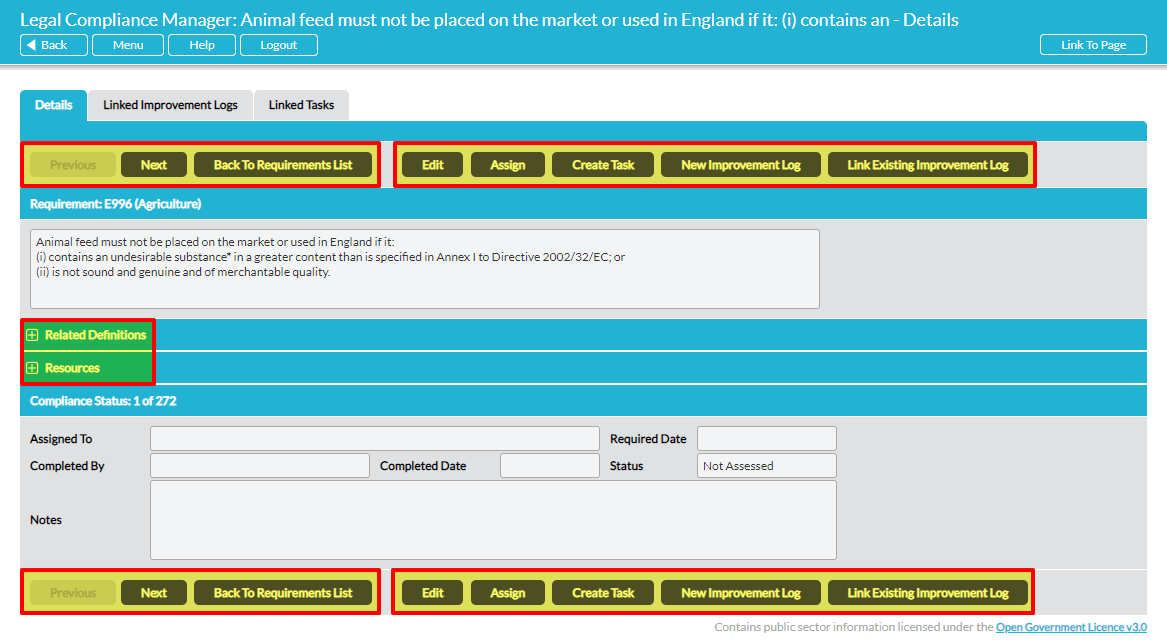
The requirement opens in ‘view’ mode. The screen is sectioned. The upper portion shows the full detail of the requirement, with supporting definitions and resources (when applicable). The lower portion contains information on the Compliance Status plus any supporting Links and/or Attachments. If this is the first audit the fields in the lower portion will initially be blank. For second and subsequent audits, the lower portion may be pre-populated with compliance evidence imported from an earlier audit IF this option was selected when the current audit was set up (see Step 1 – Set Up a New Legal Compliance Audit).
Certain terms within the requirement text are marked with an asterix*. This signifies that a definition is provided for that term. Click on the + icon to the left of Related Definitions to access definitions of terms used in the requirement. Click on the + icon to the left of Resources to view web links to any associated legislation or guidance notes.
In ‘view’ mode there are three navigation buttons – Previous, Next and Back To Requirements List – and five action buttons – Edit, Assign, Create Task, New Improvement Log and Link Existing Improvement Log.
You can systematically navigate through the requirements in ‘view’ mode using the Next and Previous buttons. Alternatively, use the Back to Requirements List button to return to the main Individual Requirements tab where you directly select any particular requirement by clicking on it, thereby avoiding navigating through the list of requirements.
The action buttons are described below:
Edit button – Evaluate Compliance/Edit Compliance Status Information
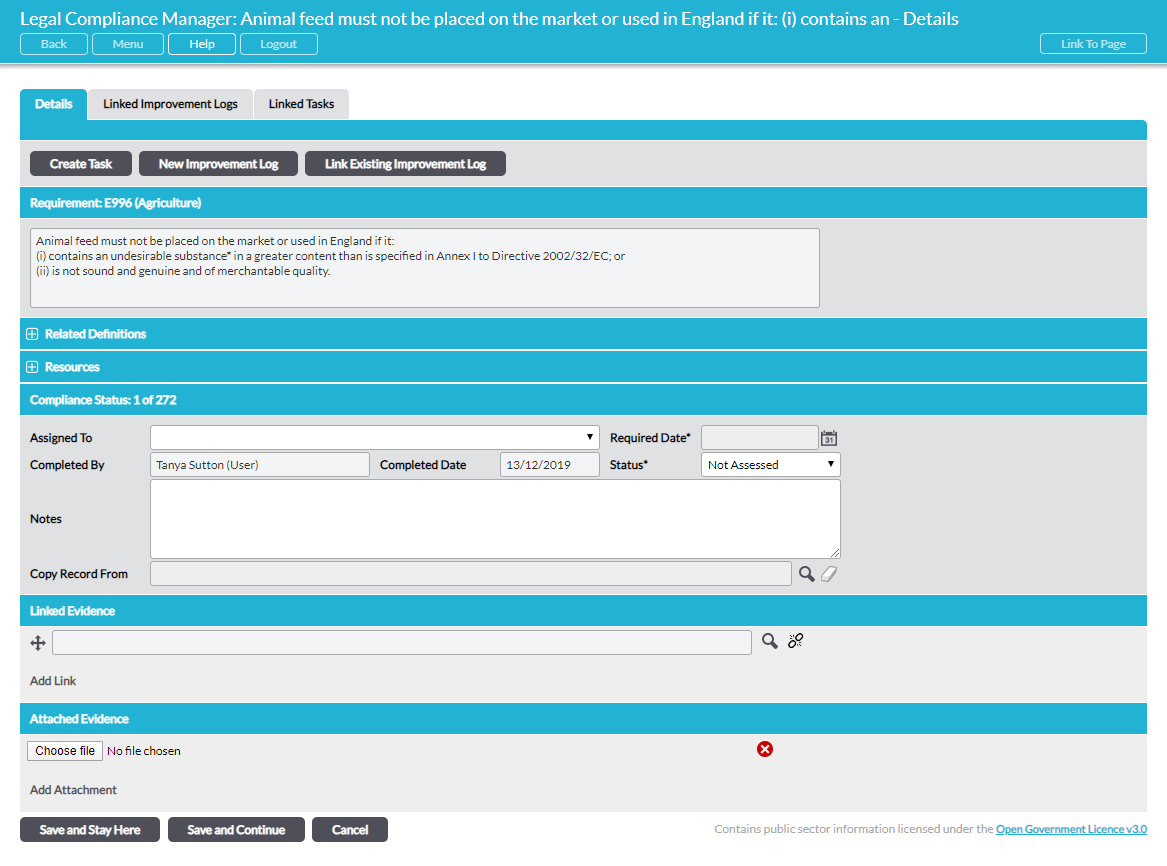
The Edit button opens the record for editing so you can record compliance evaluation details for the requirement and any supporting evidence:
A guide to the available fields follows:
Assigned To – if applicable, the name of the person given responsibility for evaluating compliance for this specific requirement and recording the evidence is shown here. This is initially blank. If you wish to assign responsibility to someone, use the drop-down menu to select the relevant person. When a requirement is assigned to somebody they will receive an automatic e-mail alert informing them (provided they have enabled the appropriate options in their Notifications in My Details). It will also appear on their Home screen in the Dashboard and To Do List.
Required Date – if applicable, the target date set for compliance to be evaluated by is shown here. This is initially blank. If you assign the requirement to somebody, a date will need to be entered here.
Completed By – automatically populated with the name of the person who is making the edits (or who last made edits).
Completed Date – automatically populated with the last date the record details were changed. If this portion is open for editing, today’s date will show.
Status – this is initially set to ‘Not Assessed’. After evaluation, change the status to ‘Compliant’ or ‘Not Compliant’ as appropriate.
Notes – use this field to record any additional information relating to the evaluation of compliance or supporting evidence. Maximum 4000 characters.
Copy Record From – this field provides the time-saving facility to copy recorded information from another requirement within the current audit , reducing the effort involved in entering the same information multiple times within the audit . Click on the magnifying glass to the right of this field. A new pop-up window will open, where you can select the requirement to copy from. If the list of available requirements is long, use the filters at the top of the window to narrow the list of selectable requirements to copy from. See Copy Another Requirement’s Compliance Record.
Linked Evidence – use this section to link to evidence of compliance. Create hyperlinks to items in other Activ modules (including files, processes, internal audits, companies and improvement logs) or to any external URL – see Link to External Resources as Evidence of Compliance. Simply click on Add Link to create a new hyperlink. You can re-order the links by dragging and dropping (hover over the cross to the left of the linked items, click and drag). IMPORTANT: when you link to files, processes and improvement logs within Activ, the link will be maintained to the version that was current at the time the link was created. If you subsequently edit a linked file, process or improvement log (and thereby generate a newer version of it in Activ), the compliance evidence will maintain the link to the version that was current at the time the link was created. This ensures that your legal compliance audit retains its integrity as a record of compliance evaluation at that moment in time.
Attached Evidence – click on Add Attachment to upload files from outside Activ to provide evidence of compliance. Examples might include Waste Transfer Notes or Equipment Inspection Records.
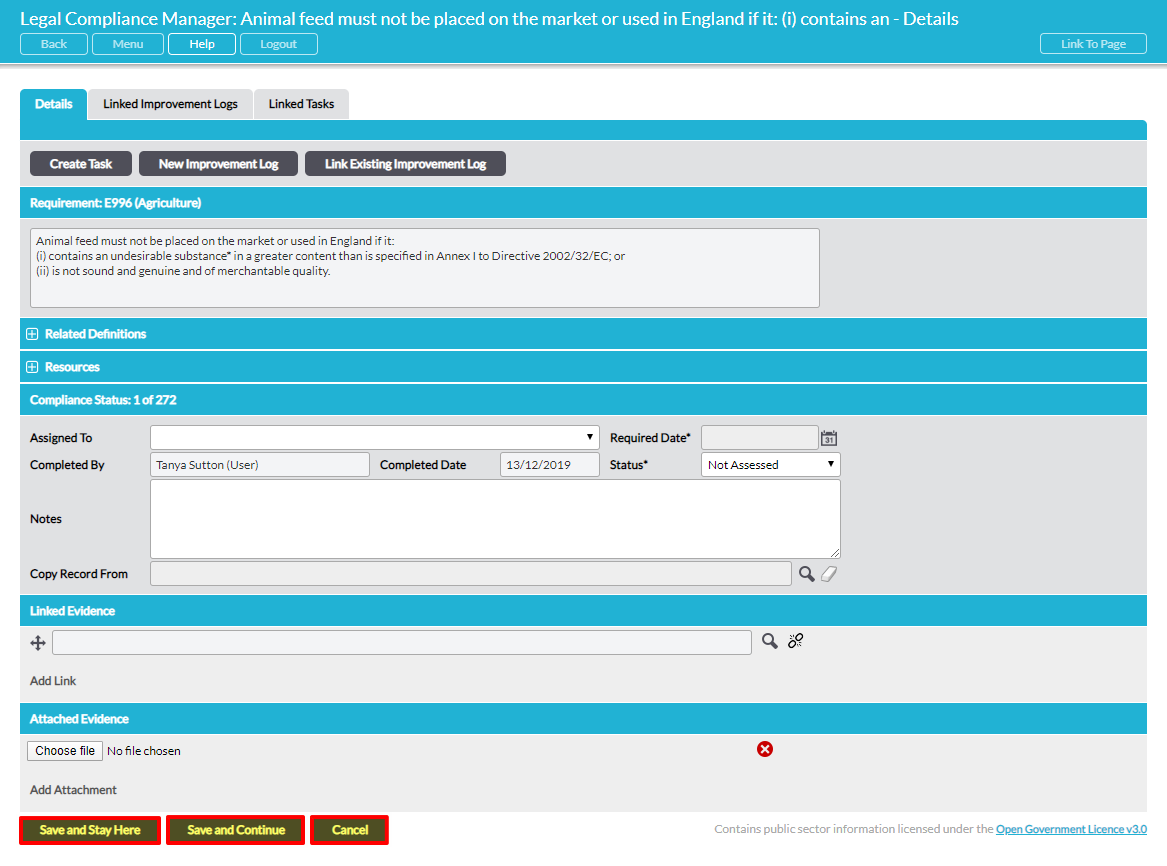
Use the buttons at the bottom of the screen to navigate to your next action:
Save and Stay Here – closes the record for editing and displays the requirement in ‘view’ mode again.
Save and Continue – navigates to the next requirement in the list, with the record ready and open in ‘edit’ mode.
Click Cancel at any time to close the record for editing without saving any changes and display the requirement in ‘view’ mode.
You can systematically navigate through the requirements in ‘view’ mode using the Next and Previous buttons at the bottom. Return to the Individual Requirements tab at any time using the Back to Requirements List button.
Through the course of reviewing legal requirements, you may wish to take follow-up action such as assigning the requirement to another individual for review, or creating ad-hoc Tasks and Improvement Logs.
Assign button
Having reviewed the details of the requirement in the upper portion of the screen you may decide to assign that particular requirement to somebody else to evaluate compliance. Click on the Assign button to do this. See Assign Responsibility to Other Users for Evaluating Legal Compliance.
Create Task button
As you review requirements you may wish to create an ad-hoc Task for yourself or somebody else. Click on the Create Task button to do this. If you create a Task for somebody else, they will receive an immediate alert e-mail and the Task will appear on their Dashboard/To Do List on the Activ Home screen. See Create an Ad-hoc Task from a Legal Compliance Audit.
New Improvement Log button
The New Improvement Log button allows you to raise a new Improvement Log associated with any requirement without having to leave the particular requirement. Clicking on New Improvement Log opens a new window where you can enter the relevant details and when you Save you will be returned to the requirement so you can continue your legal compliance audit. See Raise a New Improvement Log Associated with a Requirement.
Link Existing Improvement Log button
The Link Existing Improvement Log button allows you to efficiently link a requirement to an existing Improvement Log without having to leave the particular requirement. Clicking on Link Existing Improvement Log opens a new window where you can select the relevant Improvement Log and when you Save you will be returned to the requirement so you can continue your legal compliance audit. See Link a Requirement to an Existing Improvement Log.
*****
When the legal compliance audit is complete and ready to be ‘signed-off’ within Activ, you can ‘finalise’ it by clicking on Finalise this Audit on the audit’s Properties screen. Finalising an audit is a housekeeping action, which closes it for editing and allows you to set up a subsequent audit with evidence imported from this one. Automatic importing of evidence into new audits is only possible from a previously ‘finalised’ audit. See Finalise a Legal Compliance Audit for more detail.

