An agreement (contract, or other set of obligations) consists of three component parts:
- its overall Properties (such as legal jurisdiction, counterparty, in force date)
- associated Definitions
- its set of individual Requirements
When entering agreements into the system, some parameters are selected from pre-defined lists and these lists are created and managed in the Settings area. Therefore, it is necessary to configure your settings before you can begin to enter agreements:
Four standard parameters are used when entering an agreement’s Properties into the system. These are:
- the Site that the agreement pertains to (optional)
- the Legal Entity that the agreement pertains to
- the Legal Jurisdiction within which the agreement applies
- the Agreement Type (to help identify it for cataloguing or ownership purposes)
One standard parameter is used when entering the individual Requirements of an agreement into the system:
- the Requirement Type (to help identify it for cataloguing or ownership purposes)
For Audits of compliance, two sets of parameters are available:
- the Default Audit Options that are applied when the audit is set up
- the optional Risk Ratings available for selection when reviewing/auditing compliance with individual requirements
Finally, there is an option to allow links to be created between requirements in individual agreements and from requirements to items in other Activ modules, for referencing:
- the Linking item allows you to switch the links feature on/off
Full instruction in configuring each of the eight items in Settings is given below.
SITES – used when entering an agreement’s Properties
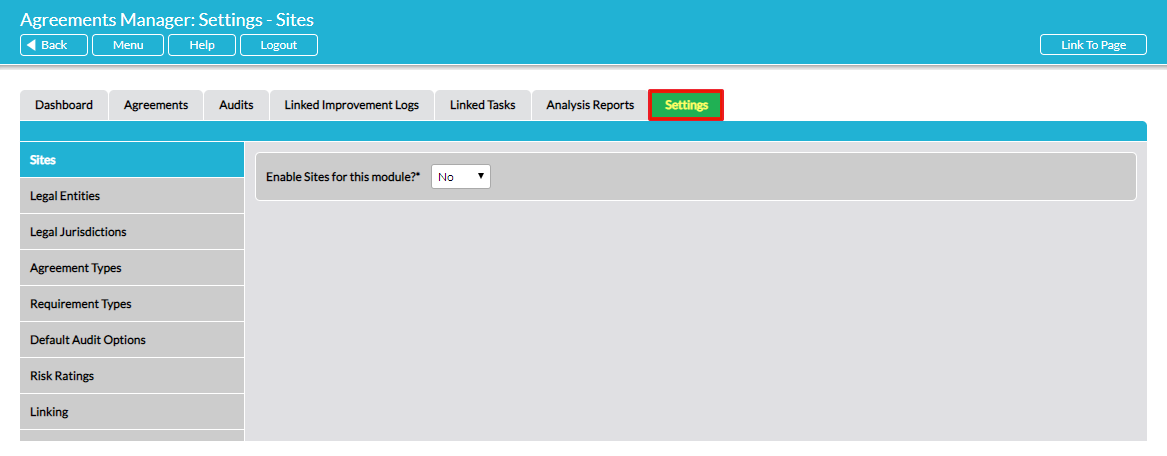
Agreements Manager offers the option to record the Site (or business unit) that an agreement pertains to in its Properties. For single site organisations this may not be relevant. In Settings, you can determine whether to enable the Site field.
To enable/disable the Sites field, select the Sites item from the menu on the left and select ‘Yes’ or ‘No’ as appropriate. If ‘No’ is selected, the Site field will be hidden in agreement Properties forms, to keep the form as clean as possible. If ‘Yes’ is selected, you can proceed to add/modify/disable/delete sites in the list below.
Note that you can add/modify/disable/delete sites from any module’s Settings tab, and the list of sites is common to all modules. Therefore, any changes you make to your list of sites in one module will feed through to all other modules.
To add a new Site, type the new Site’s name in the Site* field at the top of the page. Also select whether the Site is to be Disabled?* (meaning it is not available for selection by users) and whether it is to be the Default?* (the Site that is selected by default when any new agreement is added). Click on Add to complete the addition of the Site:
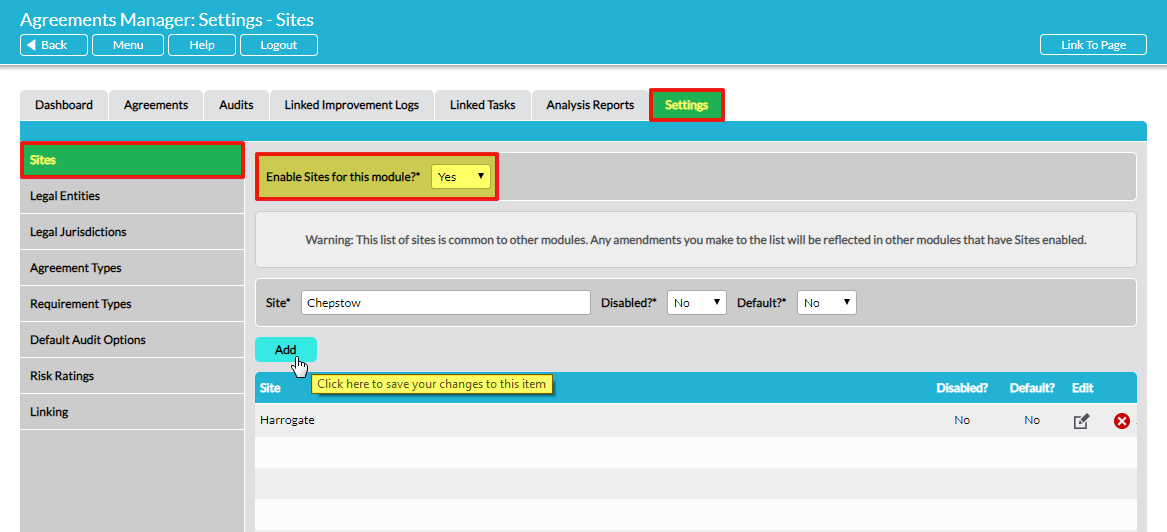
The newly-added Site is now displayed in the list. Repeat as required.
If your organisation has more than one site, it is recommended that you select Default = ‘No’ for all sites in the list, as this will force users to proactively select the correct site for each new agreement.
To edit a Site, click on the Edit (pencil) icon to its right:
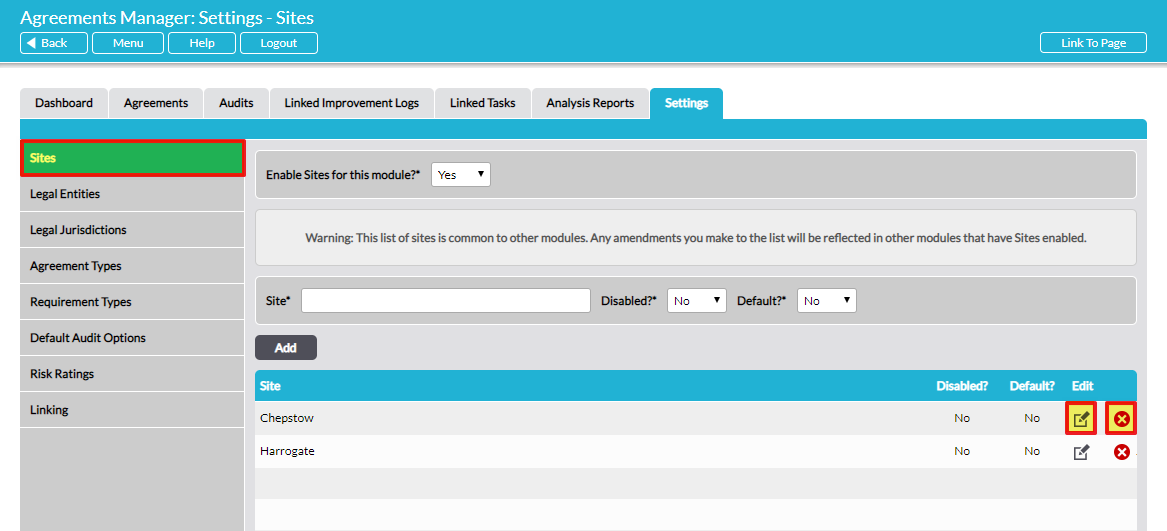
Make the changes in the fields at the top of the page, then click Save.
To delete a Site from the list, click on the Delete (red cross) icon to its right. You will not be able to delete a Site that has already been used in the system. If you wish to remove the Site from drop-down lists and prevent it being selected in future you can disable it instead.
LEGAL ENTITIES – used when entering an agreement’s Properties
When a user enters a new agreement, they must specify the Legal Entity that the agreement pertains to. The Legal Entity is selected from a drop-down list, configured by you in Settings. Many organisations are single-entity, but for groups comprising several legal entities it is clearly important to specify which legal entity any agreement pertains to.
To add a new Legal Entity, select the Legal Entities item from the menu on the left and follow the instructions as for Sites above.
If your organisation has only one legal entity, it is recommended that you select Default = ‘Yes’, to automatically populate the Legal Entity field of new agreements, thereby saving users an unnecessary click.
If your organisation has more than one legal entity, it is recommended that you select Default = ‘No’ for all legal entities in the list, as this will force users to proactively select the relevant legal entity for each new agreement.
To edit a Legal Entity in the list, click on the Edit (pencil) icon to its right and follow the instructions as for Sites above.
To delete a Legal Entity from the list, click on the Delete (red cross) icon to its right. You will not be able to delete a Legal Entity that has already been used in the system. If you wish to remove the Legal Entity from drop-down lists and prevent it being selected in future you can disable it instead.
LEGAL JURISDICTIONS – used when entering an agreement’s Properties
When a user enters a new agreement, they must specify the Legal Jurisdiction that the agreement pertains to. The Legal Jurisdiction is selected from a drop-down list, configured by you in Settings. Your system comes pre-loaded with UK legal jurisdictions. You can modify or delete these and add your own.
To add a new Legal Jurisdiction, select the Legal Jurisdictions item from the menu on the left and follow the instructions as for Sites above.
To edit a Legal Jurisdiction in the list, click on the Edit (pencil) icon to its right and follow the instructions as for Sites above.
To delete a Legal Jurisdiction from the list, click on the Delete (red cross) icon to its right. You will not be able to delete a Legal Jurisdiction that has already been used in the system. If you wish to remove the Legal Jurisdiction from drop-down lists and prevent it being selected in future you can disable it instead.
AGREEMENT TYPES – e.g. Supplier Agreement; used when entering an agreement’s Properties
When a user enters a new agreement, they must specify the type (category) that the agreement belongs to. The Agreement Type is selected from a drop-down list, configured by you in Settings. Your system comes pre-loaded with a list of common agreement types. You can modify or delete these and add your own.
To add a new Agreement Type, select the Agreement Types item from the menu on the left and follow the instructions as for Sites above.
To edit an Agreement Type in the list, click on the Edit (pencil) icon to its right and follow the instructions as for Sites above.
To delete an Agreement Type from the list, click on the Delete (red cross) icon to its right. You will not be able to delete an Agreement Type that has already been used in the system. If you wish to remove the Agreement Type from drop-down lists and prevent it being selected in future you can disable it instead.
REQUIREMENT TYPES – e.g. Business Continuity; used when entering requirements into an agreement
When requirements are being entered into an agreement, each requirement is ‘tagged’ according to its type (category). The Requirement Type is selected from a drop-down list, configured by you in Settings. Your system comes pre-loaded with a list of common requirement types. You can modify or delete these and add your own.
To add a new Requirement Type, select the Requirement Types item from the menu on the left and follow the instructions as for Sites above. In addition, optionally, each Requirement Type can be assigned to an Owner. When new audits are set up, as a time-saving feature, you can choose to automatically assign responsibility for evaluation of the included requirements to their relevant ‘Type’ Owner. This assignment can subsequently be manually changed for any requirement in the audit.
To edit a Requirement Type in the list, click on the Edit (pencil) icon to its right and follow the instructions as for Sites above.
To delete a Requirement Type from the list, click on the Delete (red cross) icon to its right. You will not be able to delete a Requirement Type that has already been used in the system. If you wish to remove the Requirement Type from drop-down lists and prevent it being selected in future you can disable it instead.
DEFAULT AUDIT OPTIONS
When a new audit (review) of an agreement or set of requirements is set up, there are several optional features available:
Enable Risk Rating field in audits? – select ‘Yes’ to make a Risk Rating field available in all audit findings forms. The auditor/reviewer will have the option to assign a risk rating to an individual requirement. The available risk ratings are defined by you in Settings – Risk Ratings (see below). If you select ‘No’, the Risk Rating field will not be available in audit forms.
Mandatory Risk Rating? – (only available if you have chosen to enable the Risk Rating field) select ‘Yes’ here to make the assignment of a risk rating to individual requirements mandatory in all audit forms.
Automatically assign requirements to Requirement Type Owner? – where an Owner has been set for Requirement Types (see above), if you select ‘Yes’ here, when a new audit is set up its default setting will be to automatically assign responsibility for evaluating requirements to the relevant Requirement Type owner. If you select ‘No’ then new audits will default to not automatically assigning evaluation responsibility to Owners and this will need to be done manually for each requirement. NOTE: the selection you make here (‘Yes’ or ‘No’), determines the default setting for all new audits, for convenience. Whichever default selection you make, when each new audit is set up you will still have the option to manually over-ride the default for that individual audit.
Only include new and changed requirements in new audits? – if you select ‘Yes’ here, when a new audit is set up its default setting will be to include only in-scope requirements that are new or have changed since they were last audited. If you select ‘No’, all in-scope requirements will be included in the audit. NOTE: the selection you make here (‘Yes’ or ‘No’), determines the default setting for all new audits, for convenience. Whichever default selection you make, when each new audit is set up you will still have the option to manually over-ride the default for that individual audit.
Import previous findings to new audits? – if you select ‘Yes’ here, when a new audit is set up its default setting will be to import previous audit findings for each requirement into the new audit. Specifically: the findings from the most recent audit of the current version of each requirement will be imported into the new audit. If the current version of any requirement in the new audit has not been audited previously then no findings will be imported. NOTE: the selection you make here (‘Yes’ or ‘No’), determines the default setting for all new audits, for convenience. Whichever default you choose, when each new audit is set up you will still have the option to manually over-ride the default for that individual audit.
RISK RATINGS – e.g. Low, Medium, High; used when auditing compliance with requirements
(This item will only be relevant if you have elected to enable the Risk Rating field in the Default Audit Options section above.)
When audits (reviews) of agreements/requirements are being conducted, there is an option to assign a risk rating to individual requirements. This is the assessed risk to the business associated with the requirement. The Risk Rating is selected from a drop-down list, configured by you in Settings.
To add a new Risk Rating, select the Risk Ratings item from the menu on the left and follow the instructions as for Sites above. The Order field determines the position of the item in the list.
To edit a Risk Rating in the list, click on the Edit (pencil) icon to its right and follow the instructions as for Sites above.
To delete a Risk Rating from the list, click on the Delete (red cross) icon to its right. You will not be able to delete a Risk Rating that has already been used in the system. If you wish to remove the Risk Rating from drop-down lists and prevent it being selected in future you can disable it instead.
LINKING
There is an option to allow reference links to be created:
- between requirements within a single agreement
- between requirements in different agreements
- between requirements and items in other Activ modules, for example in a process in Processes, or to a file in File Manager.
To enable the Linking feature, select ‘Yes’ and then Save:

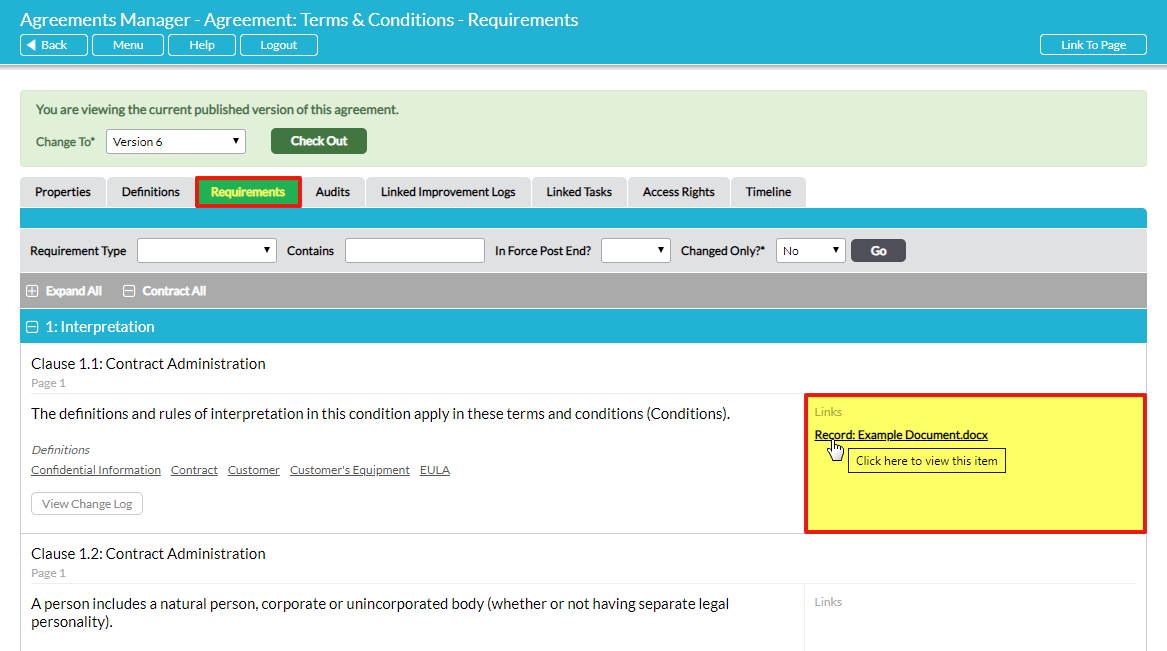
If Linking is enabled, when you view an agreement’s Requirements tab there is an additional column to the right of the list of requirements, where Links to other items are displayed and accessed:
If you do not require linking, select ‘No’ for Linking. This will keep the Requirements tab of an agreement cleaner by avoiding an unnecessary, redundant, column being displayed.
*
When you have configured the Settings, your system is ready for agreements to be entered. You can return to Settings at any time to modify your system’s options.
