For maximum flexibility, all Supplier Assessments within Activ can be completed by either:
- one of your employees, if they have a user account; or
- any member of the Supplier’s company, if a link to the Assessment has been sent to them.
If the latter option is used, the Supplier will not need a login to your system. Instead, they will be directed to an online form that will allow them to input their responses, and that will save their data to the Assessment’s underlying record.
Note that the Assessment will need to be sent to the Supplier before they can fulfil it. For guidance on how to do this, see Send a Supplier Assessment.
Also note that, to protect against data loss, every response that the fulfiller enters will be saved to your system as they complete the corresponding question. This means that if the fulfiller loses their connection or closes their window, all data entered against previously completed questions will be preserved. Responses will only be lost if the session is ended whilst a question is open in ‘response’ view, and the loss will only affect the data entered against that specific question. This means that the fulfiller can leave the Assessment at any time without losing their work.
For convenience, this article has been split into four sections:
- Open the fulfilment form – employees with logins
- Open the fulfilment form – Suppliers without logins
- Complete and submit the assessment
*****
Open the Fulfilment Form – Employees with Logins
If you are an employee who is responsible for manually fulfilling a Supplier’s Assessment, open the Supplier Assessment in the normal manner (see View a Supplier Assessment) and click on the Fulfil button.
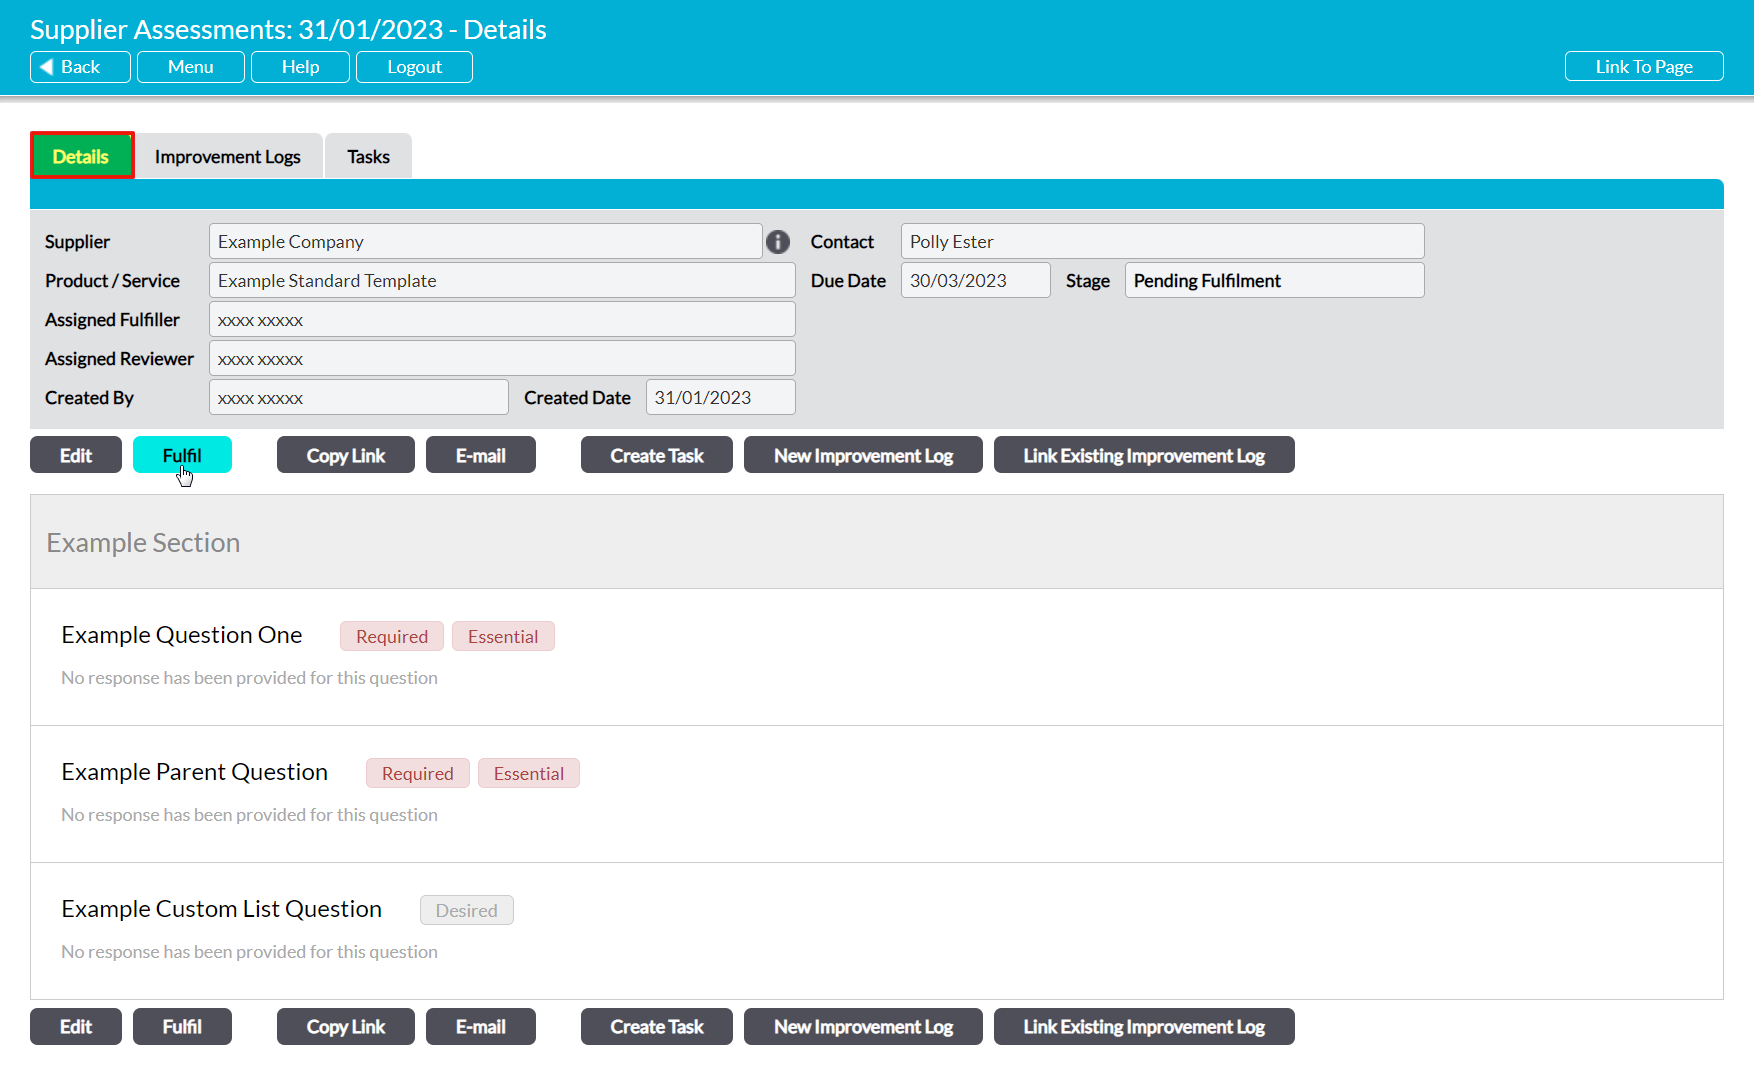
The Assessment will be opened on its Fulfilment Form, enabling you to enter the appropriate responses into its questionnaire.
*****
Open the Fulfilment Form – Suppliers without Logins
If you are a supplier who has been asked to complete a Supplier Assessment, you will have been provided with a direct link to an online form that contains the Assessment. To access the form, you will simply need to follow the provided link.
*****
Complete and Submit the Assessment
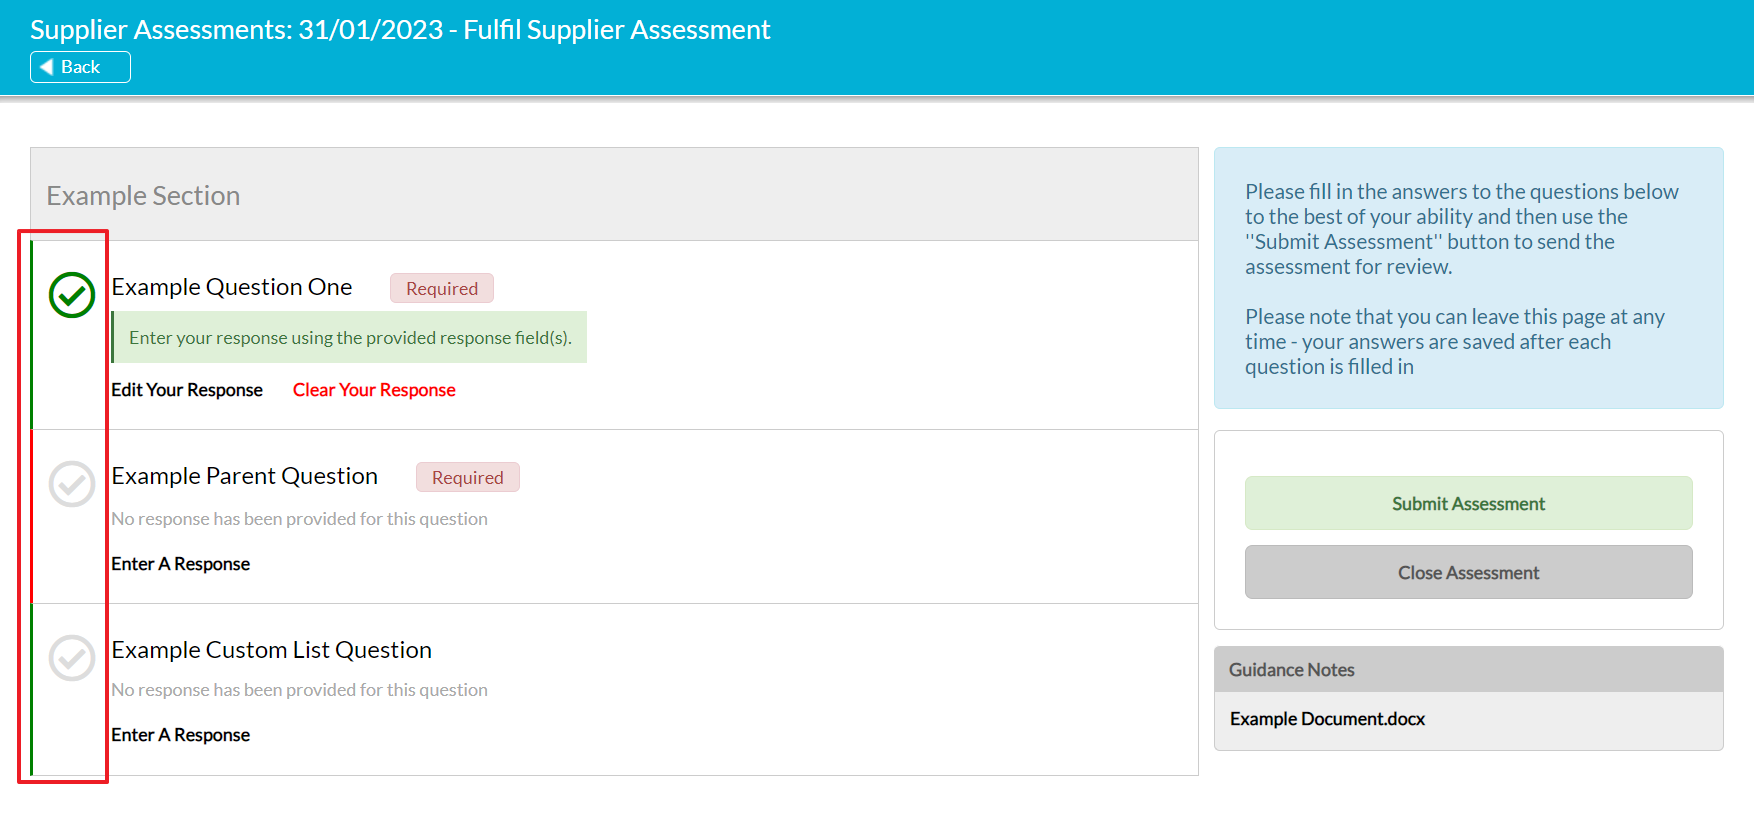
To begin completing a Supplier Assessment, open it on its fulfilment form. The Assessment’s questionnaire will be opened in editing view, and will be arranged in up to four key sections:
- The Questions Panel – this will be displayed as a table on the left-hand side of the page, and will display all of the questions that you need to complete, along with tags to identify any questions that are mandatory. You will use this section to enter and manage your responses to each question. Note that additional questions may appear within this section as you are entering your responses, if a question is tied to conditional sub-questions. These questions will appear directly beneath their ‘parent’ question, and will be indented to make them visually distinct from the other questions.
- An Instructions Panel – this is the blue panel in the top right corner of the page. It provides some simple standard instructions describing what the page is for.
- Action Buttons – these are displayed directly beneath the Instructions Panel, and are used to Submit the Assessment for Review once you have finished entering your responses, or to Close the fulfilment form if you need to take a break from working on it (e.g. to obtain further information or attend other tasks).
- Guidance Notes – this section will appear directly beneath the Action Buttons panel if the requestor has included any attachments to support the Assessment. Click on any of the file names displayed within this section to download the attachment to your device.
To enter your responses, locate the question you wish to answer and click on the Enter a Response link displayed directly beneath it.

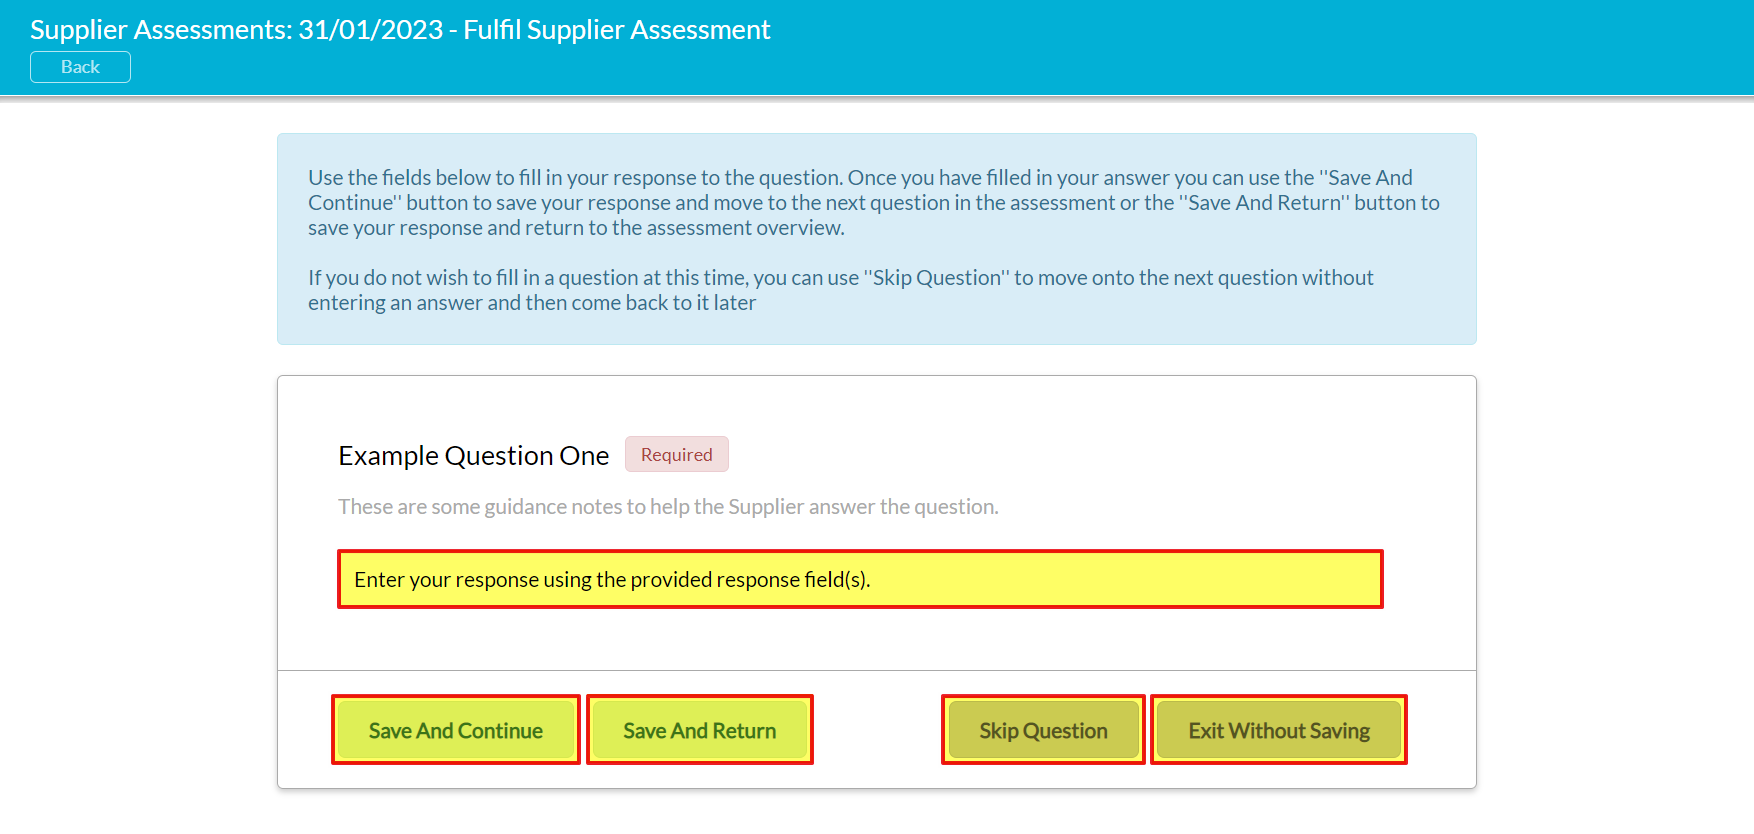
The selected question will be opened in editing view. Each question will be displayed individually on its own page, which will include:
- a blue instructions panel containing some standard instructions on how to complete questions.
- the full question text, in bold.
- relevant guidance text in grey, if any guidance notes have been provided for the question.
- one or more fields allowing you to enter your response. This may take the form of a dropdown menu, a file upload option, a multi-choice tick list, a date field, or a free text field. Note that in some cases, you may have the option to add additional response fields by clicking on ‘Add Another Response’, and that in the case of multi-choice lists you may have the option to select multiple options.
Once you have entered your response, click on either:
- Save and Continue to save your data and be taken to the next question, in response view. Note that this will take you back to the main fulfilment form if you have just answered the last question in the form; or
- Save and Return to save your data and return to the main fulfilment form.
You will also have the option to:
- Skip the question if you are not ready to answer it. This will take you to the next question in the form if there are questions after the one you wish to skip, or will advise you that you have reached the end of the questionnaire.
- Exit Without Saving. This will return you to the main fulfilment form without saving any data to the question.
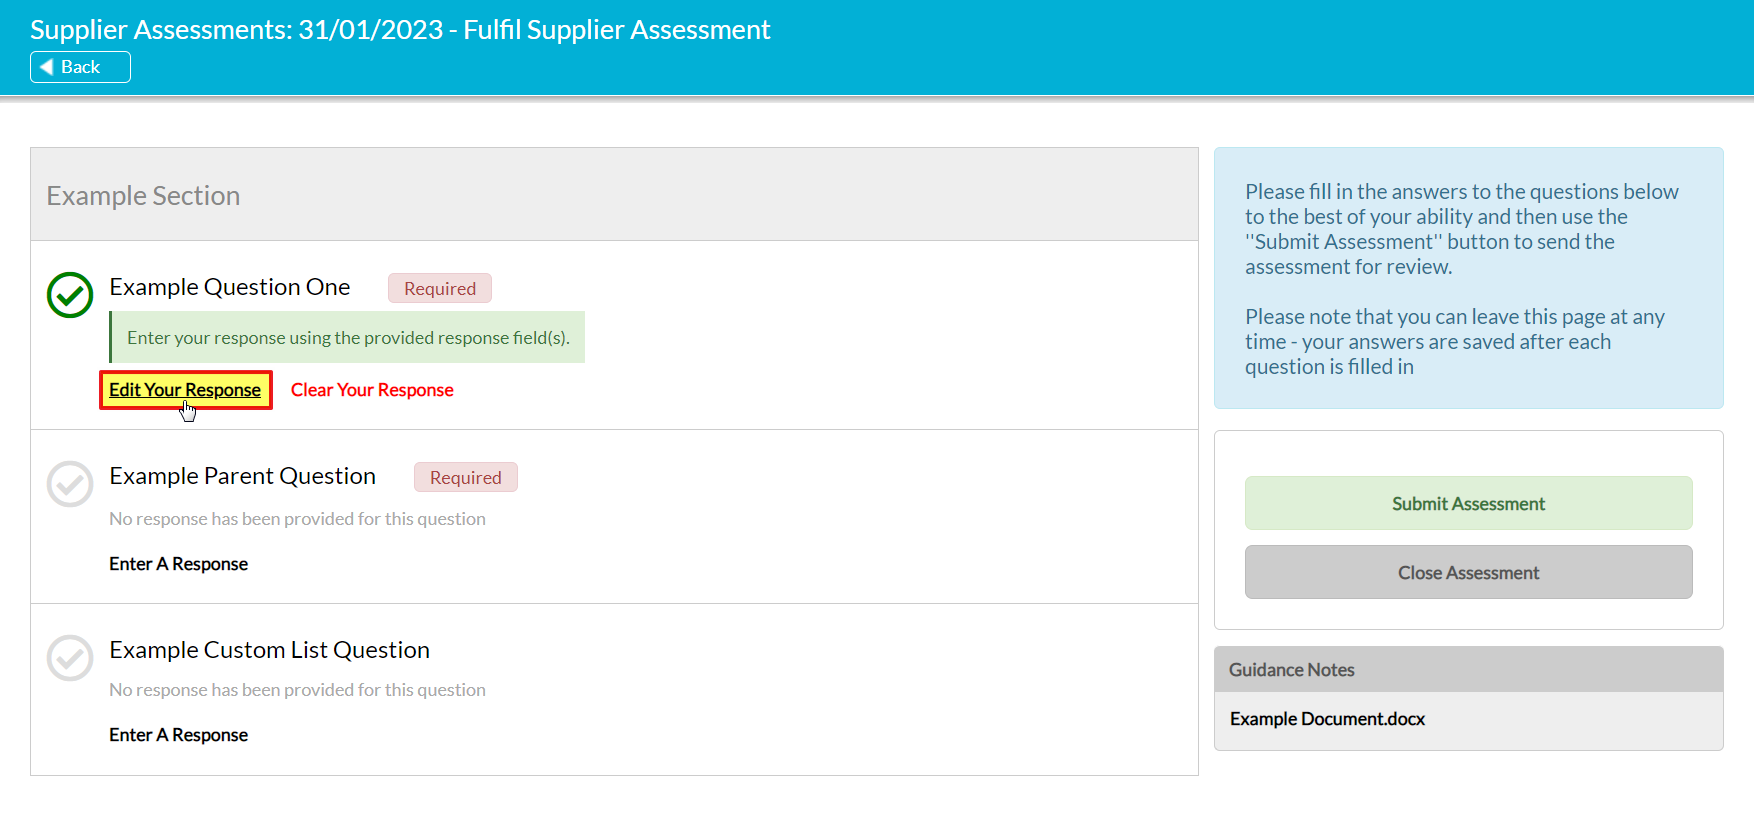
When you return to the main fulfilment form after saving responses, any question(s) that you answered will automatically be marked with a green tick. In addition, your responses will be displayed against each question within a green textbox, enabling you to quickly review your responses without re-opening each question in response view.
If you find that you need to modify any of your responses, you will be able to do so by clicking on the Edit Response link displayed directly beneath it. This will open the question in response view, with your data displayed so that you can make any necessary amendments.
Note that if you are editing a parent question of conditional sub-questions, editing your response may lead to the removal of those sub-questions. Should this occur, any data that was entered into those sub-questions will be lost.
In addition, if you decide that you are not happy with a response and want to remove it so that you can start over, you can do so by clicking on the Clear Your Response link directly beneath it.
Note that if the question is a parent question to conditional sub-questions, clicking on Clear Your Response will remove all data from both the parent and its sub questions. The sub-questions themselves will also be hidden from your questionnaire, as they are no longer relevant to your assessment.

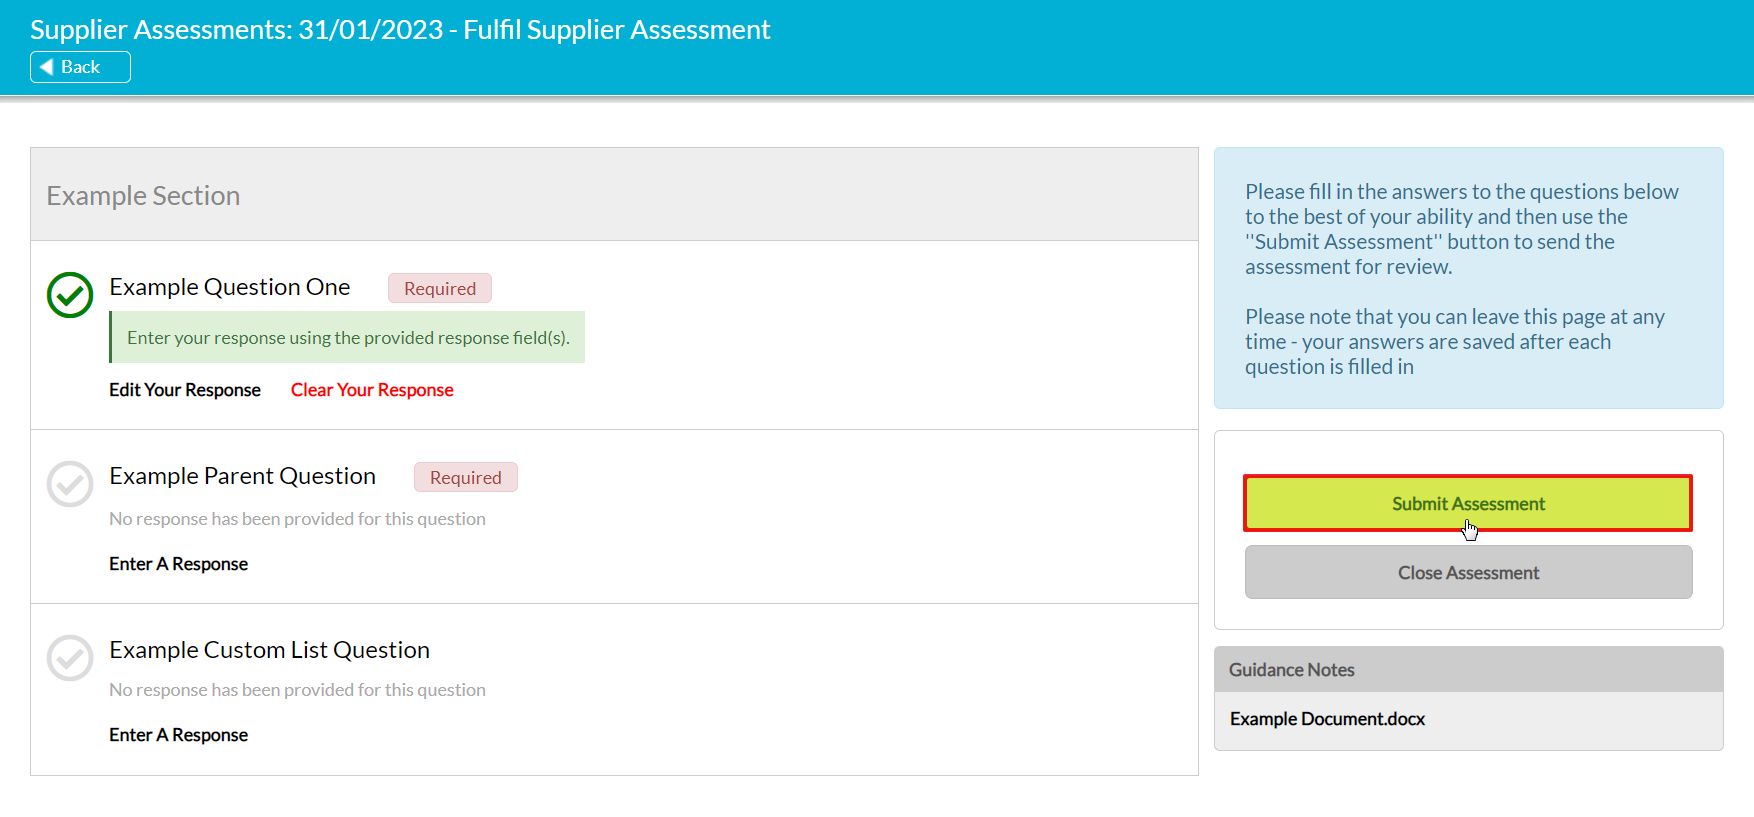
Once you have entered all of your responses, you will need to submit the Assessment to the requesting company so that they can review your data. To do so, locate the Action Buttons panel and click on the Submit Assessment button.
If there are any mandatory questions within the questionnaire that you have not yet completed, Activ will present you with a notice advising that you are not able to submit the Assessment. It will also automatically add a coloured bar to the left-hand side of the questionnaire, to visually indicate which questions you still need to complete. This will be:
- green if the question has been answered or is optional; and
- red if the question is mandatory and has not been answered.
If all necessary questions have been answered, then Activ will either:
- automatically record you are the fulfiller and take you back to the Assessment’s record within Activ, if you are a user who is logged into the system; or
- present you with a popup prompting you to enter your name, if you are a Supplier without a login or have logged out and used the ‘Copy Link’ function to test your Assessment.
In the later case, enter your name into the text field so that the requestor knows who they should contact with any further queries, and then click Submit Assessment.
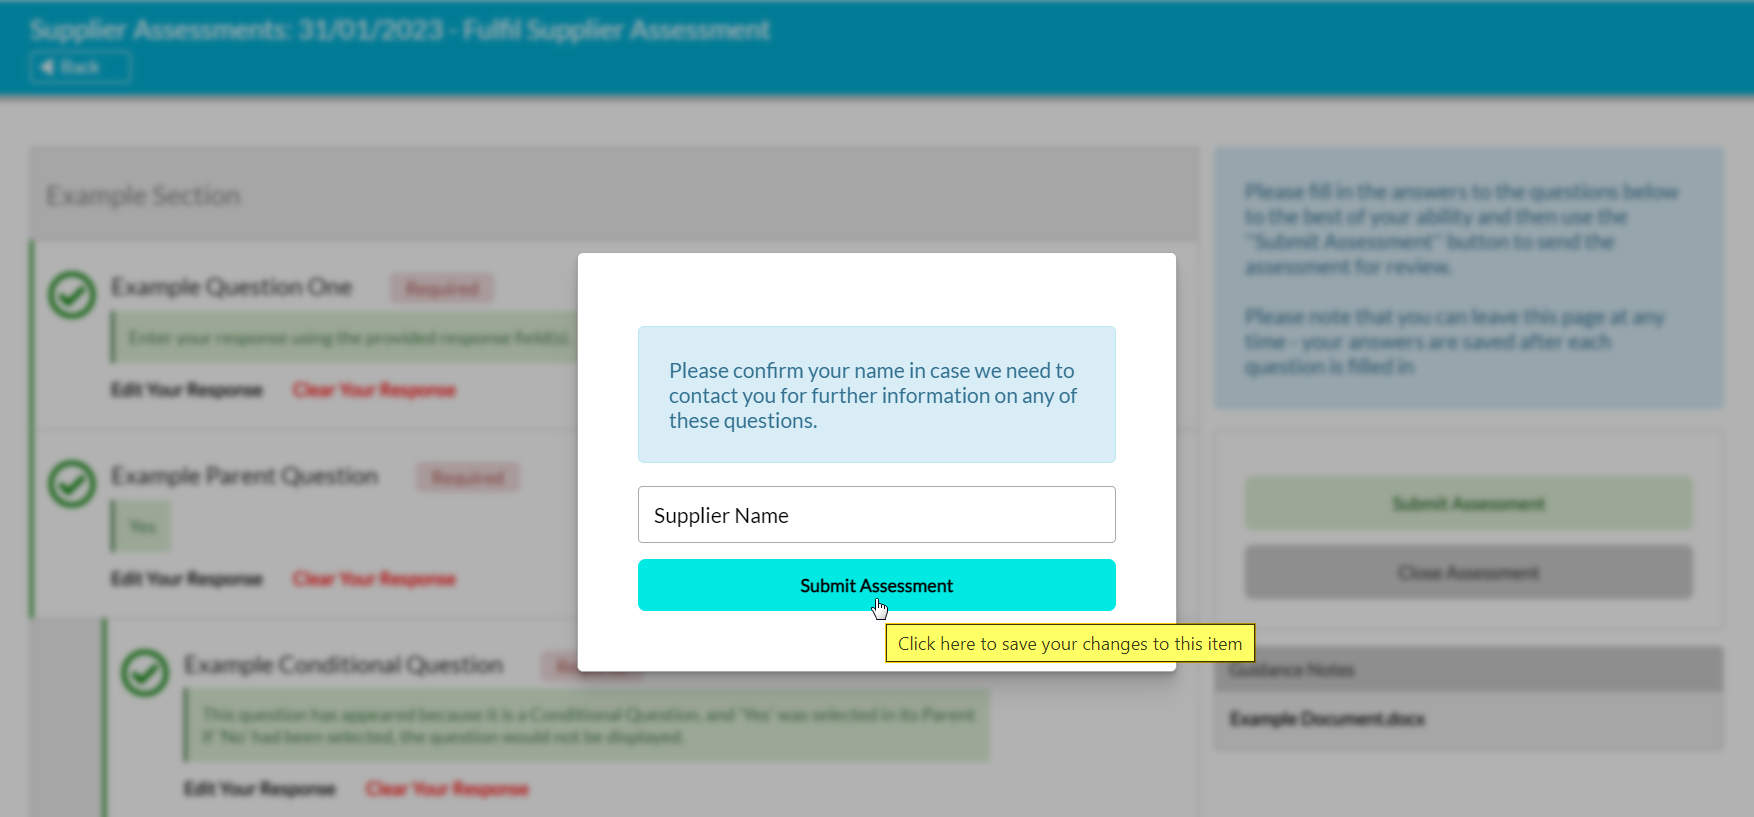
This will submit your answers to the requestor, and you will be taken to a new page confirming that your responses have successfully been submitted.
In addition, the Supplier Assessment itself will be marked as Fulfilled, and will be ready for review.
