For convenience, Resource bookings can be deleted from:
*****
Delete a Resource Booking from the Resource Booking Tab
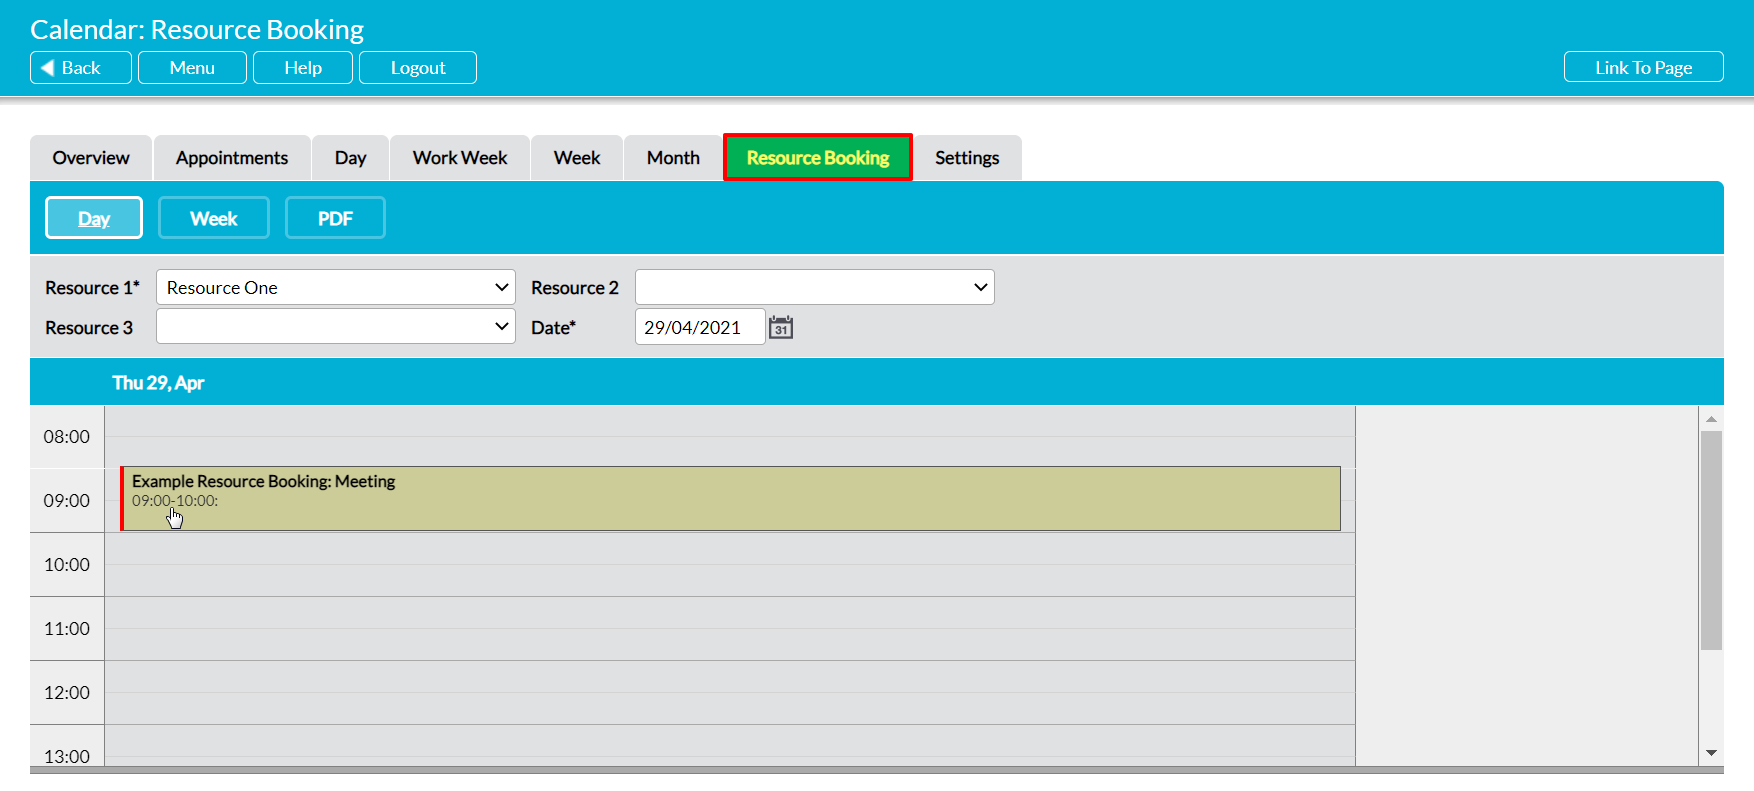
To delete a Resource booking from the main Resource Booking tab, open the Calendar module on its Resource Booking tab, and then navigate to the appropriate Resource and day/week. Note that all screenshots are taken from the Day view, but that the process and layout is similar across both pages.
Locate the booking that you wish to remove and click on its entry. A red bar highlight will appear to its left to confirm that it has been selected.
Use the delete key on your keyboard.
You will be prompted to confirm whether the booking should be deleted. Click on OK, and the booking will be removed from the Resource’s Calendar.
Note that this action cannot be undone. Once a Resource booking has been deleted, it will be permanently removed from your system. In addition, if you delete the Resource booking from this tab, then the associated Appointment will also be deleted from your system, removing if from the Calendars of all assigned participants. If you wish to remove a Resource from an Appointment but leave the Appointment itself in place, see below.
*****
Remove a Resource from an Appointment
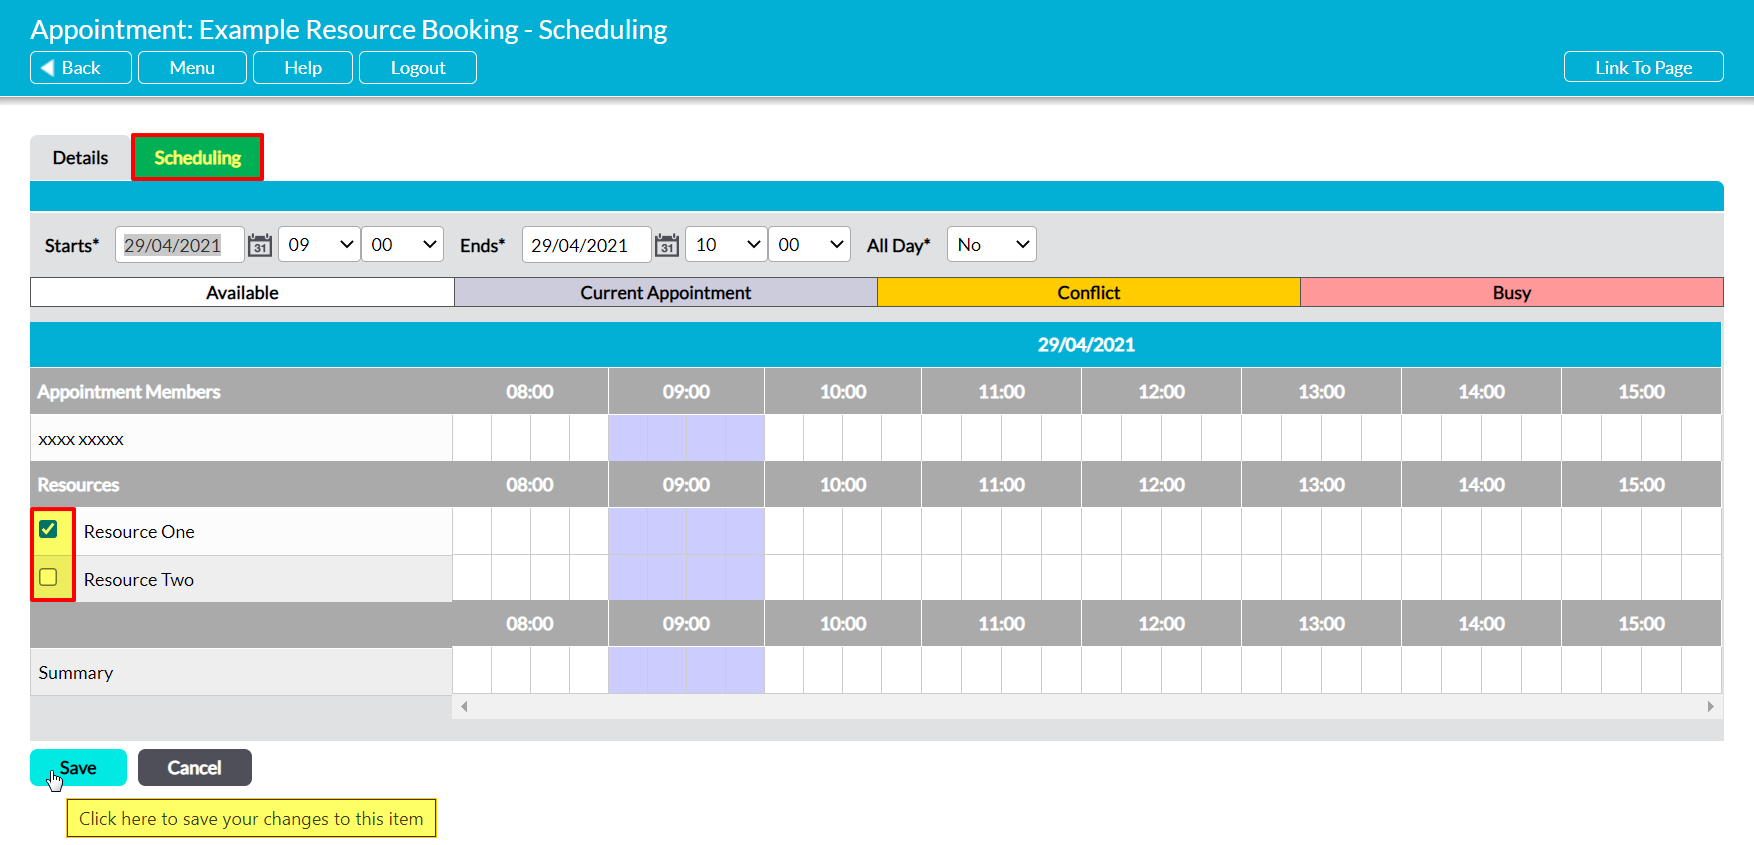
If an Appointment still needs to take place but the associated Resource(s) are no longer required, then you have the option to remove the Resource from the Appointment without deleting the Appointment itself. To do so, open the Appointment in editing view (see Edit an Appointment) and then click on its Scheduling tab. This will open a Calendar view allowing you to compare the schedules of all participants and associated Appointments. Locate the Resources section of the Calendar, and untick the appropriate Resource, then click Save.
You will be returned to the Appointment’s Details tab, and the Resource will have been removed from its information. In addition, if you removed all Resources from the Appointment, then the Booked Resources panel will be hidden from the form.


