There are three options for creating Tasks:
- create a one-off Task and assign it to one person.
- create identical one-off Tasks for multiple people in one batch.
- create a repeating Task according to a schedule and assign the associated Tasks to one person.
This article covers the creation and management of one-off Tasks. For guidance on creating a repeating Task schedule, see Create a Repeating Task Schedule.
If you have ‘Read Only’ permissions for the Tasks module, you can create Tasks for yourself only. However, users with higher system permissions for Tasks can also assign Tasks to other users. See System Permissions for guidance on permission levels and how to change them.
*****
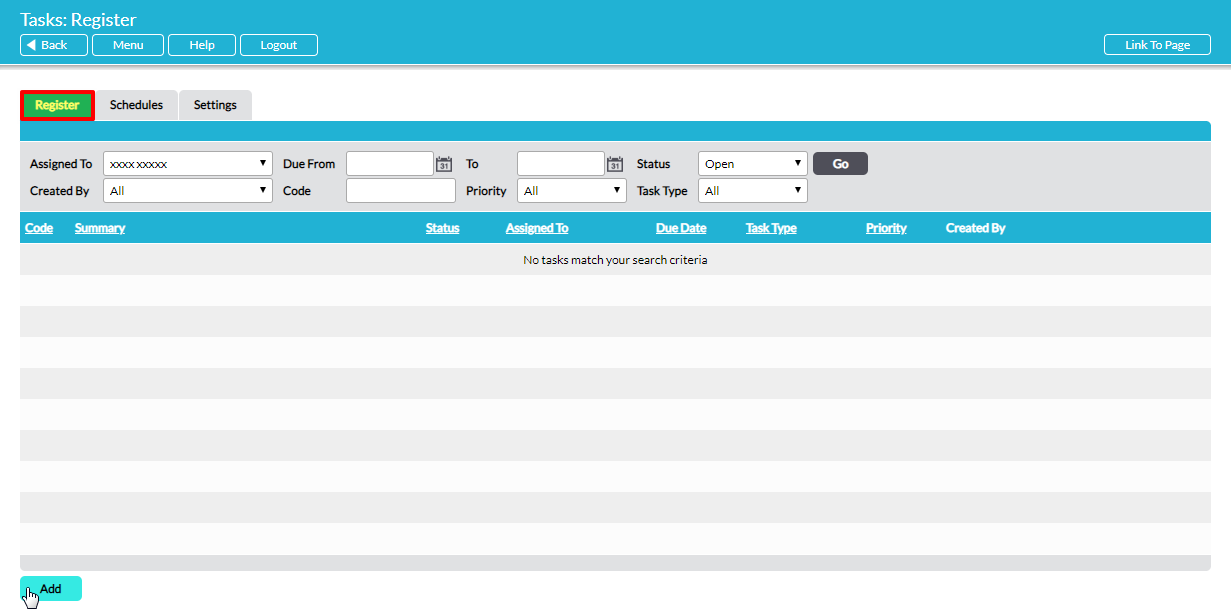
To create a Task, open the Tasks module and navigate to the Register tab. This houses a register of all Tasks that are currently within your system. By default, all open Tasks assigned to you are shown.
Click on the Add button.
This opens a blank Details form for you to populate. Code, Created By and Created Date are automatically filled and cannot be changed, but all other fields are available for editing.

A brief explanation of each of the fields follows. Fields marked with an asterisk* are required.
Code – automatically generated unique identifier for each new Task that is created. Codes are generated sequentially upon first save and cannot be changed.
Status – this shows the current status of the Task. When a Task is first created, it is automatically marked as ‘Open’ within this field. The status can be changed using the drop-down list when editing a Task.
Summary* – enter a descriptive summary of the Task.
Task Type* – this field defaults to ‘Unspecified’, and allows you to select an appropriate type (category) of Task using the drop-down menu. The categories available in the drop-down menu are configurable via the Settings tab of the Tasks module (See Configure Tasks Menus). You might, for example, create a specific Type for a specific project. You can also change the default Task Type, or specify that there is no default so that a user is forced to select an appropriate Task Type upon creating a Task.
Priority* – specify the degree of importance of the issue: typically high, medium or low. The categories available in the drop-down menu are configurable via the Settings tab of the Tasks module. You can change the default Task Priority, or specify that there is no default so that a user is forced to select an appropriate Task Priority upon creating a Task. See Configure Tasks Menus.
Site – available if Sites is enabled within the Tasks module’s Settings (see Enable/Disable the ‘Sites’ Field in Forms). Use the dropdown menu to select the site that the Task applies to, or leave blank if site doesn’t need to be specified.
Details – enter any further description of the Task or additional instructions, as required.
Assigned To* – click in this field to select a person responsible for completing the Task. If you want to create an identical Task for multiple people, simply select further names by clicking in the field as many times as necessary. Note that when you assign a Task to multiple people, you are creating individual (identical) Tasks for all of the users you select. While these Tasks are identical they are entirely independent of each other.
Due Date* – select the due date for the Task.
Created By – this field is automatically populated with the name of the user who created the Task and cannot be changed.
Created Date – this field is automatically populated with the date the Task was created and cannot be changed.
Completed/Cancelled By – (not present for ‘Open’ Tasks) this field is automatically populated with the name of the user who completed/cancelled the Task. Note that Cancelled By is not applicable to ISO Certification Tasks.
Completed/Cancelled Date – (not present for ‘Open’ Tasks) this field is automatically populated with the date the Task was completed/cancelled. Note that Cancelled Date is not applicable to ISO Certification Tasks.
The Links section provides you with the option to create links to relevant items (such as files and processes) elsewhere within Activ. These links are created by clicking on ‘Add Link’, navigating to the item’s location within Activ, and selecting the item by clicking the radio button next to it. Alternatively, you can link to items outside of Activ via hyperlink.

The Attached Files section provides you with the option to upload files from outside Activ and attach them to the Task. Click on ‘Add Attachment’ to navigate to the location the file.

Click on Save to finish creating the new Task (or Tasks, if multiple assignees were selected). You will be returned to the Register.
If you have assigned the Task to another user or users, they will be automatically alerted about the new Task, provided they have selected the relevant option in their My Details – Notifications settings (see Tasks Alerts and Reminders).
