Activ provides you with the option to log planned or historic Communications within your system, and to assign these Communications to yourself or to other users. This feature can be used to assist you with planning and monitoring Communications, and to maintain a detailed Communication Log. In addition, scheduling Communications within Activ enables you to include reminders of upcoming Communications in your daily Notifications (see Communications Alerts and Reminders).
Communications can be scheduled from two locations:
Planned and historic Communications are created in the same manner, and can be added from either of these locations. Once created, all Communications will be listed within the appropriate company and contact’s records, and within the appropriate tab in the Communications area. These tabs are:
- The Scheduled Communications tab, if the new Communication’s date is in the future.
- The Historic Communications tab, if the new Communication’s date is in the past.
In addition, any Communications that are scheduled for the future will be added to the Owner’s Activ Calendar and daily Notifications (see ).
Note that all Communications must be associated with an existing third-party company and a contact that is recorded against that company. If you want to record a Communication against a new company or contact you must first create the company and contact within the Customers & Suppliers: Companies and Customers & Suppliers: Contacts areas. (See Add a Company and Add a Contact).
*****
Via an Individual Company’s Record
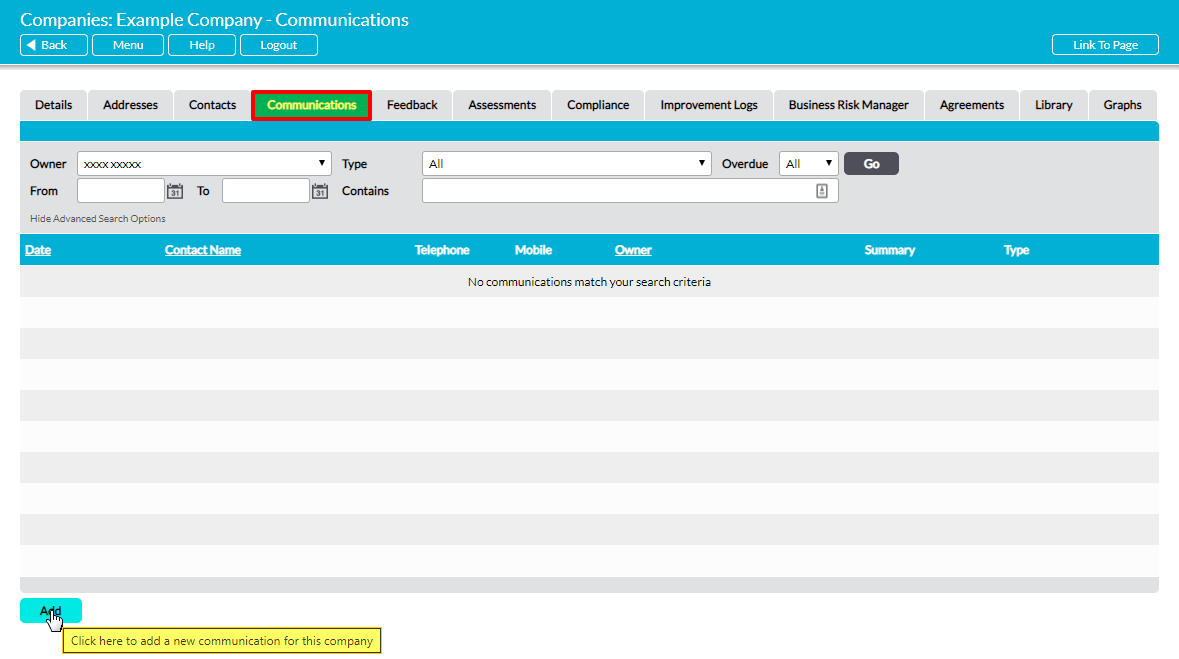
To add a Communication from a specific Company’s record, open the company’s record and click on its Communications tab (see View a Company for an explanation of how to open an individual Company’s record).
Click on the Add button.
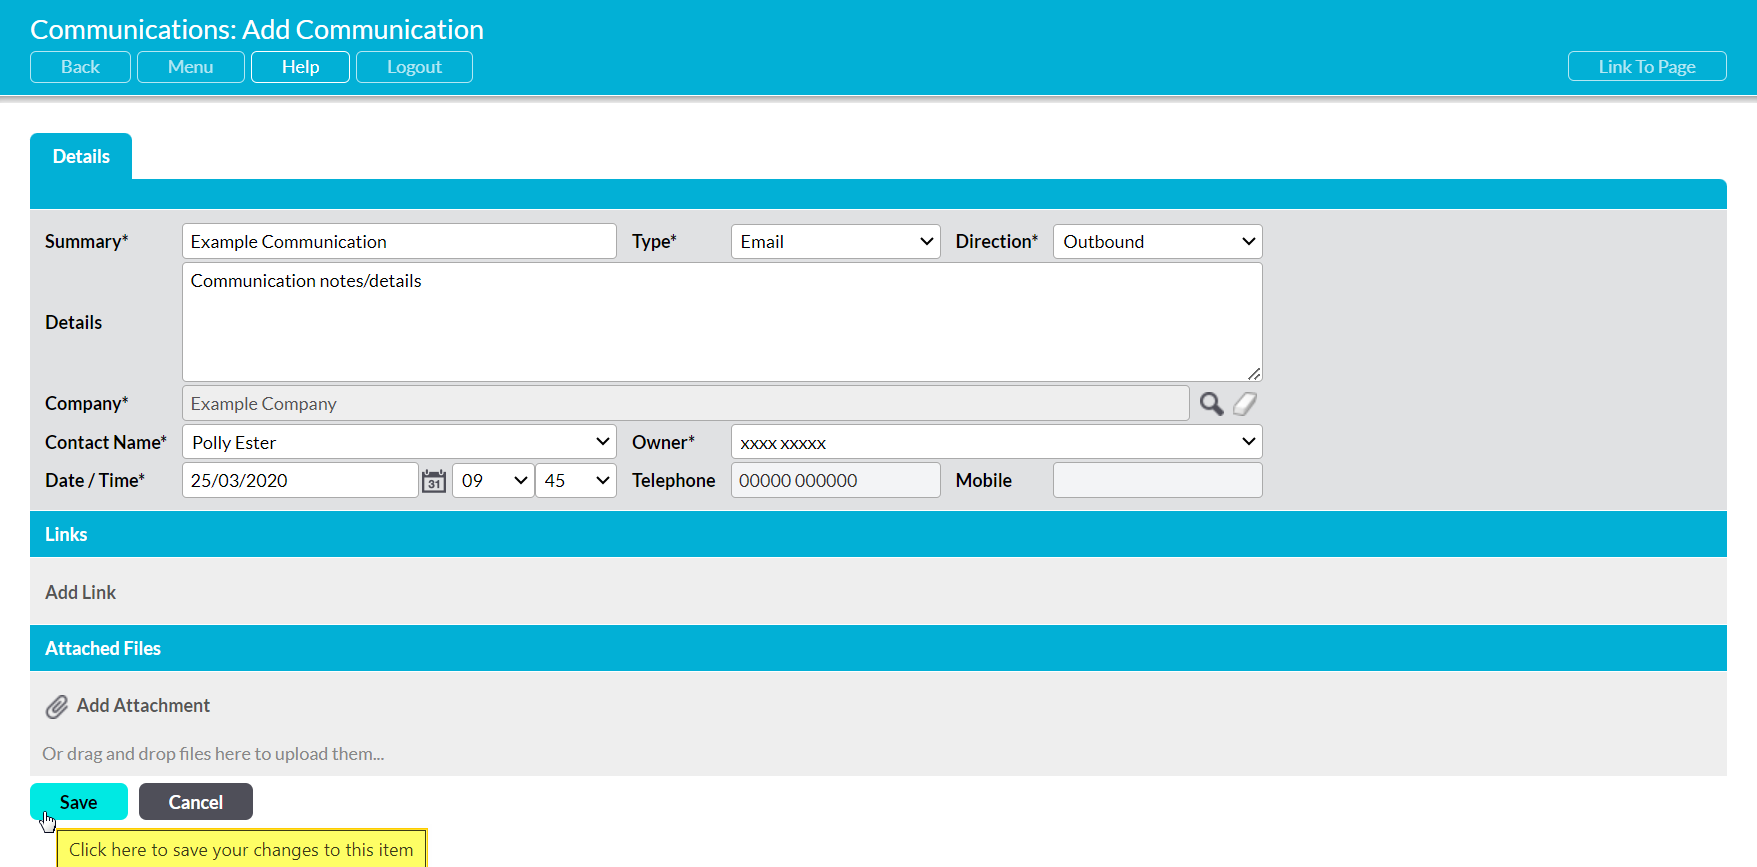
A blank Add Communication form will open. The Company*, Telephone and Mobile fields are automatically filled and cannot be edited, but all other fields are editable. These are:
Summary* –a descriptive summary of the Communication.
Type* – the type of Communication that is being logged. Five default options are available: email, letter, other, telephone, and telesales. See Configure Communication Menus for a guide on how to edit this parameter.
Direction* – whether the Communication is inbound or outbound. Use the dropdown menu to select the appropriate option.
Details – use this field to record any relevant notes or instructions for the Communication.
Contact Name* – the contact that the Communication is associated with. Use the dropdown menu to select the appropriate contact from the list. If a primary contact has been set for the company, then this contact will be automatically selected within the Contact Name* field. Otherwise, the field will default to the first contact that is within the dropdown menu. Note that you must associate the Communication with one of the company’s existing contacts. If you need to associate it to a different contact, you will first need to add that contact to the company’s record (see Add a Contact).
Owner* – the user who ‘owns’ (i.e: is responsible for) the Communication. This field defaults to you, but you can assign the Communication to another user using the dropdown menu.
Date/Time* – the date and time at which the Communication occurred or is scheduled to occur. Select the calendar icon to enter the appropriate date, and use the dropdown menus to the icon’s left to assign the appropriate time.
Links – click on ‘Add Link’ within this panel to open a new popup window that will allow you to link to other Activ pages or records you have stored in other modules, or to add a link to an external website.
Attachments – click on ‘Add Attachment’ within this panel to open your file explorer and upload a new file as an attachment.
Click on Save once you have finished entering the necessary details.

You will be returned to the company’s Communications tab, and the new Communication will now be visible within the list.
*****
Via the Communications Area
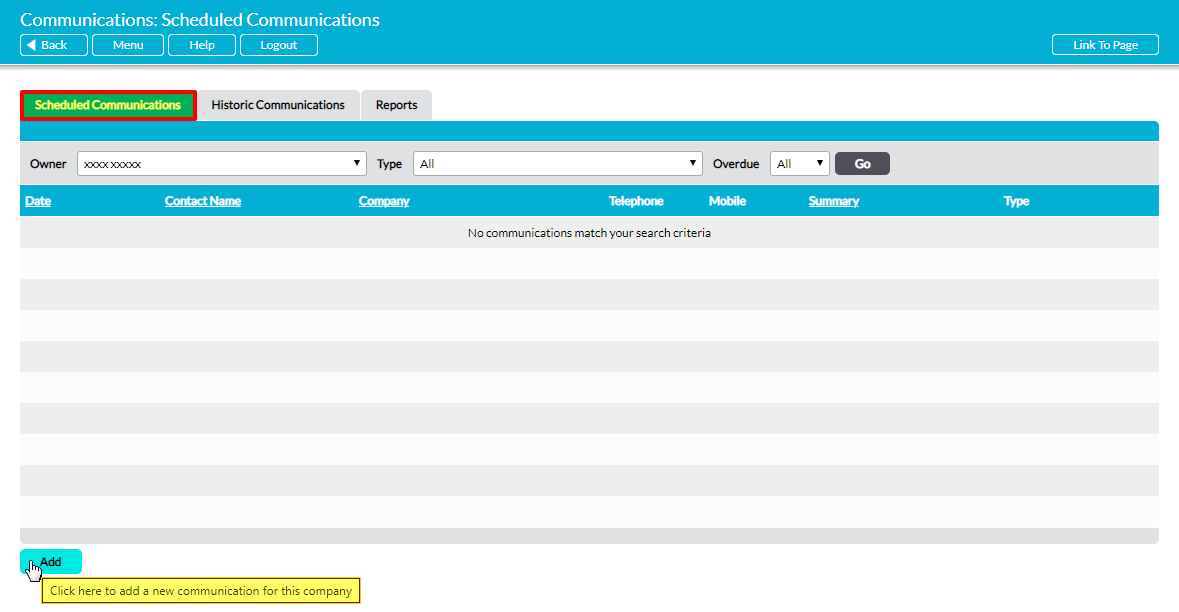
To add a Communication from the Communications area, open the Customers & Suppliers: Communications area and click on either the Scheduled Communications or Historic Communications tab. This will open a register of all planned or historic Communications that are recorded within your system.
Click on the Add button.
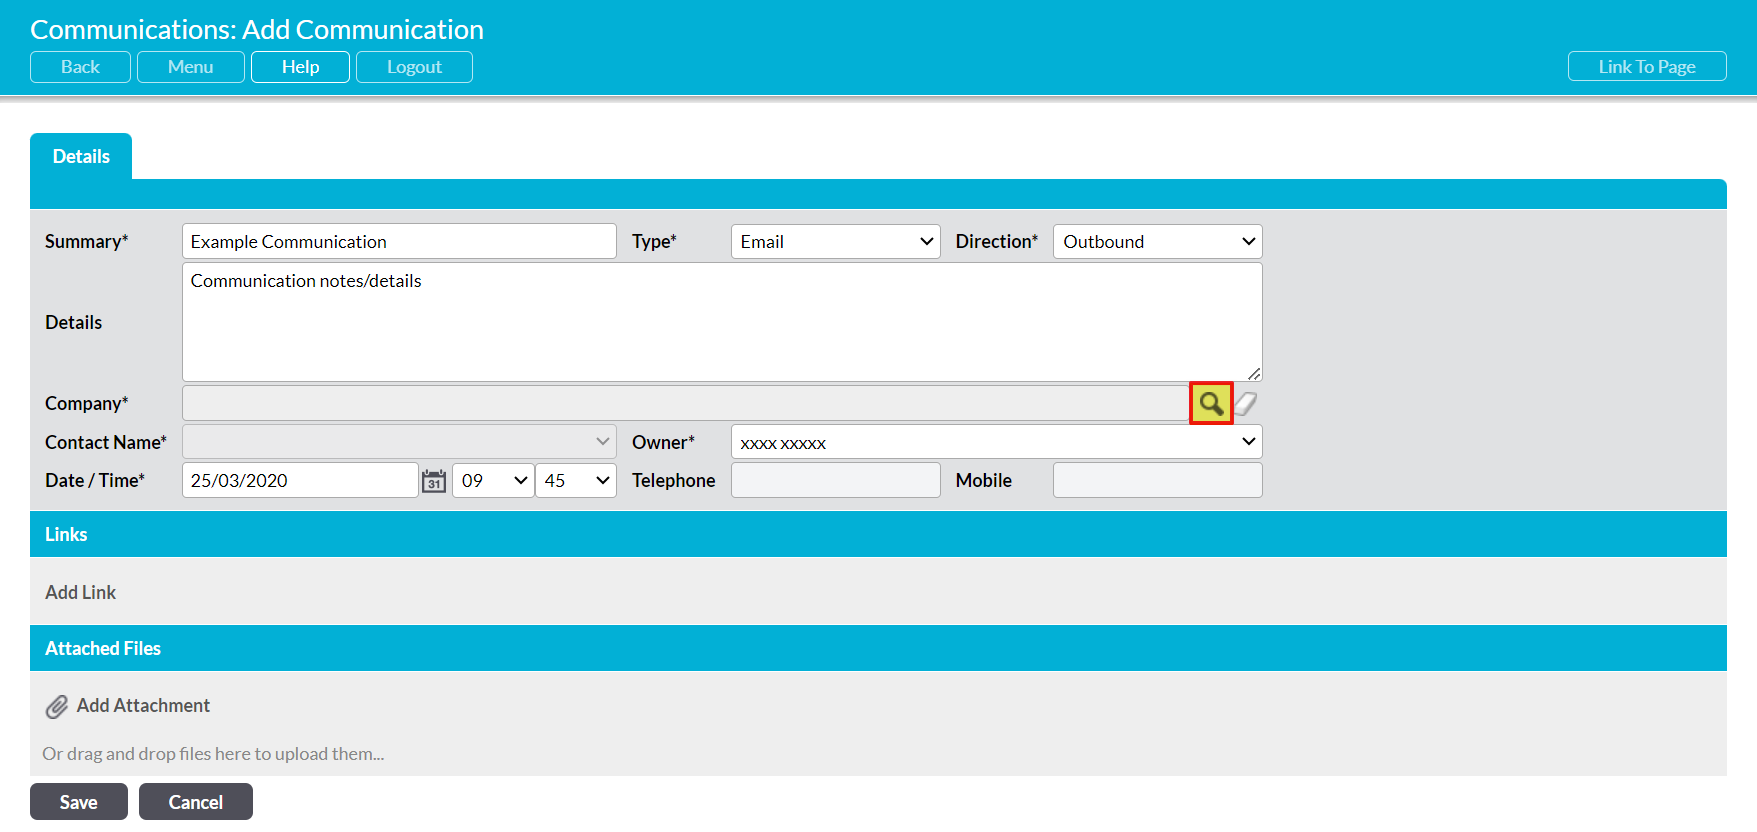
A blank Add Communication form will open. All Communications must be assigned to one of the third-party companies that are recorded in your Customers & Suppliers: Companies area. To select the appropriate company, click on the magnifying glass to the right of the Company* field.
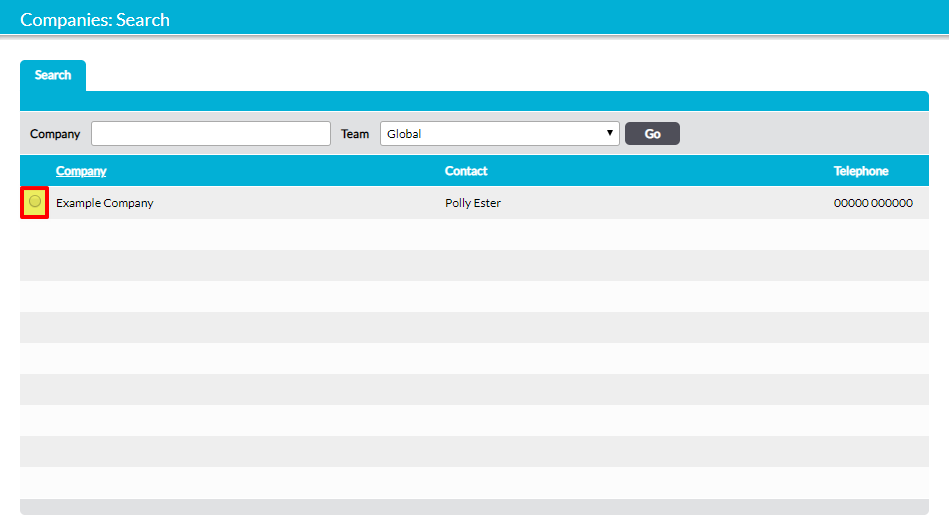
A new window listing the available companies will open. Use the radio buttons to select the appropriate company from the list.
The Telephone and Mobile fields will be automatically filled and cannot be changed, but all other fields are editable. These are:
Summary* –a descriptive summary of the Communication.
Type* – the type of Communication that is being logged. Five default options are available: email, letter, other, telephone, and telesales. See Configure Communication Menus for a guide on how to edit this parameter.
Direction* – whether the Communication is inbound or outbound. Use the dropdown menu to select the appropriate option.
Details – use this field to record any relevant notes or instructions for the Communication.
Contact Name* – the contact that the Communication is associated with. Use the dropdown menu to select the appropriate contact from the list. If a primary contact has been set for the company, then this contact will be automatically selected within the Contact Name* field. Otherwise, the field will default to the first contact that is within the dropdown menu. Note that you must associate the Communication with one of the company’s existing contacts. If you need to associate it to a different contact, you will first need to add that contact to the company’s record (see Add a Contact).
Owner* – the user who ‘owns’ (i.e: is responsible for) the Communication. This field defaults to you, but you can assign the Communication to another user using the dropdown menu.
Date/Time* – the date and time at which the Communication occurred or is scheduled to occur. Select the calendar icon to enter the appropriate date, and use the dropdown menus to the icon’s left to assign the appropriate time.
Links – click on ‘Add Link’ within this panel to open a new popup window that will allow you to link to other Activ pages or records you have stored in other modules, or to add a link to an external website.
Attachments – click on ‘Add Attachment’ within this panel to open your file explorer and upload a new file as an attachment.
Click on Save once you have finished entering the necessary details.
You will be returned to the tab you started on, and the new Communication will now be visible within the appropriate register.
