Some parameters used within the Asset Manager module are selected from pre-defined lists, which are created and managed using a combination of the module’s Settings tab and dedicated pages within other elements of the module (e.g. the Engineers page within Assets and the Stock Locations page within Stock Control). Due to the nature of asset management, these settings do not contain any pre-configured options, but must instead be configured by your company before you begin using the module. It is important to note that some of these settings are used across multiple elements of the Asset Manager module, and that the module cannot be used until they have been correctly configured.
The settings associated with the Asset Manager module can be grouped into three broad categories:
- Those used when managing Assets
- Those used when managing Stock
- Those used when managing Jobs
This article covers the settings that are relevant to Stock Control. In order to manage your Stock, your users must specify:
- the Site that the Stock belongs to
- the Location within which the Stock is kept
- the Stock Category to which the Stock belongs.
These settings are located on three pages:
- the Settings tab
- the Sites page within the Assets tab
- the Stock Locations page within the Stock Control
In addition to these settings, seven further areas are available. These are:
- Area (Asset Management)
- Asset Type (Asset Management)
- Engineer (Job Management)
- Skills (Job Management)
- Permits (Job Management)
- Schedule Priority (Job Management)
- Schedule Category (Job Management)
See the relevant user guide (identified in brackets above) for instructions on how to configure these additional setting areas.
*****
Configure Stock Categories
Stock Categories are the categories (or types) of Stock that your organisation maintains (e.g. spare software licences or construction parts), typically with the intention of using it in Maintenance Jobs or recording it as an Asset component. It is a required field when adding new Stock to your organisation’s Stock Catalogue.
To add a new Stock Category, click on the Settings tab, and then the Stock Categories option in the left-hand menu. Enter the new Stock Category’s name in the Display As* field at the top of the page, and select it’s Order (position in the list), whether the Category is to be Disabled?* (not available for selection by users), and whether it is to be the Default?* value (selected by default when new Stock is added), then click Add.
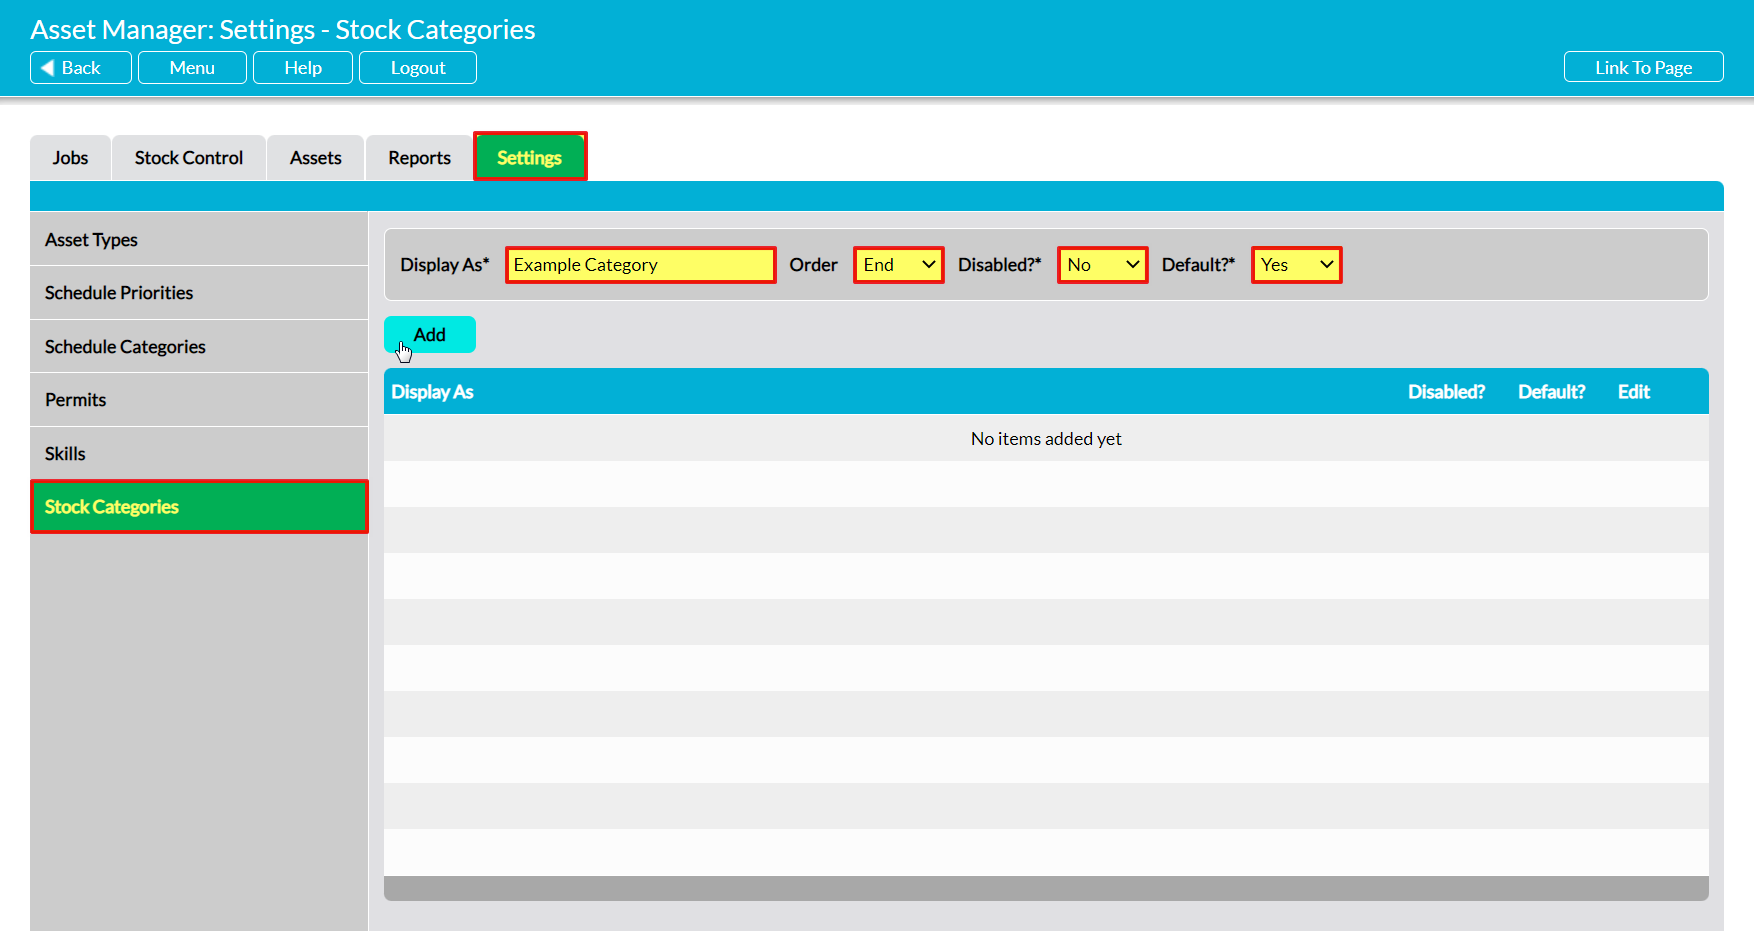
The new Stock Category will now be displayed in the list, in the position that you selected.
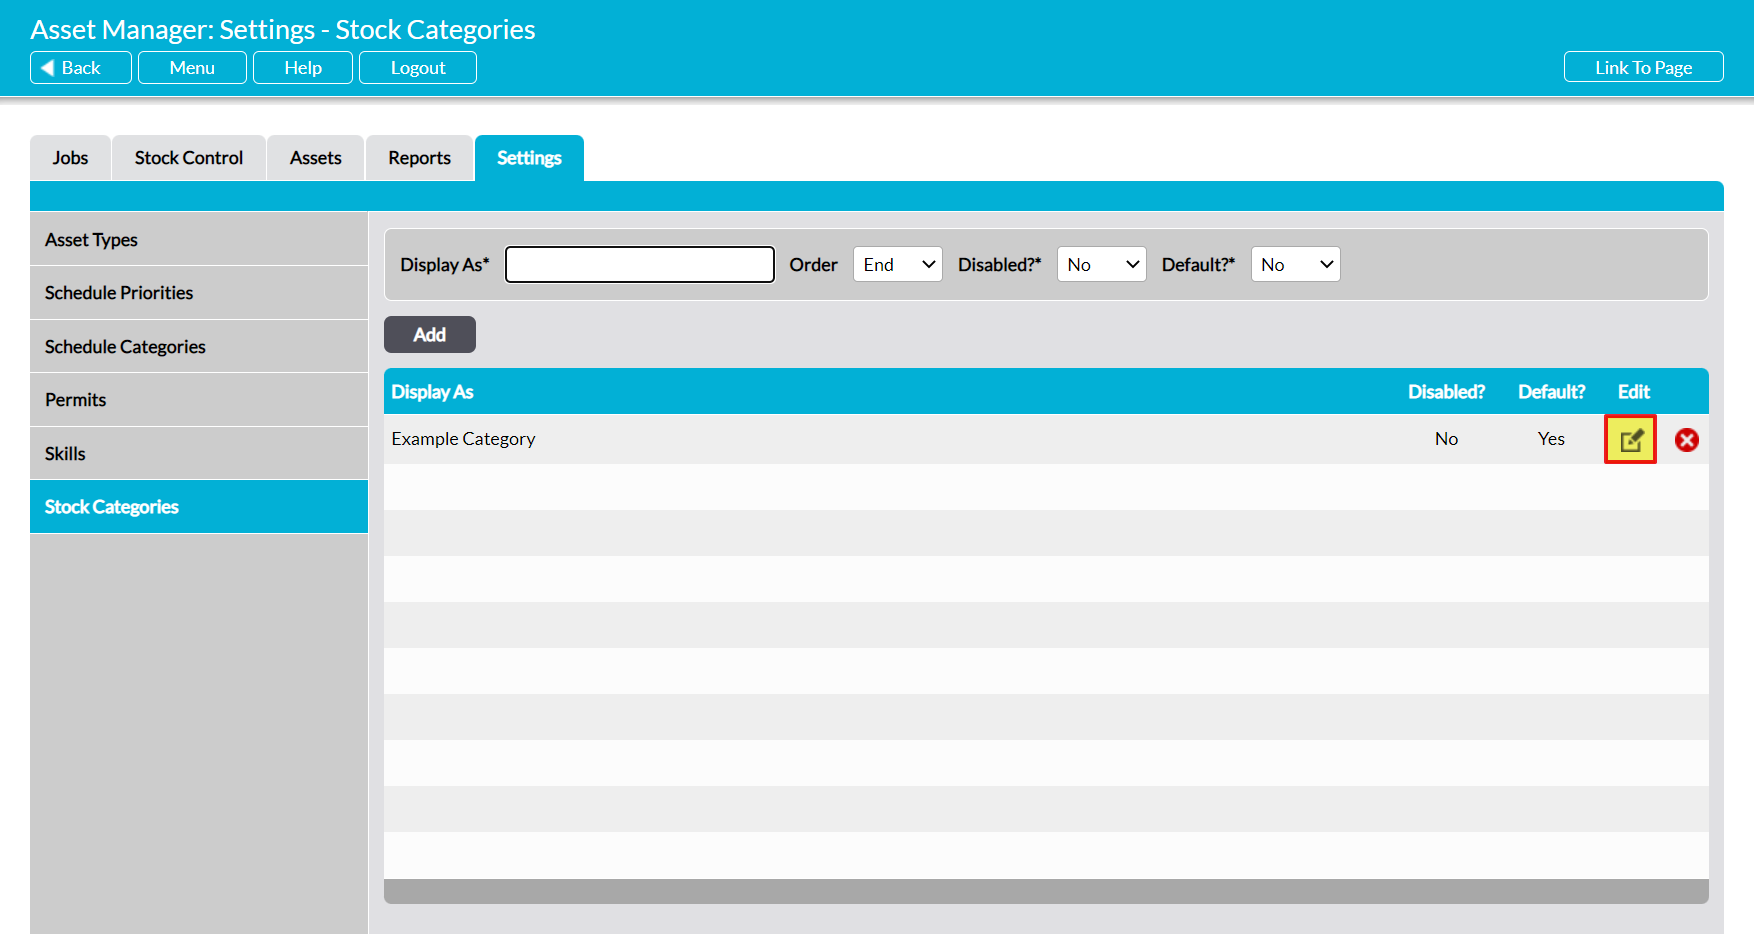
To edit a Stock Category, locate its record within the list and click on the pencil icon.
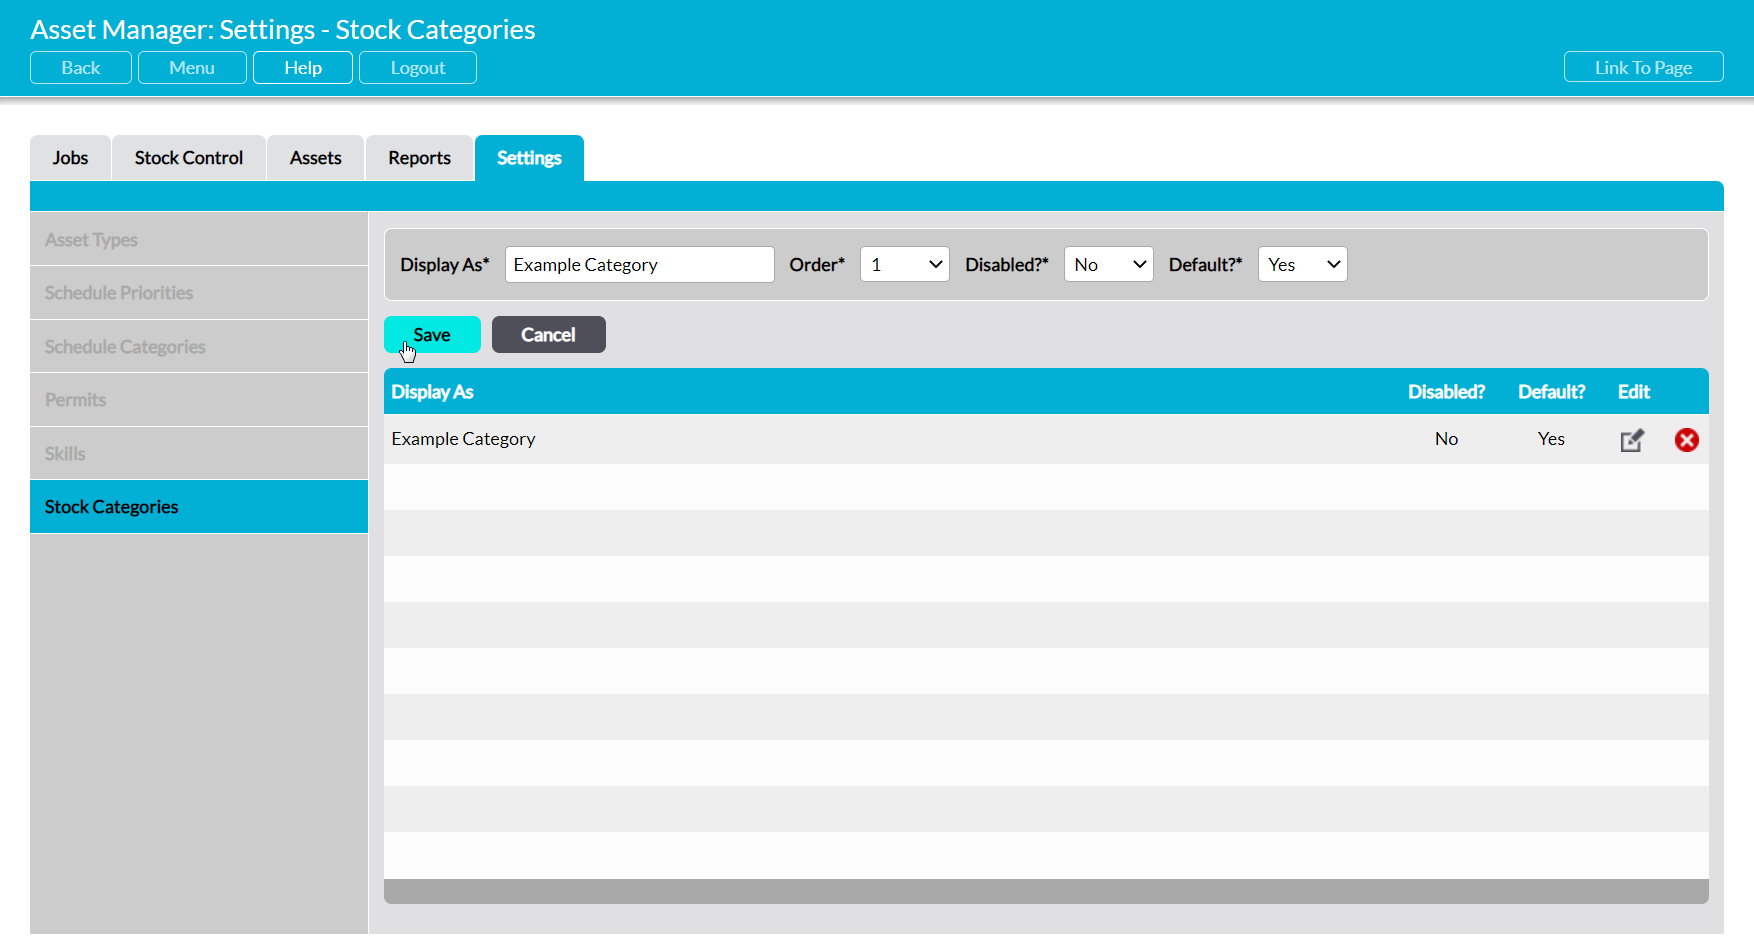
Make the necessary changes to the fields at the top of the page, and then click Save.
To delete a Stock Category from the list, locate its record and click on the red cross icon.
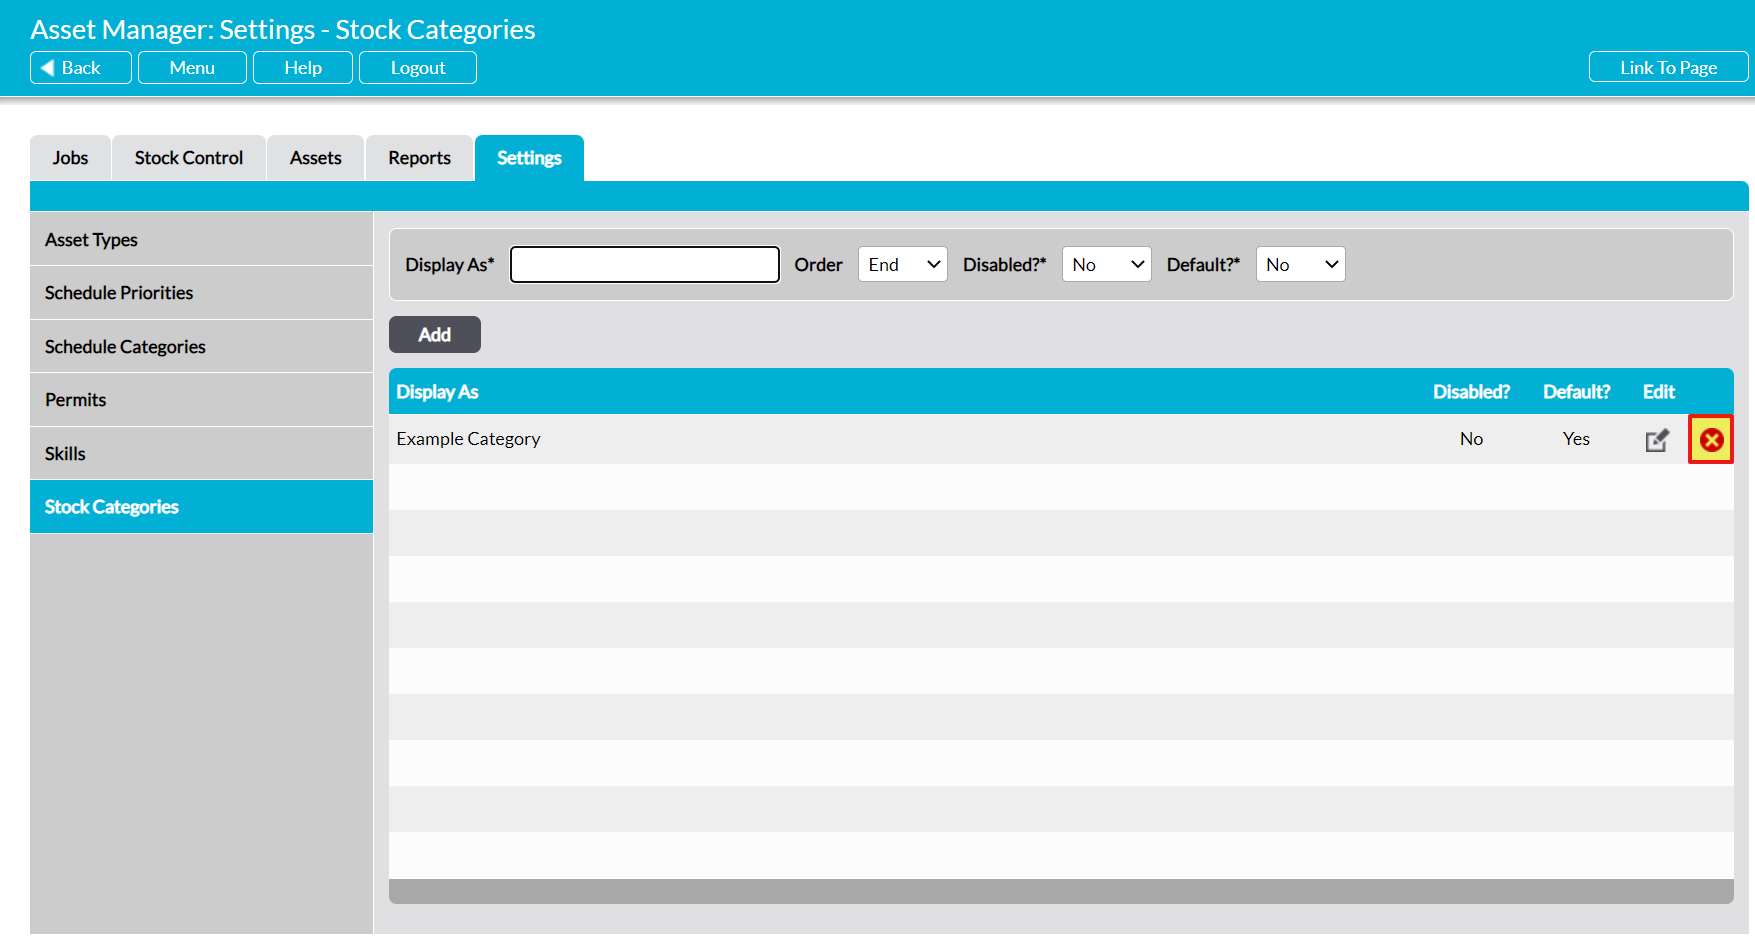
If the option hasn’t been used within your system, then it will be cleared from the list. However, you will not be able to delete a Category that has previously been used in your system. Instead, you will need to Disable the option to remove it from dropdown lists and prevent its future selection.
