Many of the modules within Activ provide you with the option to assign your records to a specific Site, allowing you to organise your information by the site that it is most relevant to. When used effectively, this can become a powerful filtering and reporting tool that can help to give you oversight of what is happening at each site – particularly if the setting is used within modules such as the Incident Log and Improvement Log.
The Site setting can be configured from within any module that makes use of the field, but, uniquely amongst Activ’s settings, also takes the form of a single centralised list of options. This means that (with the exception of the Asset Manager, which uses a separate set of Sites), modifying your Sites within any one module will modify them for all other modules throughout your system. This ensures that all modules (excluding the Asset Manager) will always be using the same set of sites, and that you can make any necessary modifications in a single place instead of having to duplicate those changes within every relevant module.
The following article explains how to:
and uses the Tasks module for all screenshots. However, the process will be the same regardless of which module you are configuring your Sites from, with exception of the Asset Manager module, which uses a separate pool of Sites (see Manage the Asset Manager’s Sites for guidance).
*****
Enable Sites Within a Module
To provide you with greater flexibility to customise your records to your own organisation’s needs, Activ allows you to enable (or disable) the Sites setting on a module-by-module basis. This means that you can choose to have it enabled for some modules, whilst keeping it disabled for others, or alternatively have the field enabled or disabled for all modules.
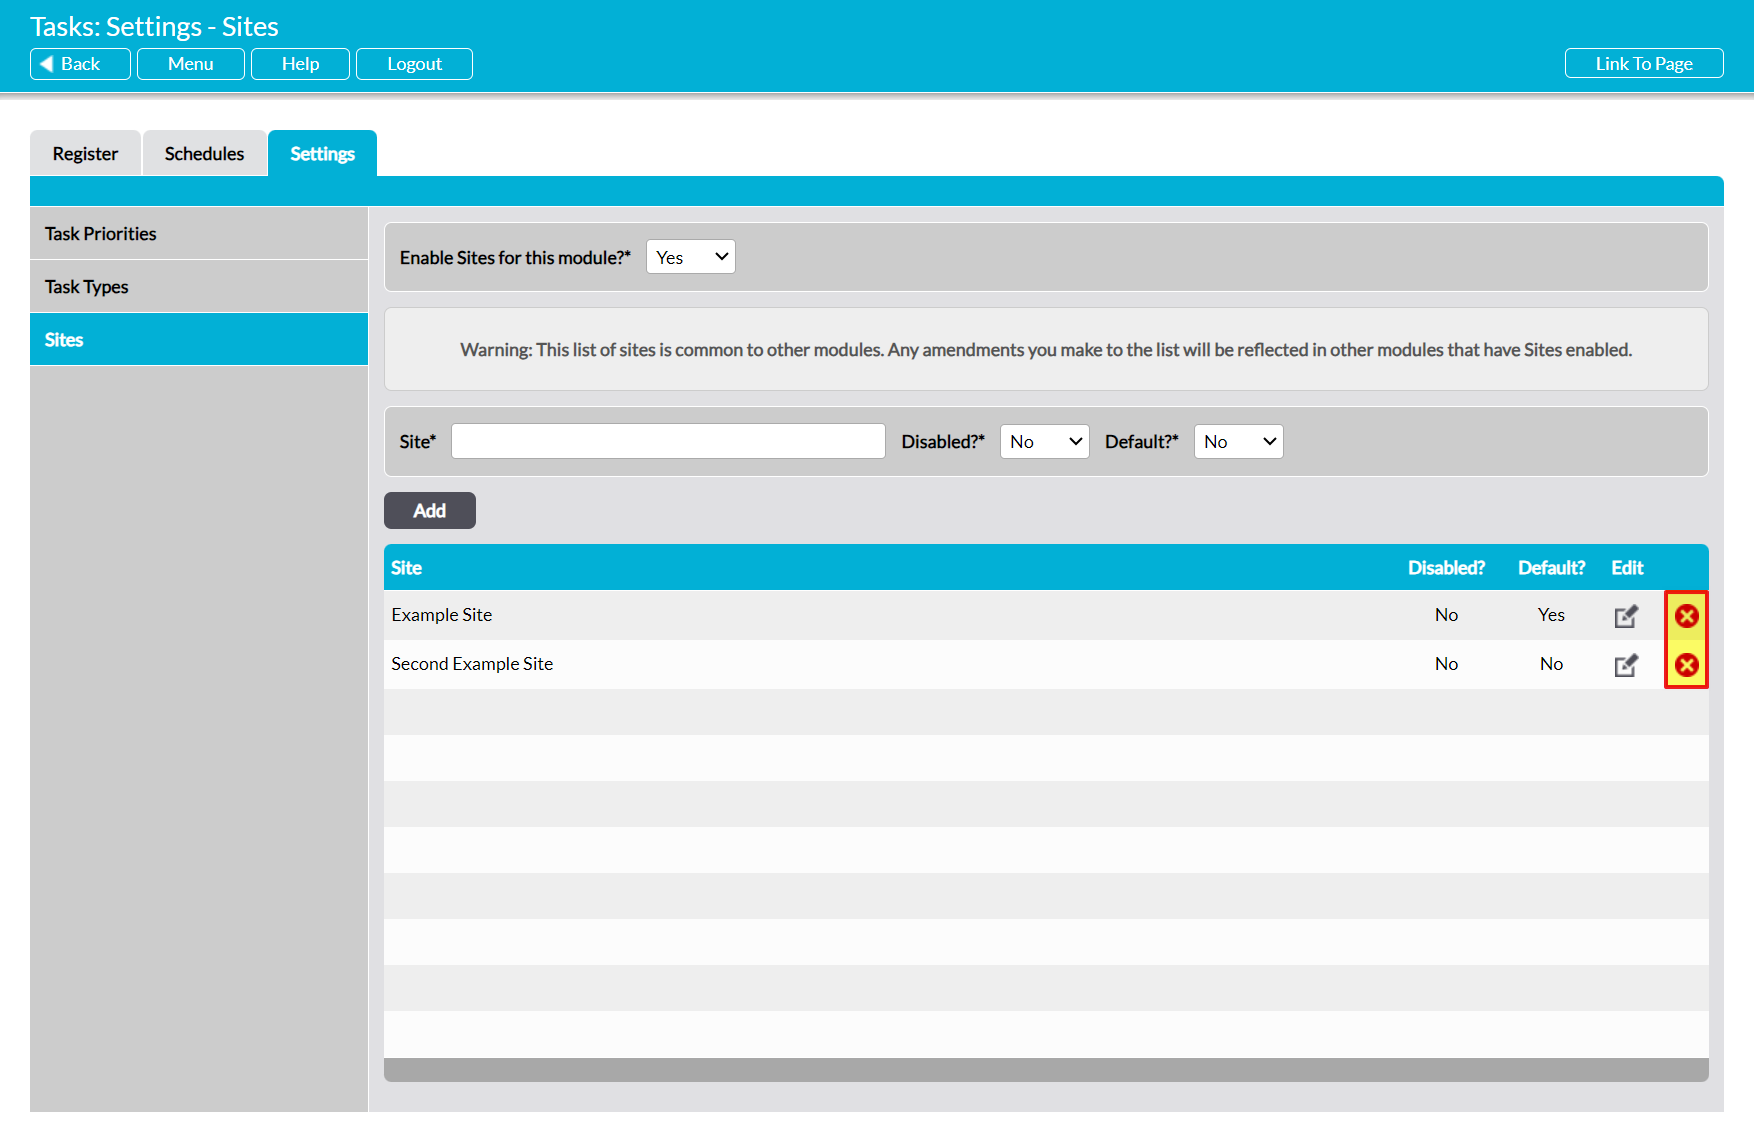
To enable or disable the Sites setting (and its corresponding field) within a module, open the appropriate module on its Settings tab, and then click on the Sites menu item. This will open the Sites setting. Locate the Enable Sites for this Module field at the top of the page, and either:
- use the dropdown to select ‘Yes’, if you want to enable Sites for this module; or
- use the dropdown to select ‘No’, if you want to disable it.
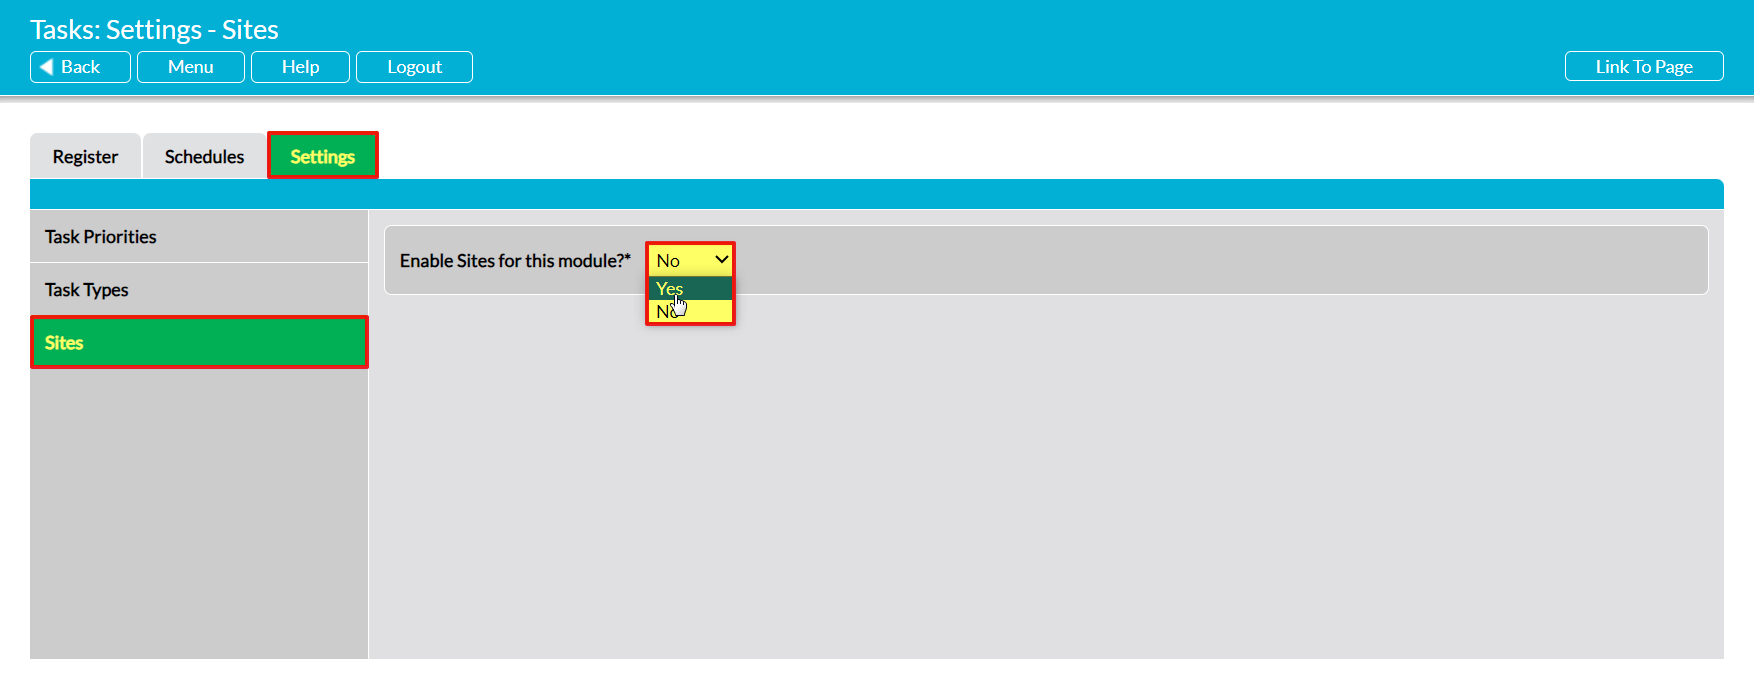
Note that by default, Sites will be disabled for most modules and all other associated fields for the setting will be hidden from the page. However, if Sites is enabled then additional fields will appear to enable you to configure your list of sites (see below).
Also note that, in the case of the Asset Manager and Audit Manager, Sites is a mandatory field and therefore cannot be disabled for those modules.
*****
Configure your System’s Sites
When configuring your system’s Sites, it is important to remember that you are working on a global setting: that is, one that is common to all modules (with exception of the Asset Manager) that are in your system and that include the Site field. Because of this, caution should be taken when you are working on this setting, and you should never modify, delete, or disable a Site without first determining whether it might still be needed for other parts of the system. Changing a Site in one module will automatically change it for all other modules (except the Asset Manager) that include the Site field. Similarly, adding a Site to one module will add it to all other modules (except the Asset Manager). It is also important to be aware that Sites must be enabled (see above) for the specific module you are working in before you can make any modifications to the setting.
If you need to add a new Site to the module you are working on (and the other modules in your system), open the appropriate module on its Settings tab, and then click on the Sites menu item. This will open the Sites setting. Enter an appropriate name for the Site within the Site field at the top of the page, then use the dropdown menus to specify whether the option is to be Disabled?* (unavailable for selection) and whether it is to be the Default?* (selected by default when new records are added). Click on Add once all fields have been completed.
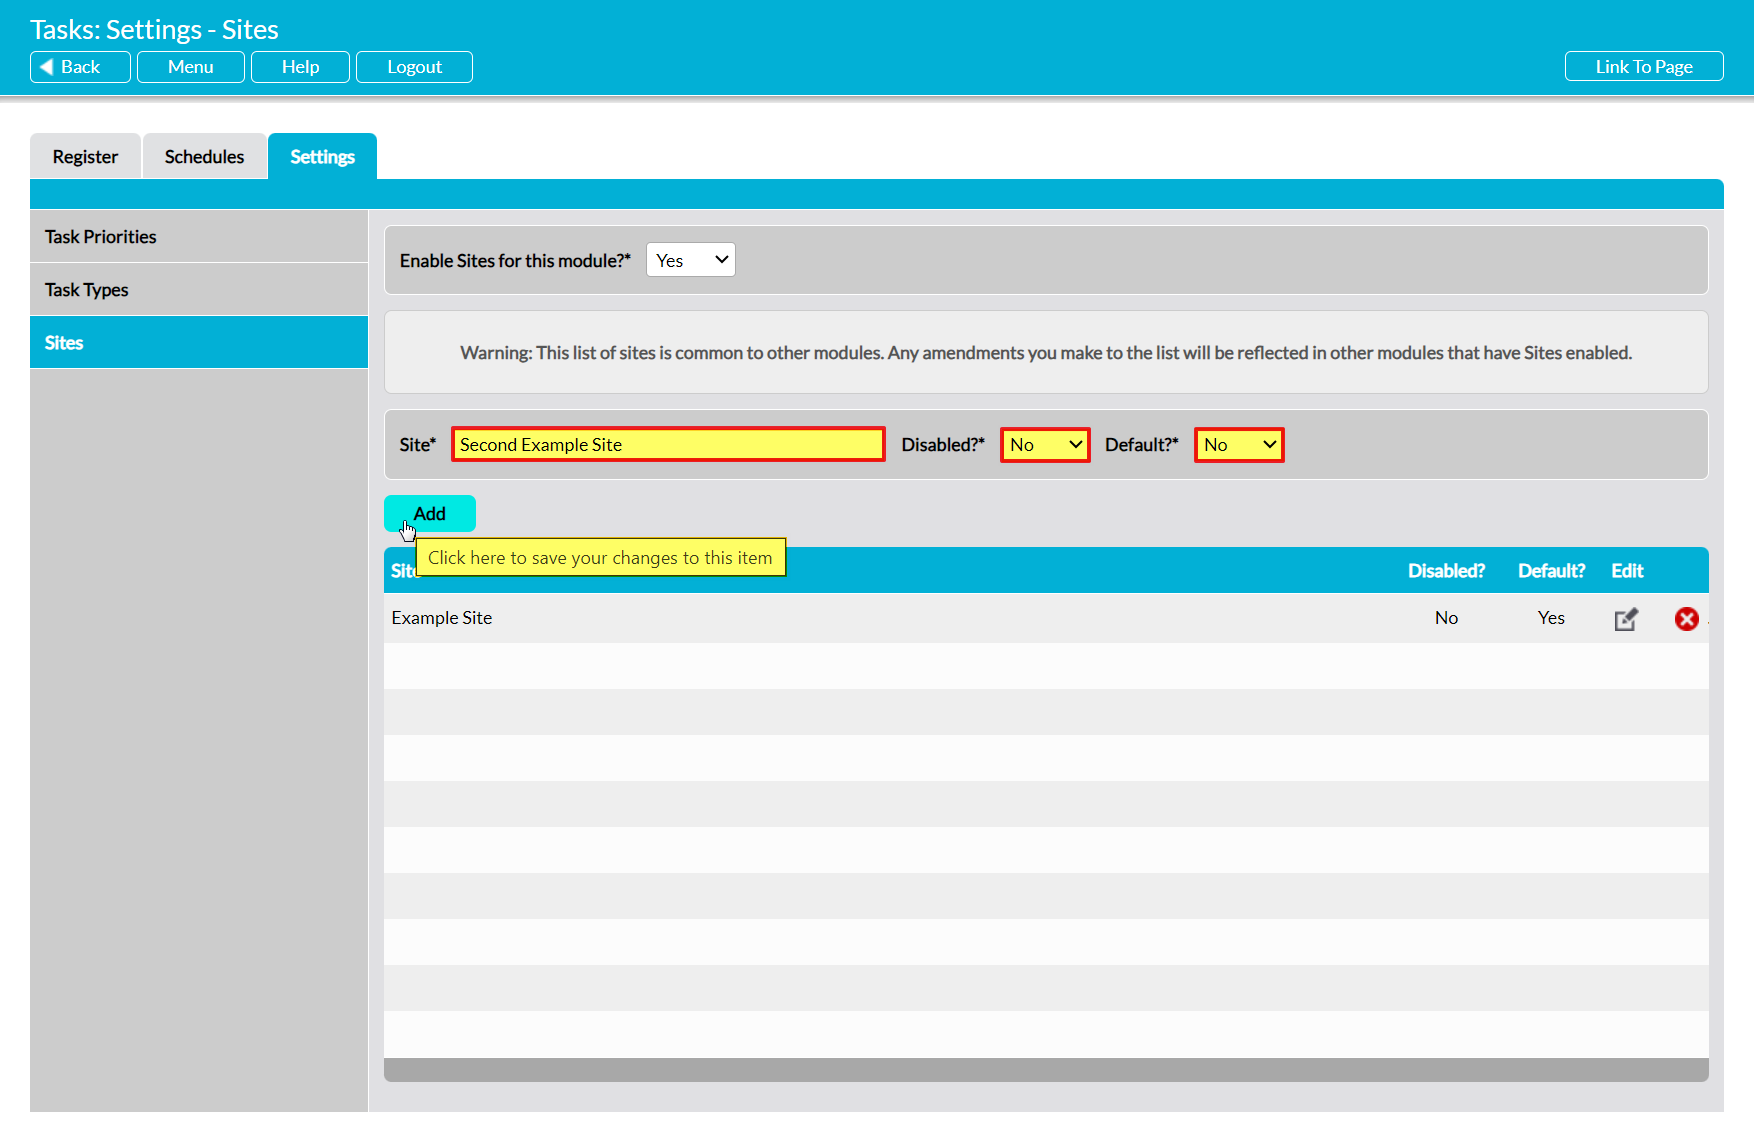
The new Site will be added to the register displayed in the bottom half of the screen, and will now be selectable throughout all other Site-enabled modules within your System (if the Site is not disabled). Note that Sites are displayed alphabetically.
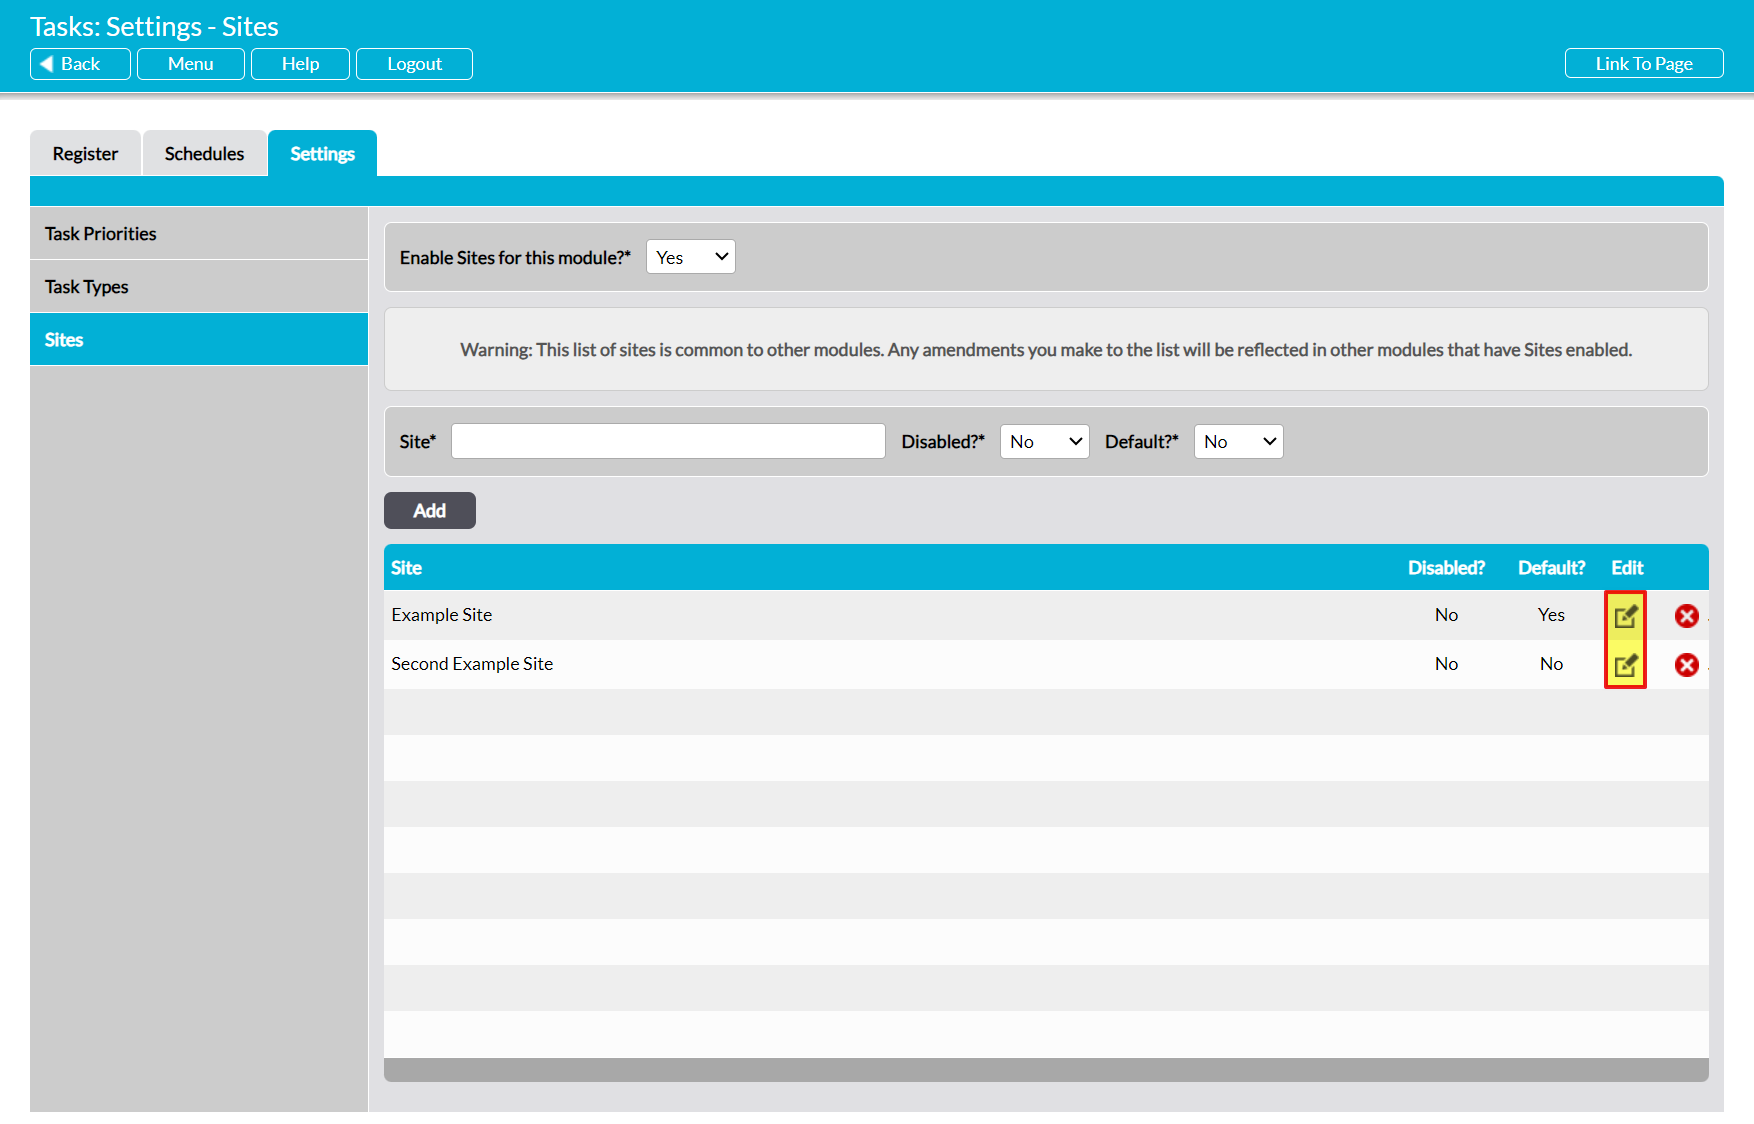
To edit a Site, locate its record within the list and click on the pencil icon.
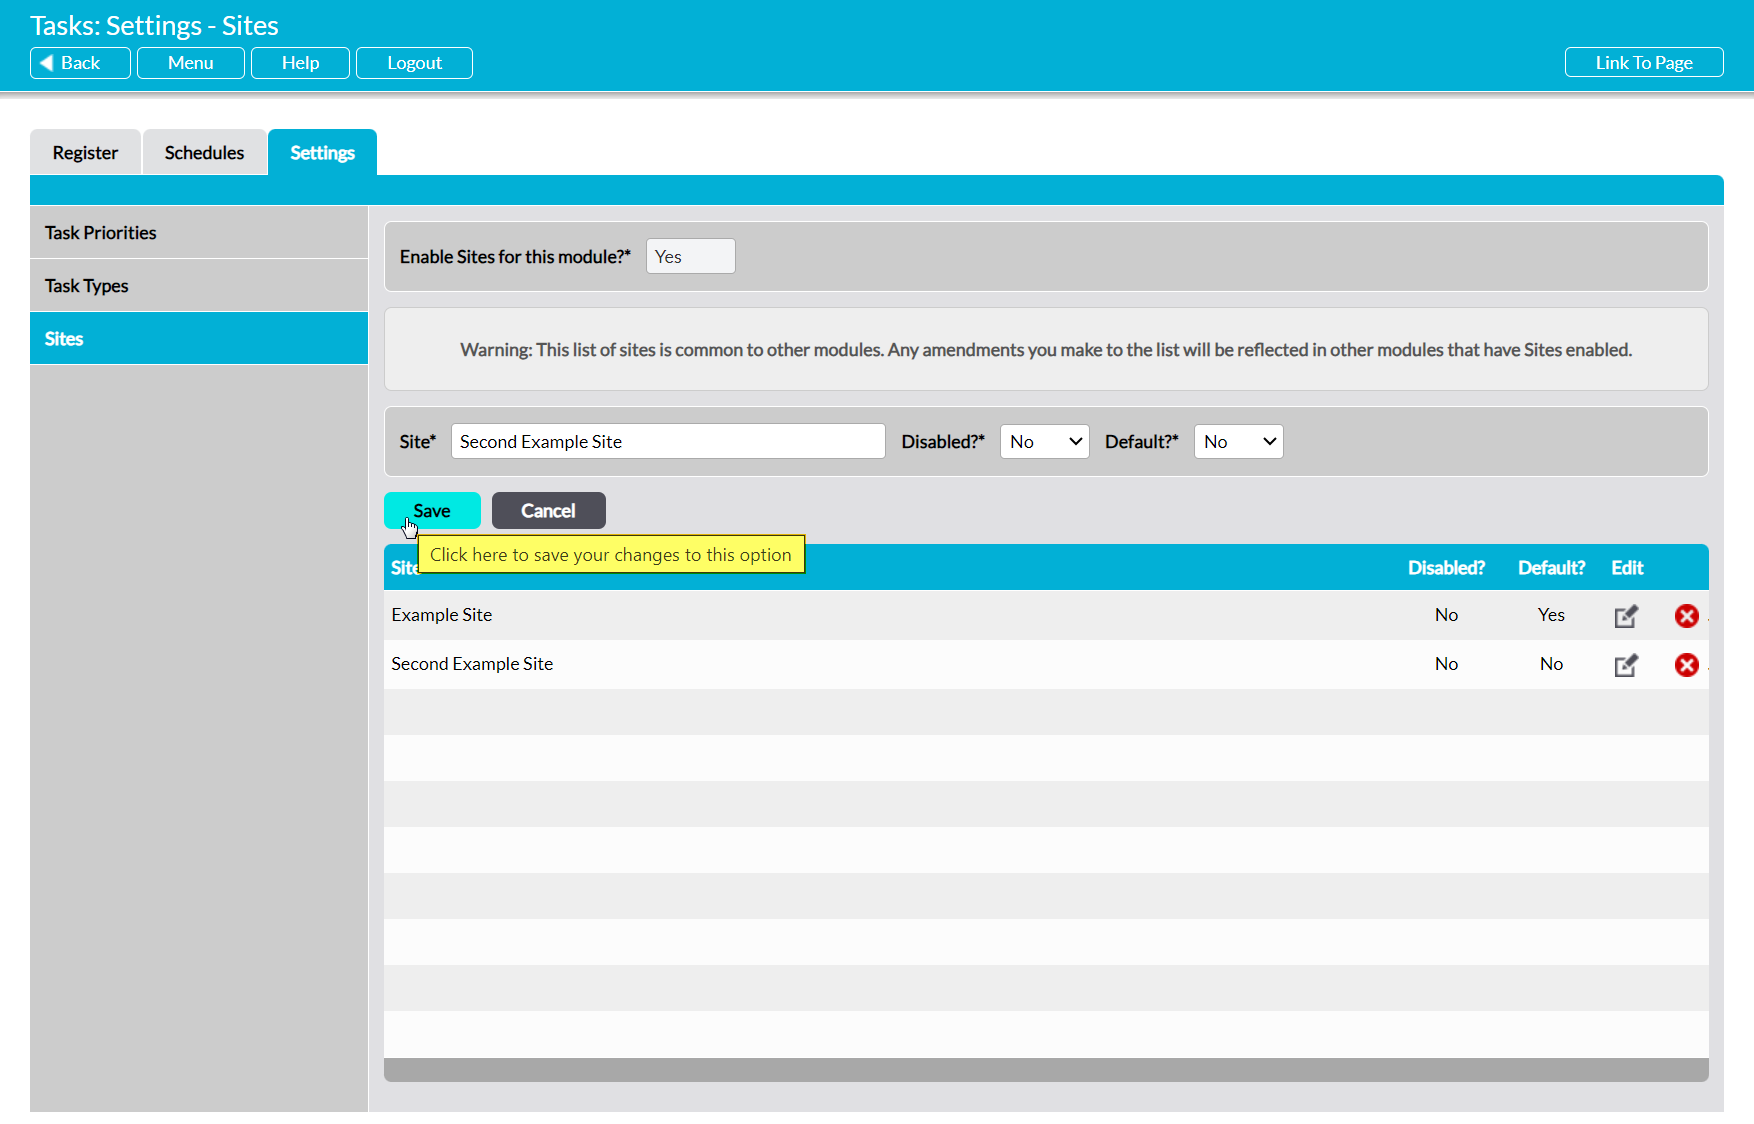
Make the necessary changes to the fields at the top of the page, and then click Save.
To delete a Site from the list, locate its record and click on the red cross icon.
If the option hasn’t been used within any module that has Sites enabled then it will be cleared from the list. However, you will not be able to delete a Site that has already been used within your system. Instead, you will need to Disable the option to remove it from dropdown lists and prevent its future selection. Note that disabling or deleting a Site will disable or delete it from every Site-enable module within your system (excluding the Asset Manager).
