Some parameters used within the Human Resources module are selected from pre-defined lists, which are created and managed from the module’s Settings tab. Some of the settings areas included within this tab are prepopulated with a set of default options, but others will need to be configured by you before you begin using the module. In addition, all preconfigured areas can be modified by you to customise the default options to your organisation’s needs.
The settings associated with the Human Resources module can be grouped into four broad categories:
- Those used within the core Personnel tabs (i.e. People, HR Notes, Employee Libraries, Confidential Libraries, Personnel Record)
- Those related to employee Training
- Those related to formal Appraisals
- Those related to Holidays, Absences, and Lateness
This article covers the settings that are relevant to the core Personnel tabs. These are:
In addition to these settings, five further areas are available. These are:
- Absence Types (Holidays, Absences, and Lateness area)
- Skill Categories (Training area)
- Skills (Training area)
- Skill Levels (Training area)
- Appraisal Rating Types (Appraisals area)
See the relevant user guide (identified in brackets above) for instructions on how to configure these additional setting areas.
*****
Configure Nationalities
The Nationalities parameter is used within each employee’s Personnel Record, and allows you to record the nationalities of your workforce. It is not populated with any default options.
To add a new Nationality, select the Nationalities item from the left-hand menu, then enter the Nationality in the Nationality* field at the top of the page. Use the dropdown menus to select the option’s Order* (its position in the list), whether it is to be Disabled?* (unavailable for selection), and whether it is to be the Default?* (selected by default when a new employee is added to your system), then click Add.
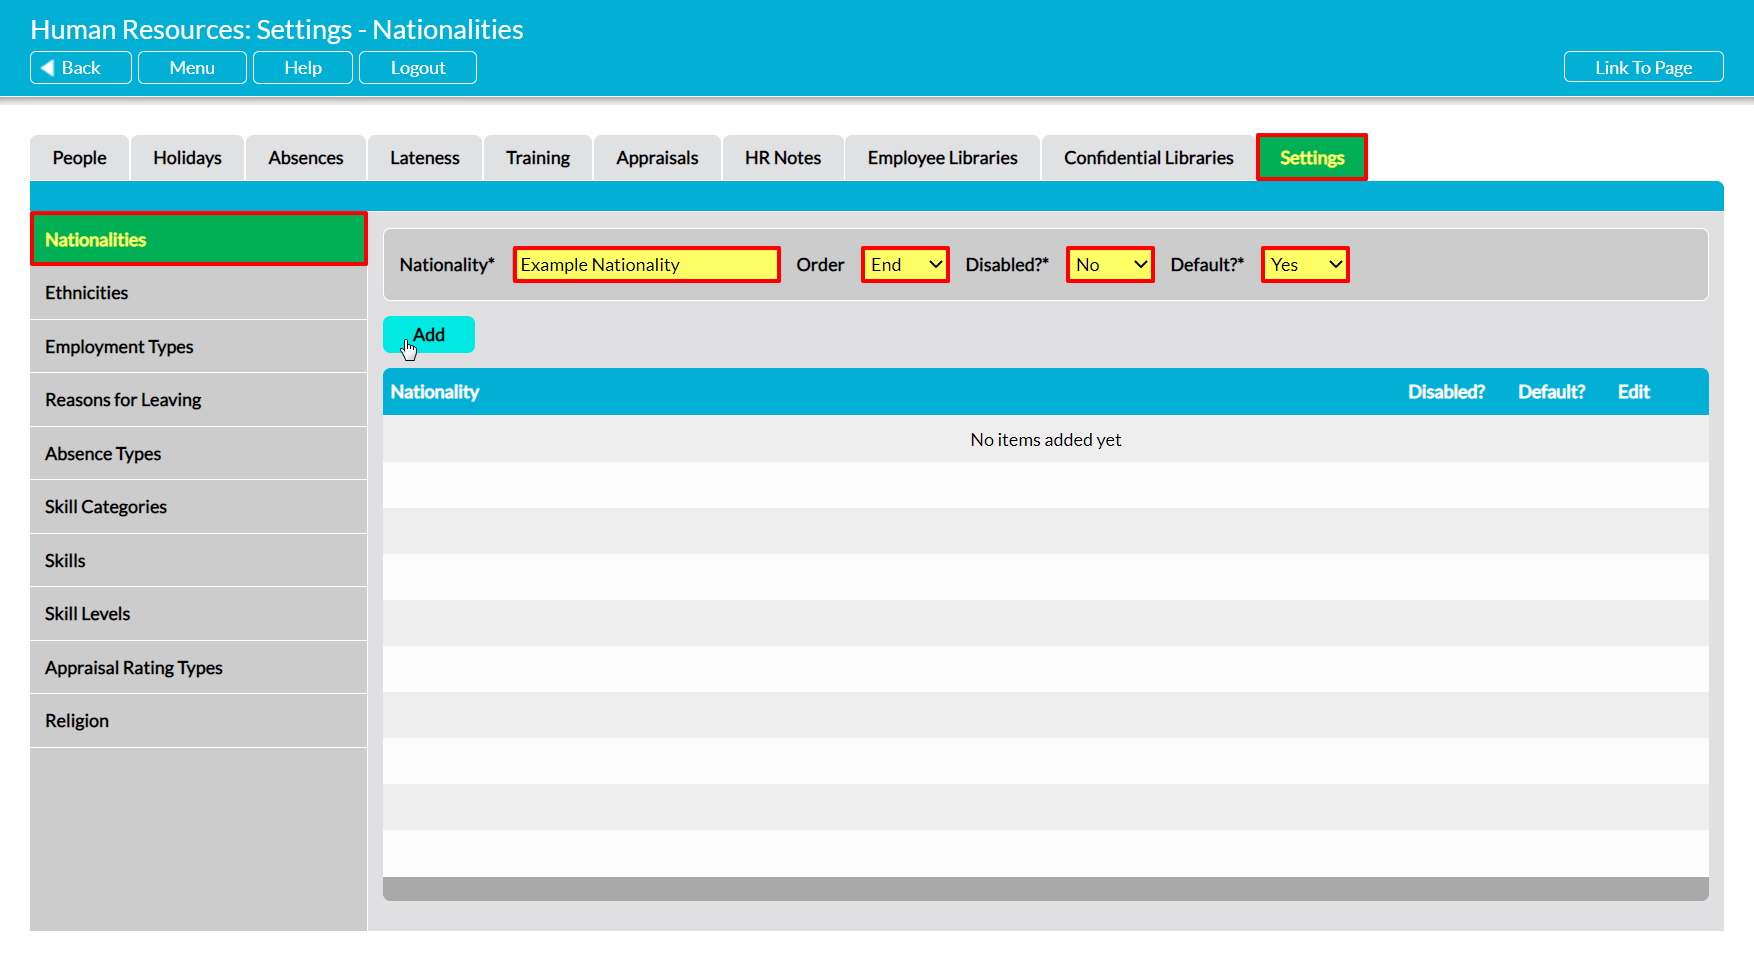
The newly added Nationality will now be displayed in the list, in the position that you specified.
To edit a Nationality, locate its record within the list and click on the pencil icon.
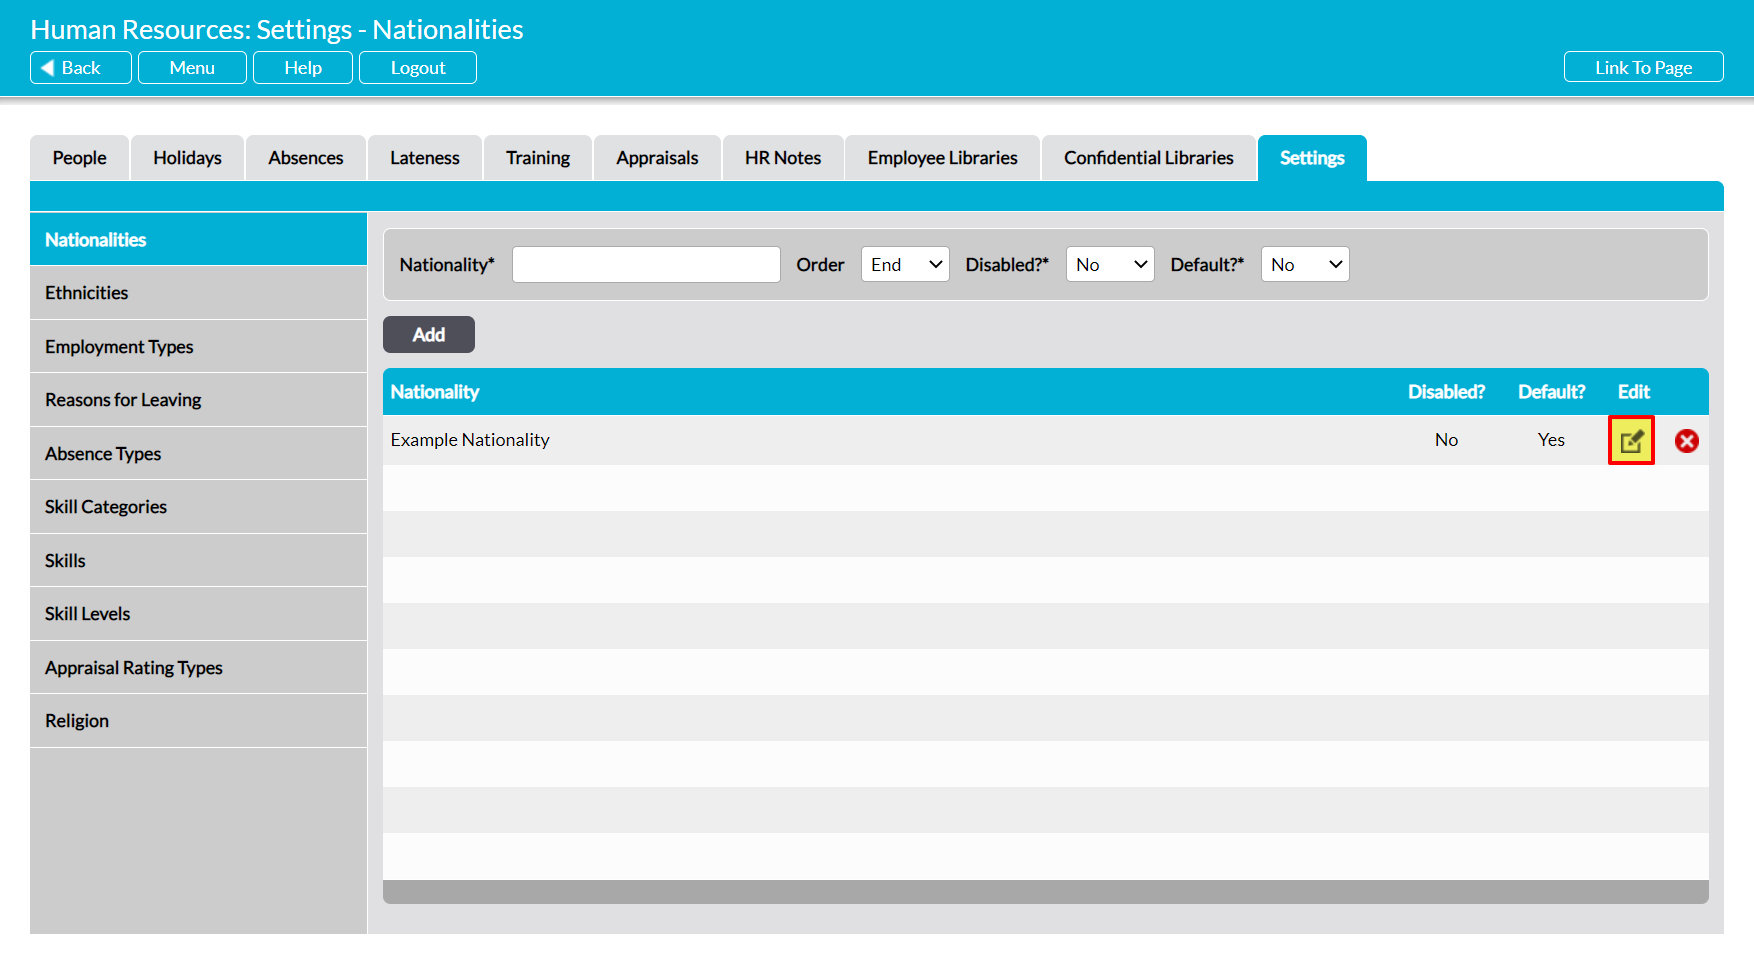
Make the necessary changes to the fields at the top of the page, and then click Save.

To delete a Nationality from the list, locate its record and click on the red cross icon.
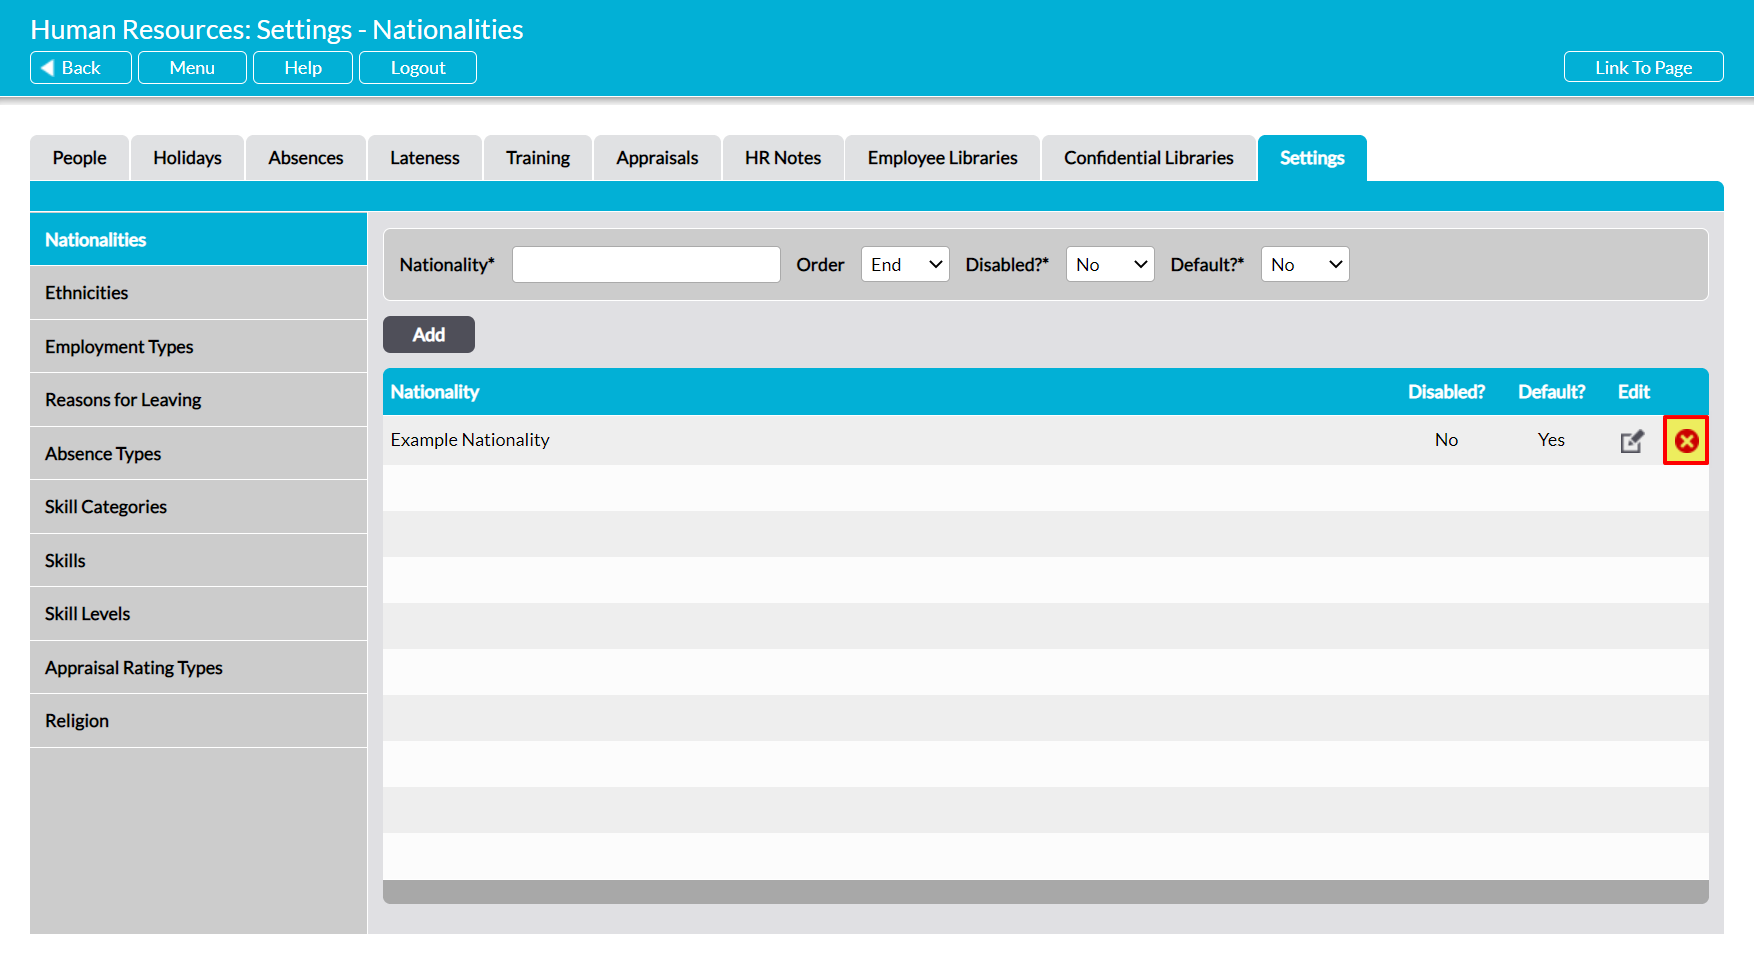
If the option hasn’t been used within any employee’s Personnel Record then it will be cleared from the list. However, you will not be able to delete a Nationality that has already been used in your system. Instead, you will need to Disable the option to remove it from dropdown lists and prevent its future selection.
*****
Configure Ethnicities
The Ethnicities parameter is used within the People tab and each employee’s Personnel Record, and allows you to record and analyse the ethnicities of your workforce. It is prepopulated with sixteen default options:
- White – British
- White – Irish
- White – Other
- Mixed – White & Black Caribbean
- Mixed – White & Black African
- Mixed – White & Asian
- Mixed – Other
- Asian & Asian British – Pakistani
- Asian & Asian British – Bangladeshi
- Asian & Asian British – Sri Lankan
- Asian & Asian British – Other
- Black & Black British – Caribbean
- Black & Black British – African
- Black & Black British – Other
- Chinese
To add a new Ethnicity, select the Ethnicities item from the left-hand menu, then enter the Ethnicity in the Ethnicity* field at the top of the page. Use the dropdown menus to select the option’s Order* (its position in the list), whether it is to be Disabled?* (unavailable for selection), and whether it is to be the Default?* (selected by default when a new employee is added to your system), then click Add.
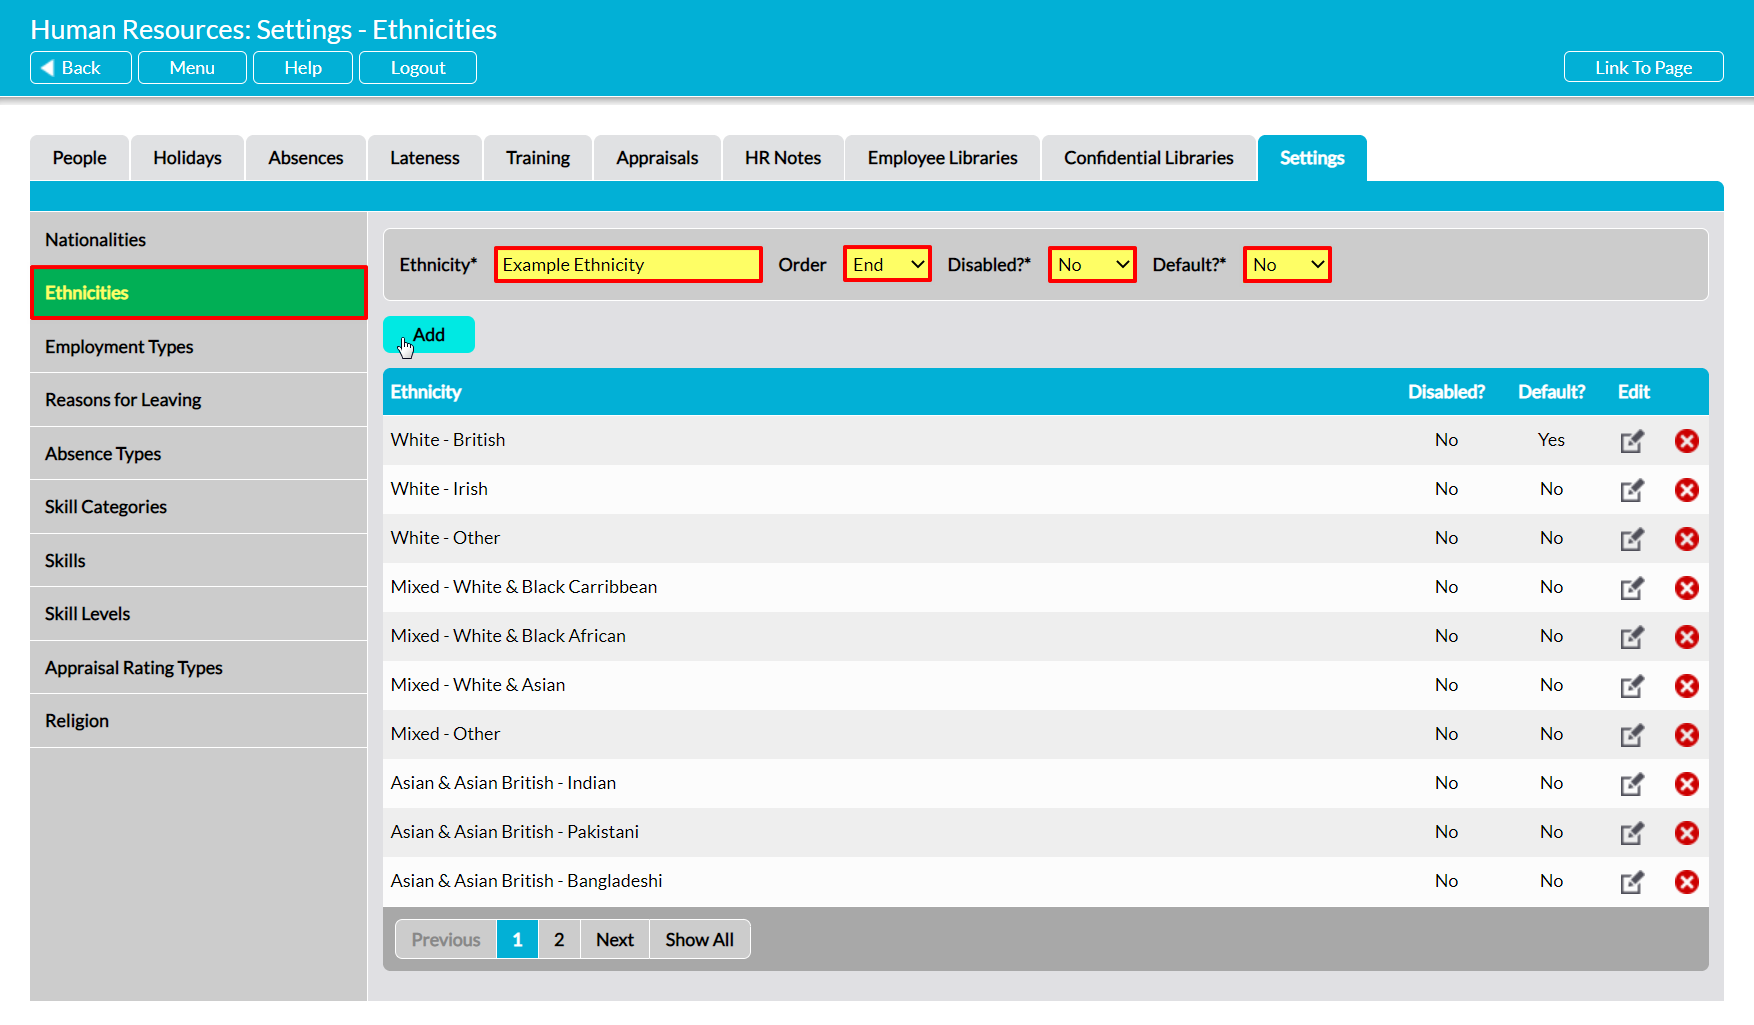
The newly added Ethnicity will now be displayed in the list, in the position you specified.
To edit an Ethnicity, locate its record in the list and click on the pencil icon. Make the necessary changes to the fields at the top of the page, and then click Save.
To delete an Ethnicity from the list, locate its record and click on the red cross icon. If the option hasn’t been used within any employee’s Personnel Record then it will be cleared from the list. However, you will not be able to delete an Ethnicity that has already been used in your system. Instead, you will need to Disable the option to remove it from dropdown lists and prevent its future selection.
*****
Configure Employment Types
The Employment Types parameter is used within the ‘Employment Details’ section of each employee’s Personnel Record, and allows you to record what type of employment your employees are contracted under (e.g. full-time, zero hours, etc). It is not populated with any default options.
To add a new Employment Type, select the Employment Types item from the left-hand menu, then enter the type in the Employment Type* field at the top of the page. Use the dropdown menus to select the option’s Order* (its position in the list), whether it is to be Disabled?* (unavailable for selection), and whether it is to be the Default?* (selected by default when a new employee is entered into your system), then click Add.
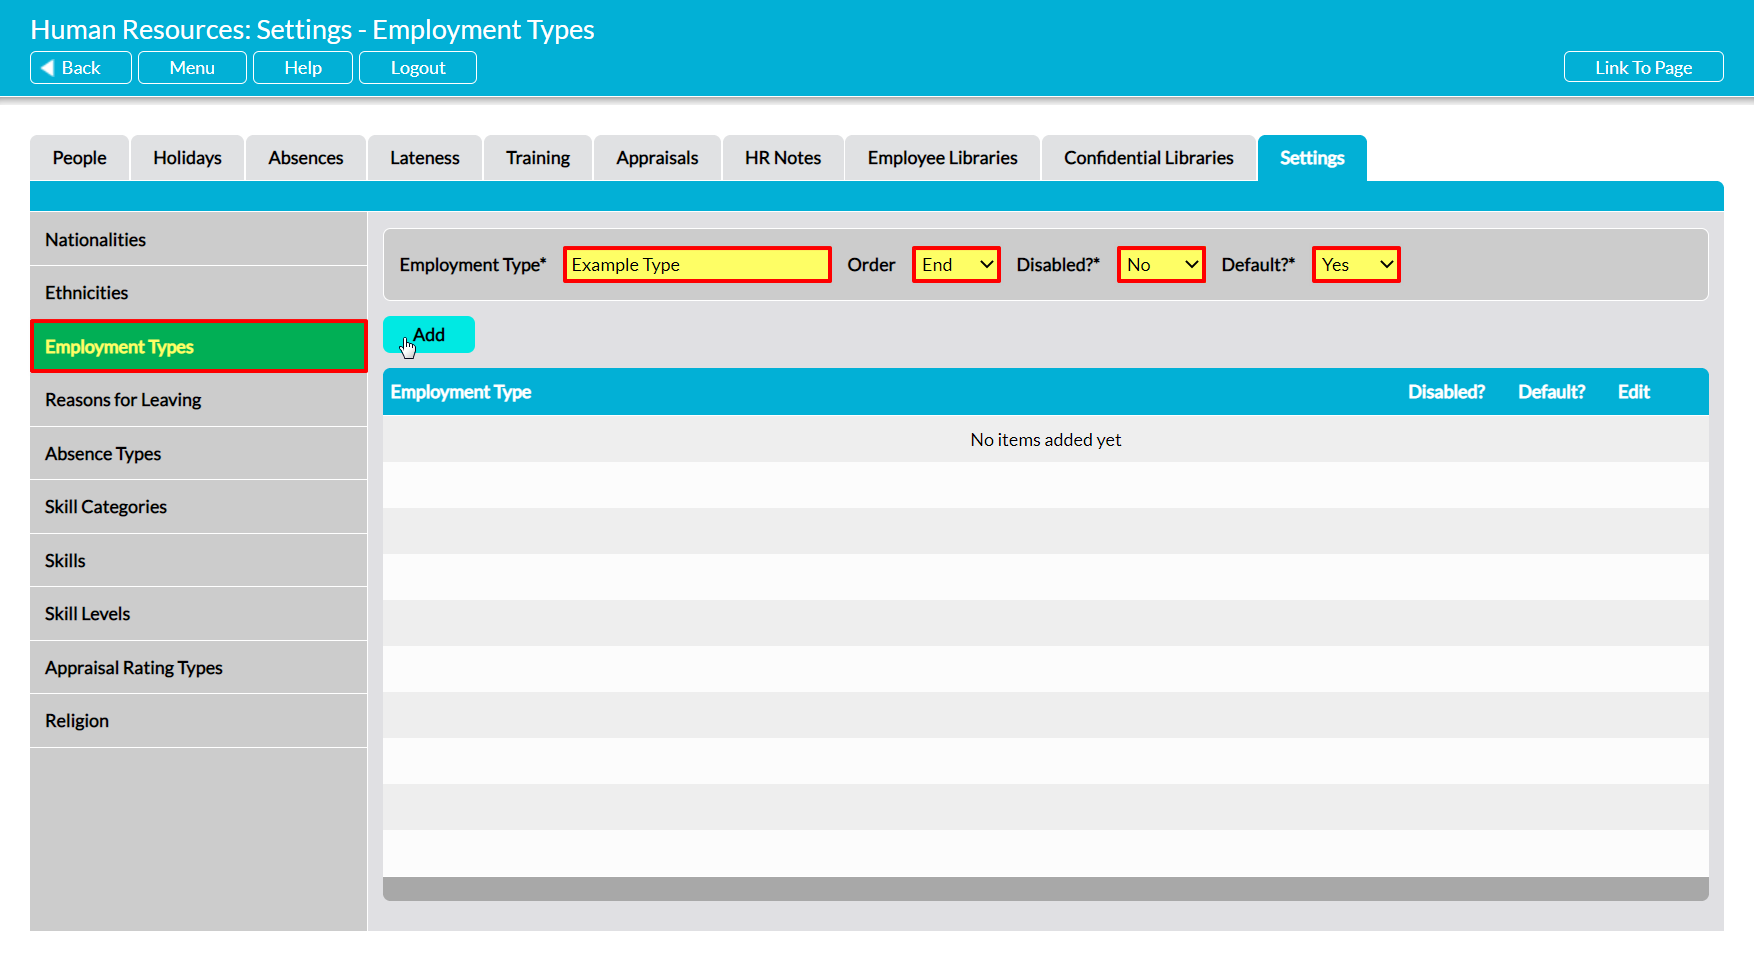
The newly added Employment Type will now be displayed in the list, in the position you specified.
To edit an Employment Type, locate its record within the list and click on the pencil icon. Make the necessary changes to the fields at the top of the page, and then click Save.
To delete an Employment Type from the list, locate its record and click on the red cross icon. If the option hasn’t been used within any employee’s Personnel Record then it will be cleared from the list. However, you will not be able to delete an Employment Type that has already been used in your system. Instead, you will need to Disable the option to remove it from dropdown lists and prevent its future selection.
*****
Configure Reasons for Leaving
The Reasons for Leaving parameter is used within the ‘Employment Details’ section of each employee’s Personnel Record, and only becomes relevant when an individual has left your organisation’s employment (either temporarily or permanently). It is used to record why the individual is no longer working for your organisation, and is not populated with any default options.
To add a new Reason for Leaving, select the Reasons for Leaving item from the left-hand menu, then enter the reason in the Reason for Leaving* field at the top of the page. Use the dropdown menus to select the option’s Order* (its position within the list), whether it is to be Disabled?* (unavailable for selection), and whether it is to be the Default?* (selected by default when you enter a leaving date against and employee), then click Add.
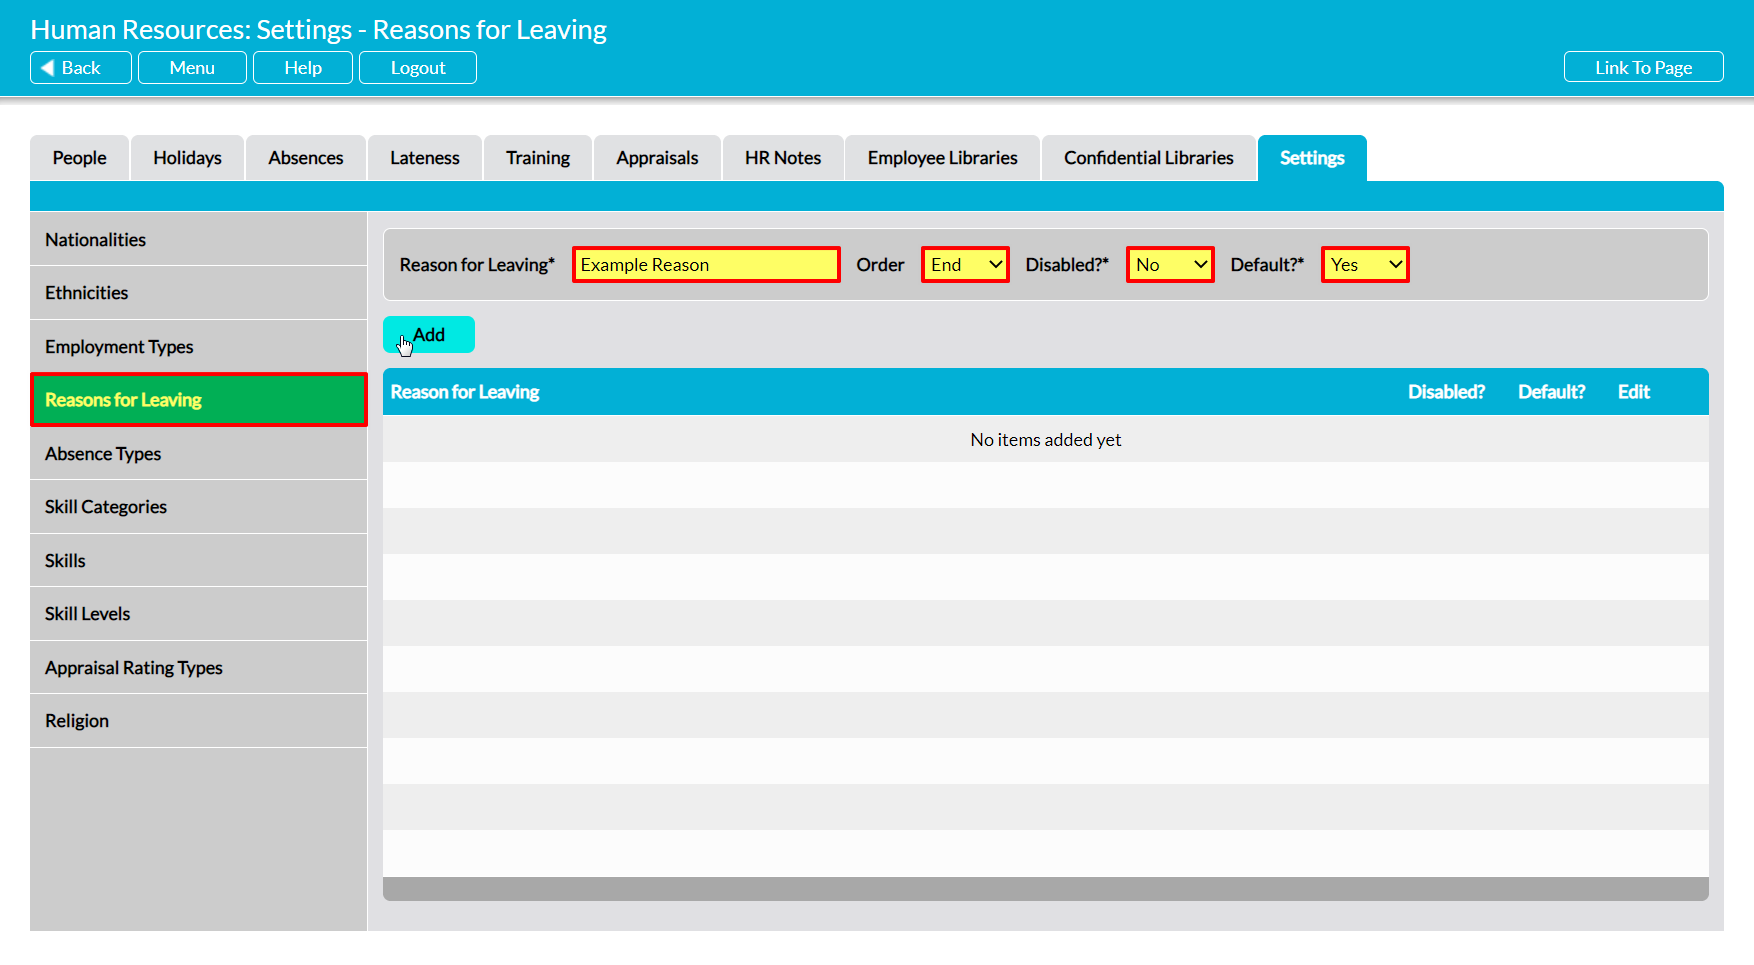
The newly added Reason for Leaving will now be displayed in the list, in the position you specified.
To edit a Reason, locate its record within the list and click on the pencil icon. Make any necessary changes to the fields at the top of the page, and then click Save.
To delete a Reason from the list, locate its record and click on the red cross icon. If the option hasn’t been used within any employee’s Personnel Record then it will be deleted from the list. However, you will not be able to delete a Reason for Leaving that has already been used in your system. Instead, you will need to Disable the option to remove it from dropdown lists and prevent its future selection.
*****
Configure Religions
The Religions parameter is used within the People tab and each employee’s Personnel Record, and allows you to record and analyse the religions of your workforce. It is not populated with any default options.
Note that this setting area and its related fields are hidden in most systems, as it is only applicable where you are required by law to report on your workforce’s religion. If you require this settings area and its related fields, you will need to contact our Support Team and request that the Religious Reporting feature is enabled within your system.
To add a new Religion, select the Religion item from the left-hand menu, then enter the Religion in the Religion* field at the top of the page. Use the dropdown menu to select whether the option is to be Disabled?* (unavailable for selection), or whether it is to be the Default?* (selected by default when a new employee is added to your system), and then click Add.
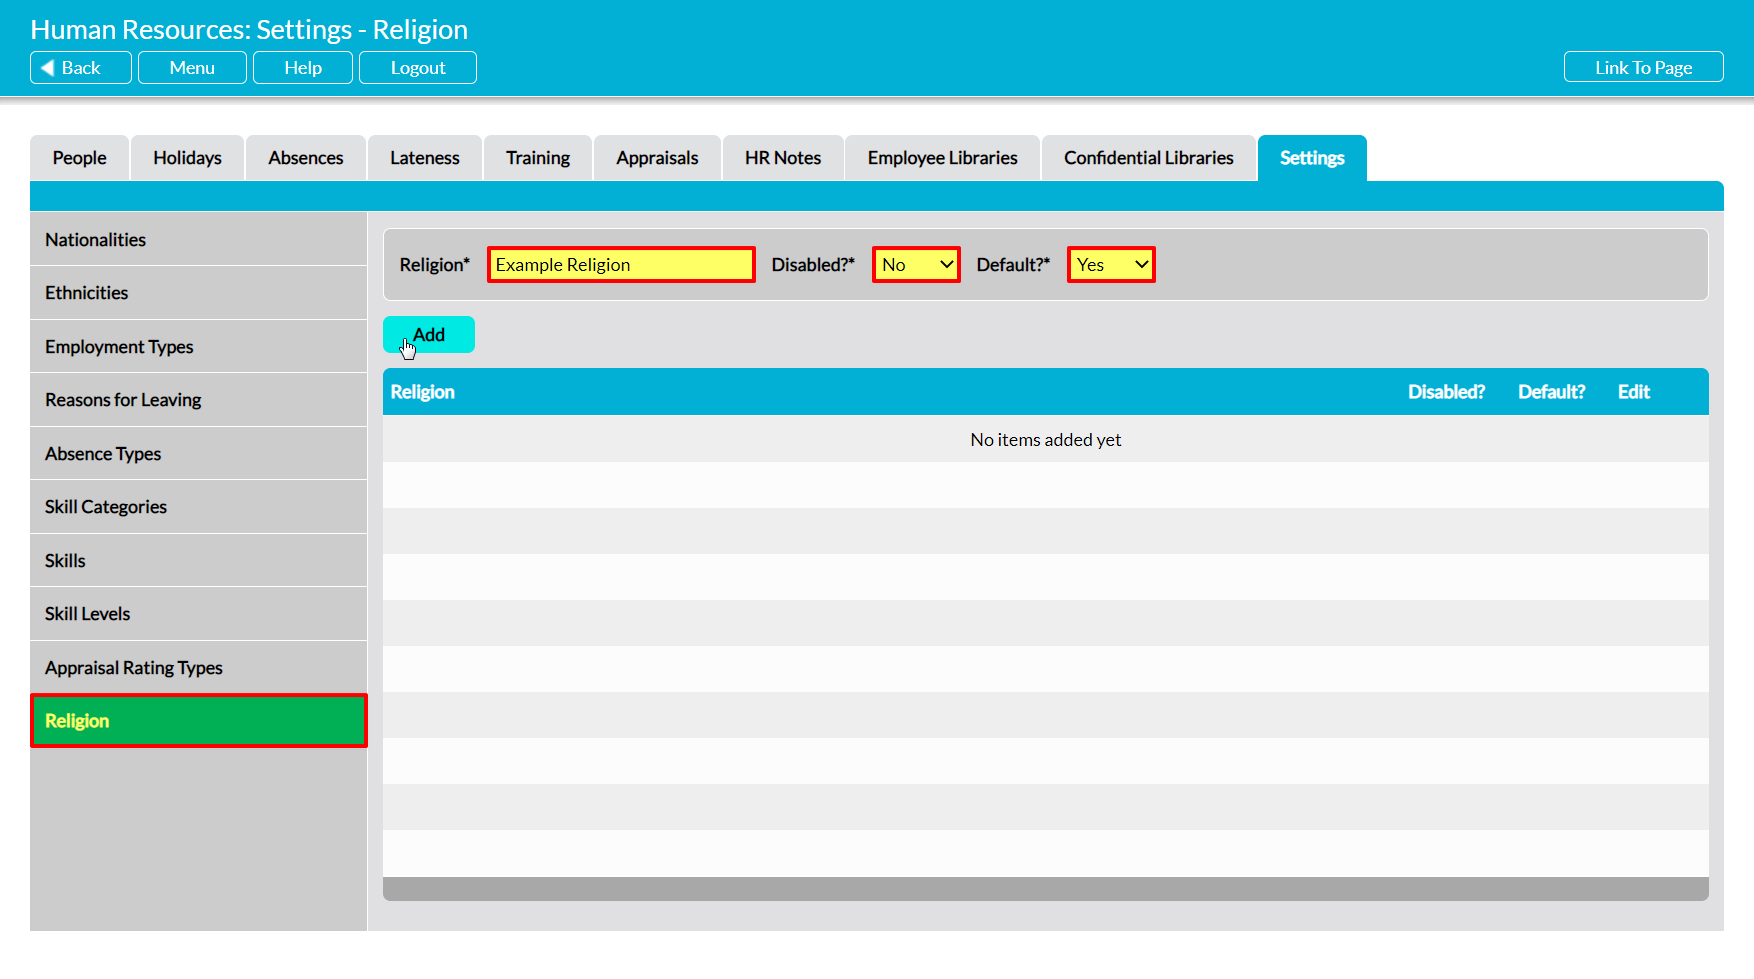
The newly added Religion will be displayed within the list. Note that Religions display alphabetically.
To edit a Religion, locate its record within the list and click on the pencil icon. Make any necessary changes to the fields at the top of the page, and then click Save.
To delete a Religion from the list, locate its record and click on the red cross icon. If the option hasn’t been used within any employee’s Personnel Record then it will be cleared from the list. However, you will not be able to delete a Religion that has already been used within your system. Instead, you will need to Disable the option to remove it from dropdown lists and prevent its future selection.
*****
Genders
The Genders parameter is used within the Equal Opportunities report and each employee’s Personnel Record, and allows you to add non-binary gender identities to your system if you have a need to record these against your employees. Due to the number of gender identities and the personal, organisational, and regional differences in the way that these are provided and recorded, it is only prepopulated with the two binary genders – allowing you to enter any additional identities that may be relevant to your employees if you choose to use the field within Activ. In addition, it is important to be aware that the binary genders cannot be removed or edited as they are hard-coded into the Equal Opportunities report.
To add a new Gender to your system, select the Genders item from the left-hand menu, then enter the Gender in the Gender* field at the top of the page. Use the dropdown menus to select whether the Gender is to be Disabled?* (unavailable for selection) and whether it is to be the Default?* (selected by default when a new employee is added to your system), then click Add.
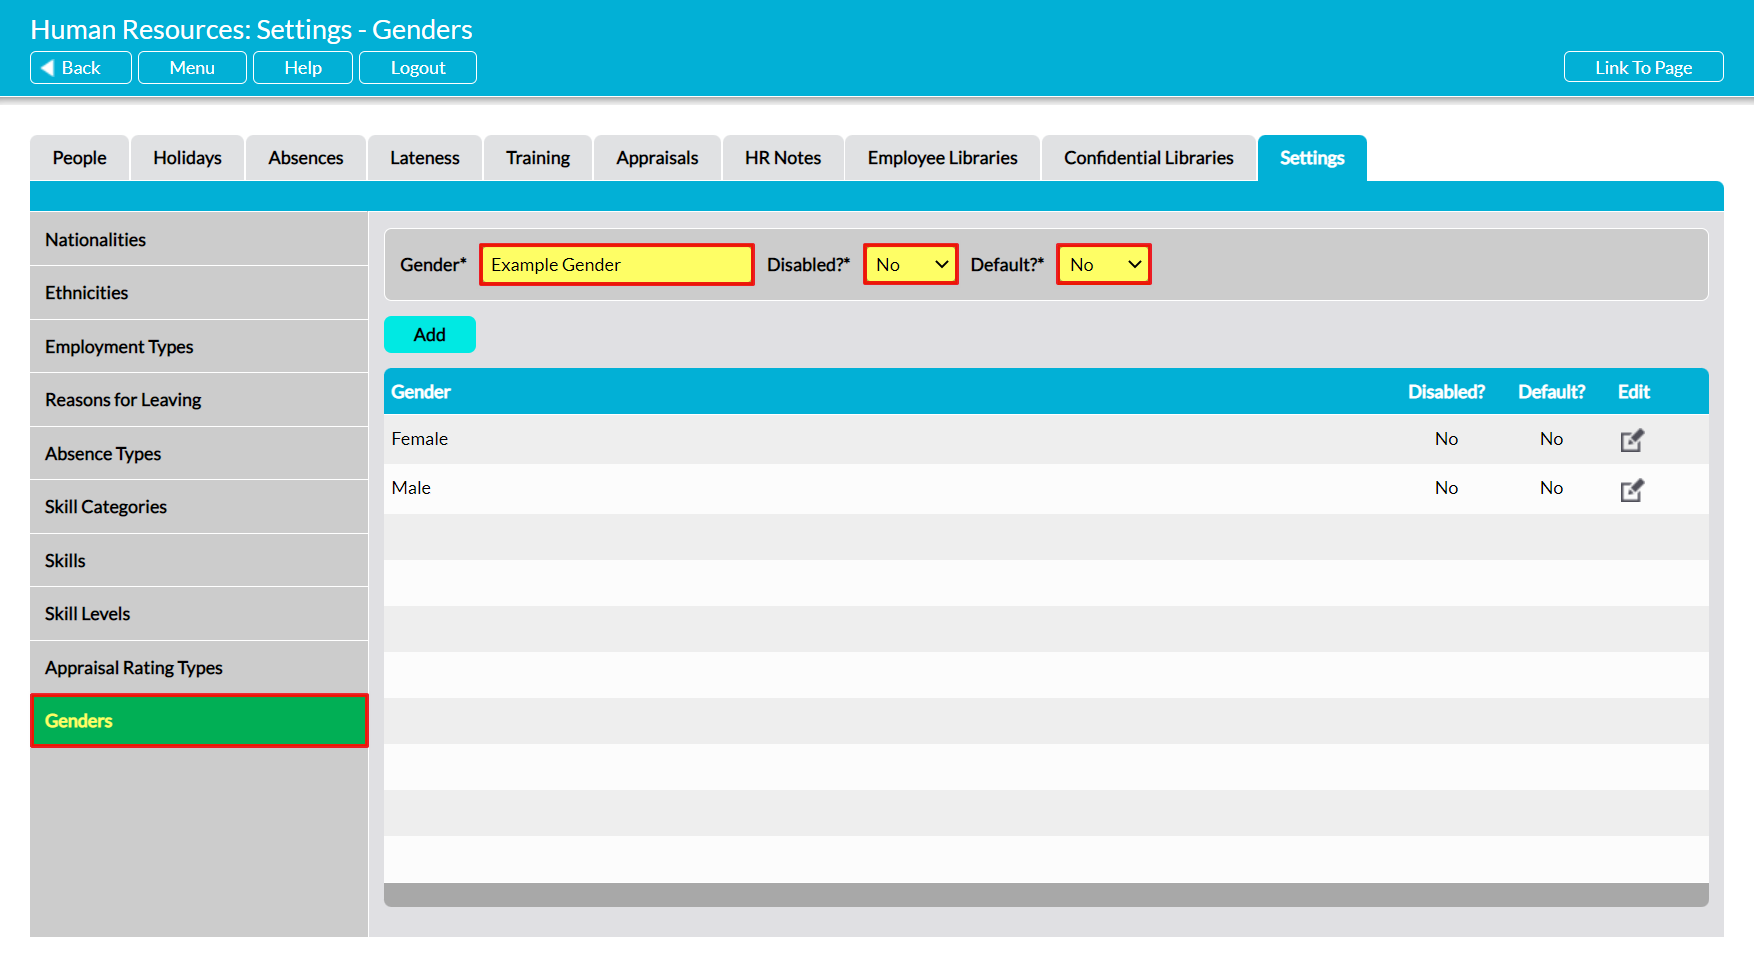
The newly added Gender will now be displayed in the list, and be available for selection within Personnel Records.
To edit a Gender, locate its record in the list and click on the red cross icon. If the option hasn’t been used within any employee’s Personnel Record, then it will be cleared from the list. However, you will not be able to delete a Gender that has already been used in your system. Instead, you will need to Disable the option to remove it from dropdown lists and prevent its future selection.
