It is likely that your company will have a set of Resources (e.g. meeting rooms, specific equipment, etc) that your employees may need to use in some of their meetings, or to complete certain aspects of their work. As these Resources are likely to be in limited supply, it is also probable that you will need a means of managing and viewing Resource availability, and allowing your employees to book Resources without creating clashes or having to go through an intermediary manager. To assist with this, Activ’s Calendar module allows you to create a list of Resources within your system (see Configure Calendar Settings), which can then be booked for use by any of your employees. Once saved, these bookings are displayed within a global Resource Calendar to provide you and your employees with oversight of Resource availability (see View Resource Bookings).
For convenience, Activ allows you to:
*****
Book a Resource Whilst Creating a New Appointment
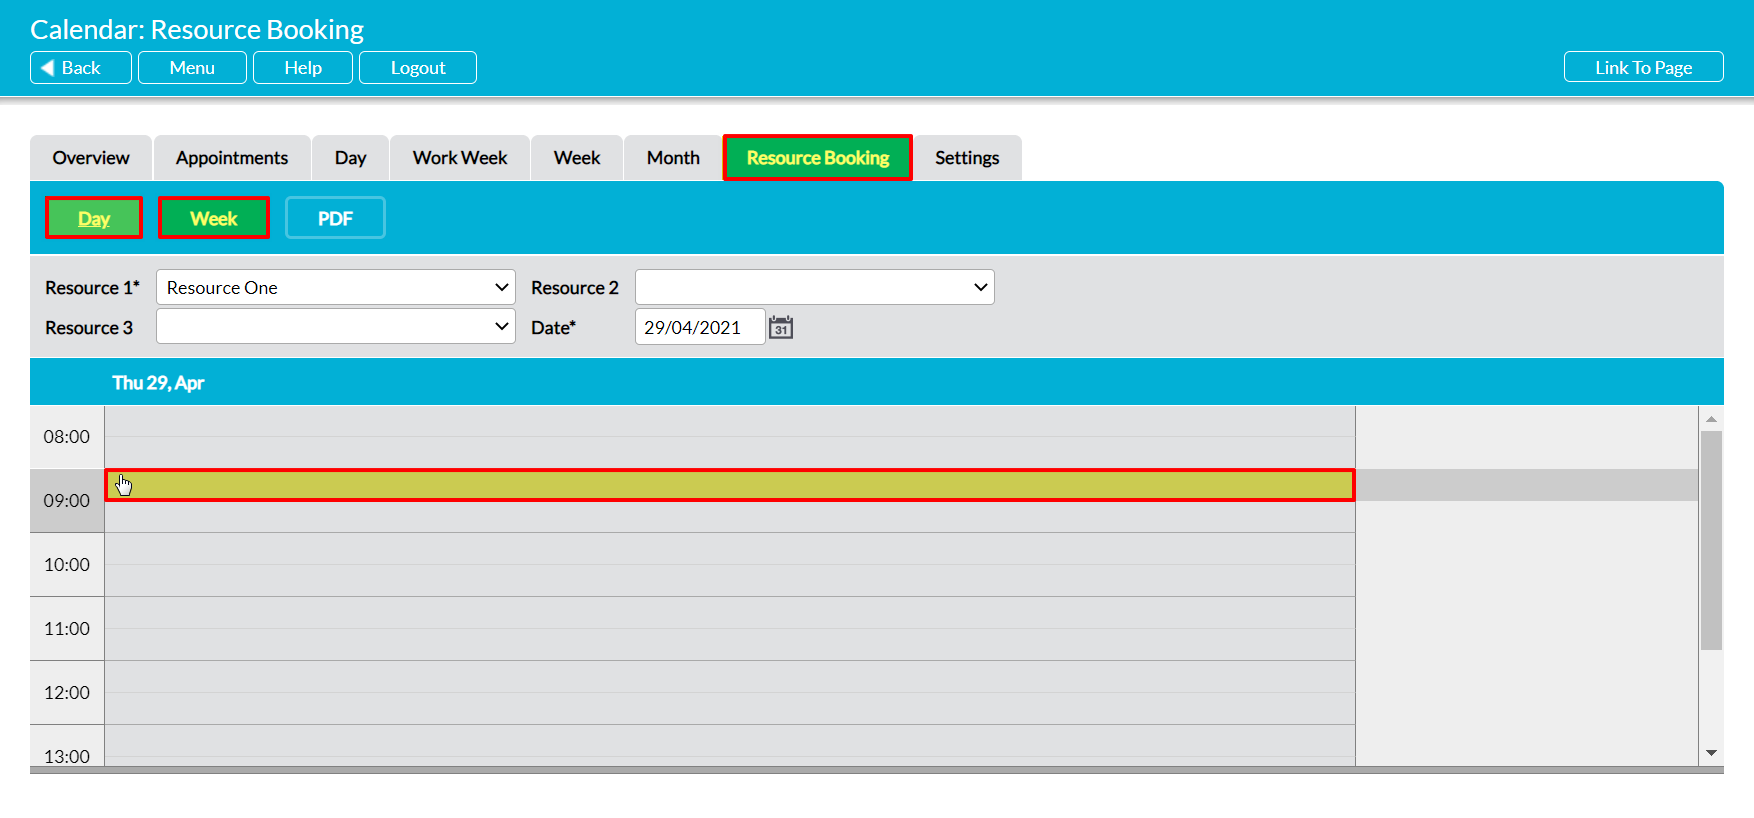
To book a Resource, open the Calendar module on its Resource Booking tab, and select either the Day or Week view. This will open the matching Calendar view, which will display all current bookings that have been made for the Resource. Note that all screenshots are taken from the Day view, but that the process and layout is similar across both pages.
Double-click within the appropriate date and time slot.
Alternatively, create a new Appointment from the Overview, Day, Work Week, Week, or Month tabs (see Create an Appointment).
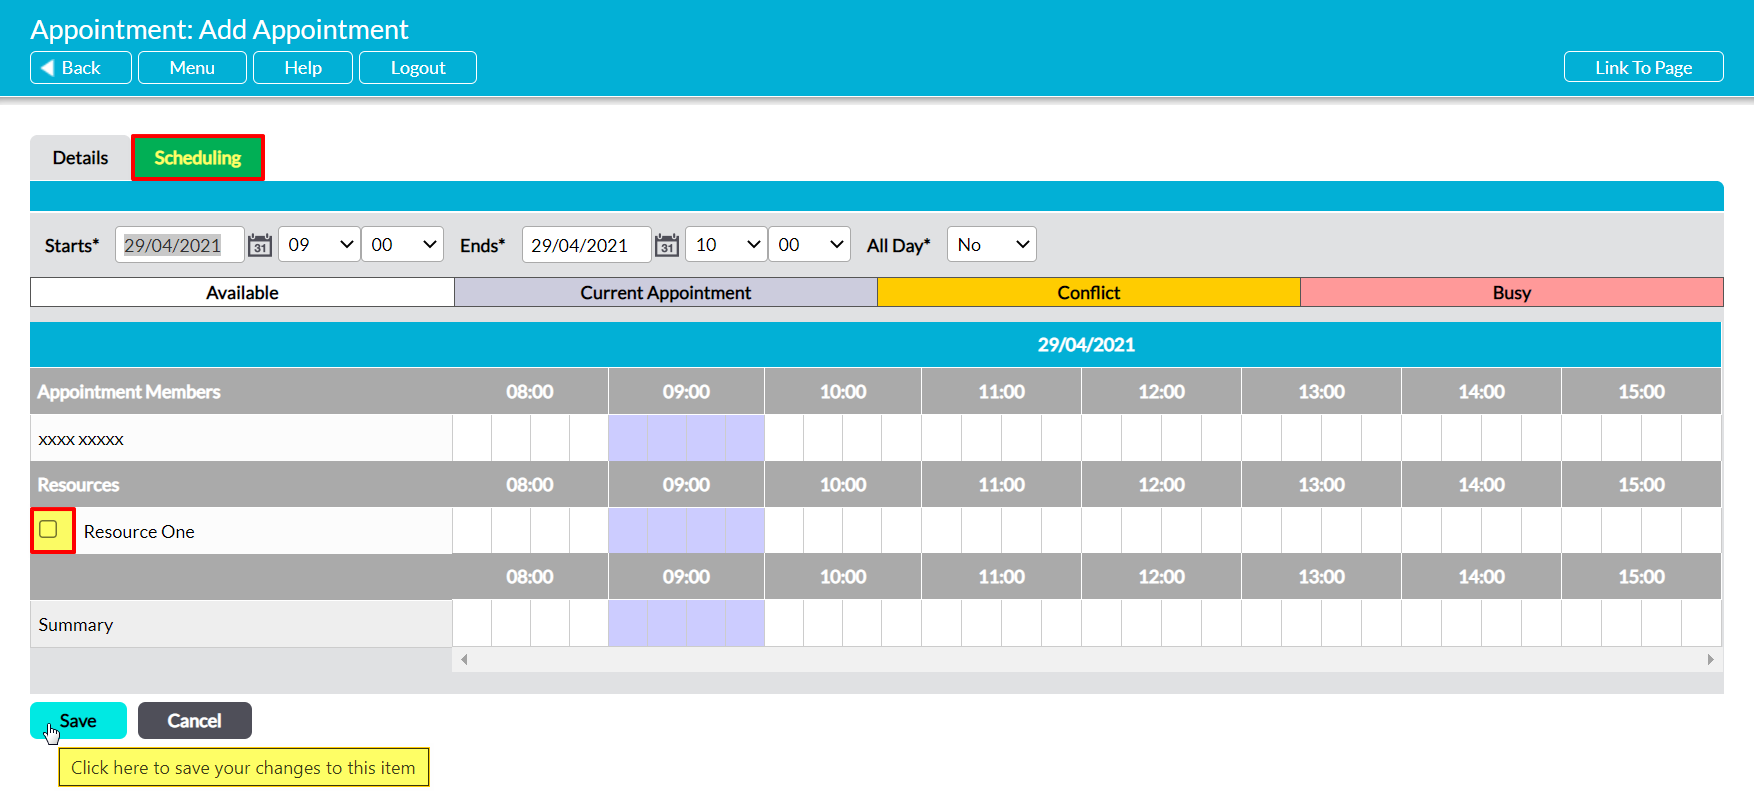
In all cases, a blank Add Appointment form will open for you to populate. Enter the Appointment’s main details, and then click on the Scheduling tab. This will open a new view allowing you to compare the schedules of your Appointment’s members, and listing the Resources that are currently recorded in your system. Locate the Resources section, and use the tick boxes to select the Resource(s) that you wish to book. Finish entering your Appointment’s details, and then click Save.
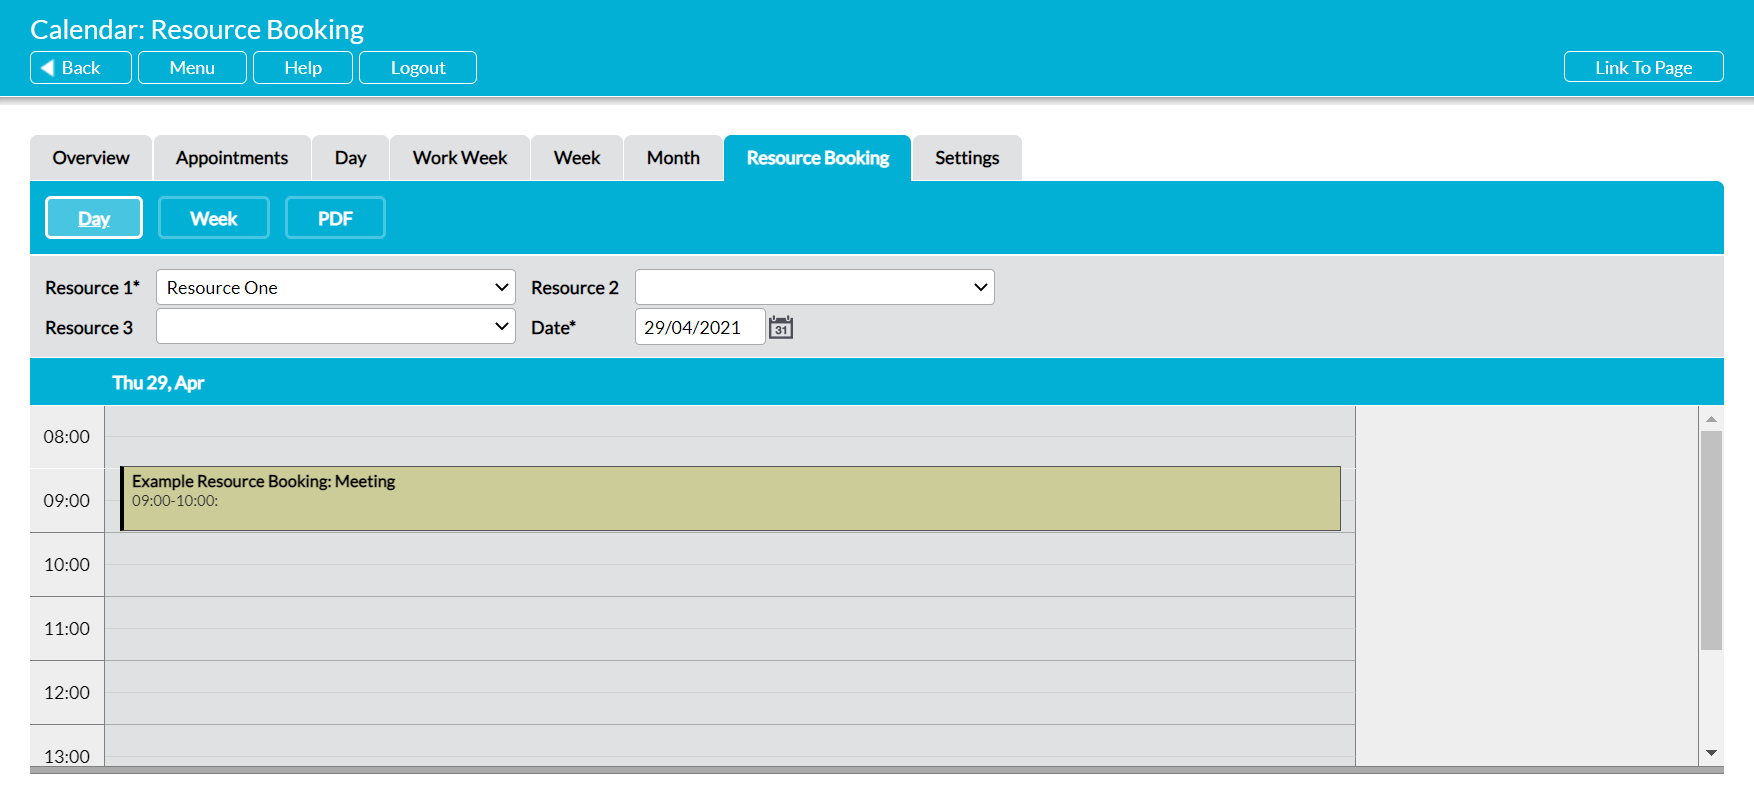
If you booked the Resource from the Resource Booking tab, you will be returned to that tab and your booking will be displayed in the appropriate slot within the Resource’s Calendar. Otherwise, you will be returned to the tab you were previously viewing.
*****
Add a Resource to an Existing Appointment
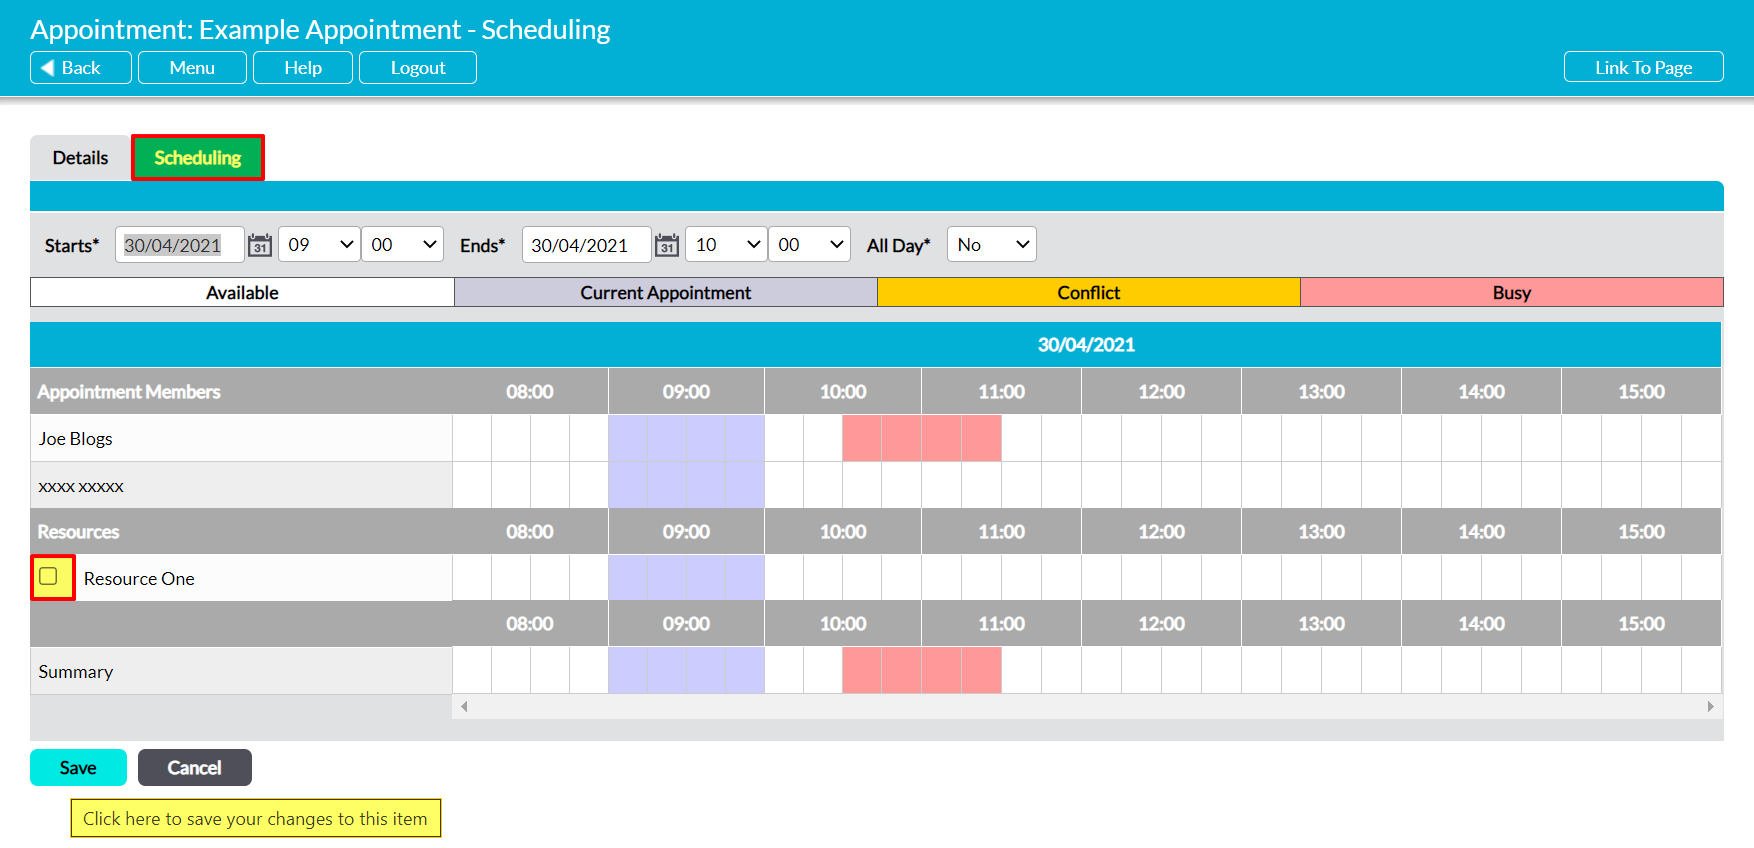
To add a Resource to an existing Appointment, open the appropriate Appointment and click on Edit.

All details will be opened for editing. Click on the Scheduling tab. This will open a new view allowing you to compare the schedules of your Appointment’s members, and listing the Resources that are currently recorded in your system. Locate the Resources section, and use the tick boxes to select the Resource(s) that you wish to book. Finish entering your Appointment’s details, and then click Save.
You will be returned to the Appointment’s Details tab, and your selected Resource(s) will be displayed within the Booked Resources panel at the bottom of the page.

