If your package includes the Customers and Suppliers module, you may find it useful to allow your key customers and suppliers to manage some of the data that you enter against their company. However, as normal (Employee and Third Party) logins allow individuals to access all data that is entered within a given module (where Teams is not in use), it will typically be inappropriate to allow your customers and suppliers to access your system through the normal means. To address this, Activ provides you with the option to create Extranet users: a type of user account that behaves differently to those provided to employees and third parties.
Individuals who are provided with an Extranet login will only be able to access the information that is associated with their own company, and are presented with a specialised set of screens that ensure they cannot access any other part of your system. The screens that are available to these users are based on their system permissions, and can include:
- their company’s Library;
- any Feedback Surveys assigned to their company;
- any Improvement Logs raised against their company; and
- any Incident Logs raised against their company.
In all cases, an Extranet’s user’s view of each area is limited to the data that has been linked to their Company’s record. See Extranet Login for more information about what is included within each available screen.
Note that users must be recorded as a ‘contact’ within your Customers and Suppliers module before they can be provided with an Extranet login. If they are not listed within their company’s contacts, you will need to add them before you can create their account (see Add a Contact).
Adding an Extranet user is a simple and secure three step process. These steps are:
- 1 – Account Setup
- 2 – Generate Validation Link
- 3 – Validate Account
The first two stages are completed by a System Administrator, and the third is completed by the user themselves.
This article focuses on the initial account setup (step one). See Send an Account Validation Link to a User and Validate your Account for guidance on steps two and three.
*****
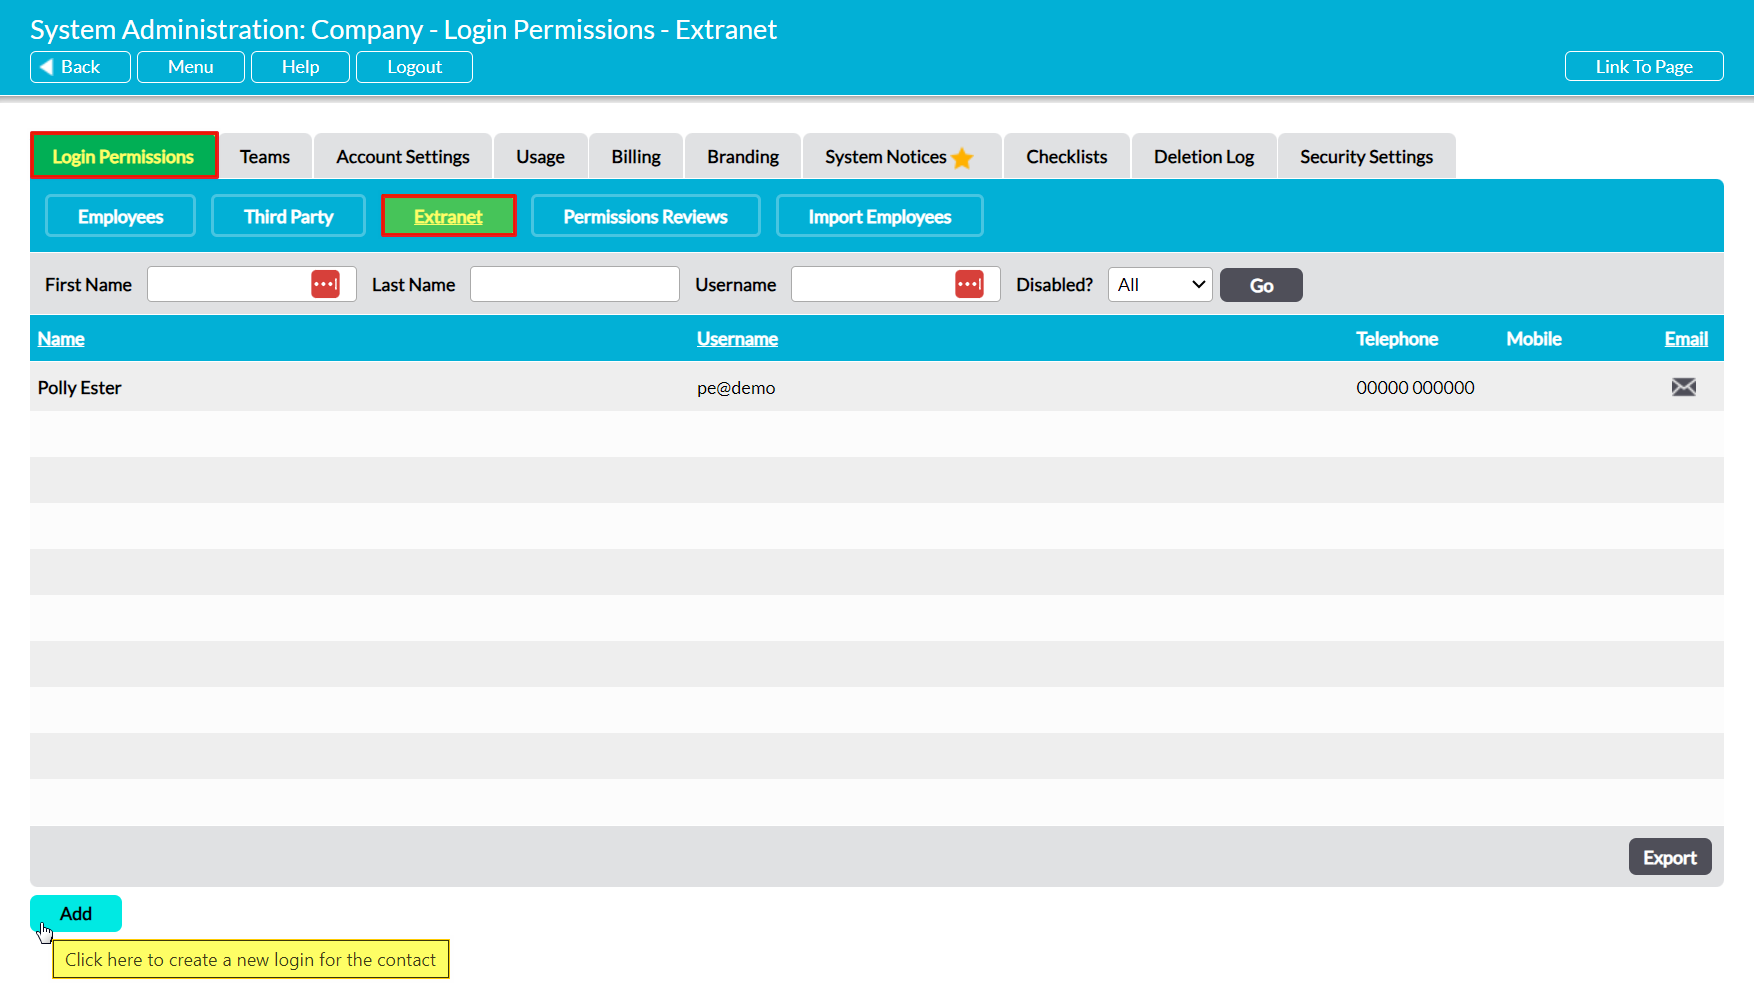
To add an Extranet user to your system, open the System Administration module on its Login Permissions tab and click on the Extranet button at the top of the screen. This will open a register of all Extranet users that have previously been entered into your system. Click on the Add button.
This will open a blank Add Contact tab for you to populate. For convenience, this form is divided into two sections:
- The Details section, which allows you to configure the account’s basic settings.
- The System Permissions panel, which allows you to set module permissions for the user (see System Permissions).
*****
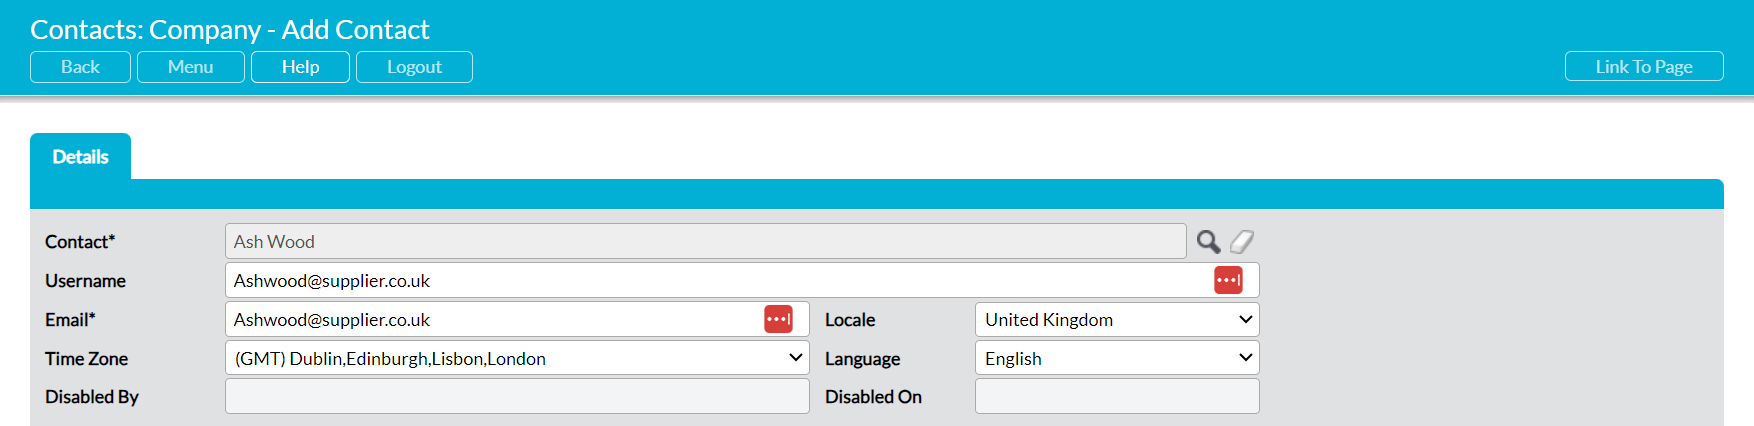
Details
The Details panel records the user’s key system details, and consists of eight fields:
Contact* – use the magnifying glass to select the appropriate contact from your Customers and Suppliers: Contacts register. Note that Extranet users must be selected from your existing Contacts – if the individual has not already been entered into your system as a contact, you will need to add them to the appropriate company before you can create their account (see Add a Contact).
Username – enter a provisional Username for the user. Note that this must be unique, and that the user will be able to change it when they validate their account.
Email* – enter the user’s main contact email.
Time Zone / Locale / Language – use these fields to set the user’s time, locale, and language.
Disabled On / Disabled By – automatically records who disabled the user and when the user was disabled.
*****
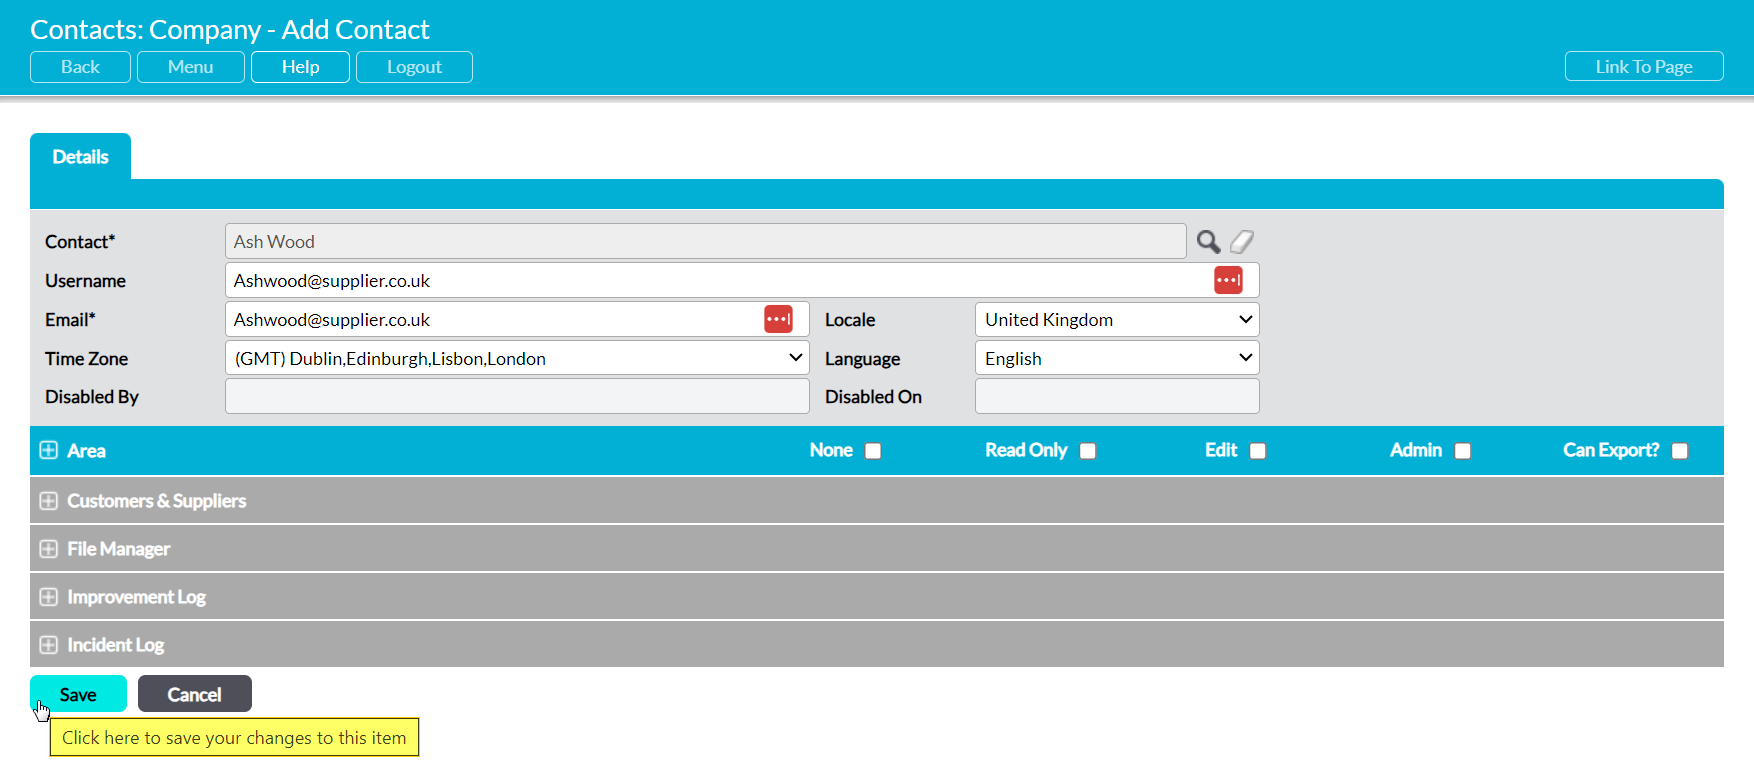
System Permissions
The System Permissions panel records the user’s permissions to each module that is included within the Extranet screens, and determines what areas they will be able to view and modify. Each Area shown within the panel relates to a module within your system, and the Areas displayed will depend on the modules that are included within your package. Note that when you provide an Extranet user with access to these areas, the user will only be able to view the data that is assigned to their own company – they will not have access to any data that is not directly related to their company (see Extranet Login for more information).
Use the plus icon next to each Area to view the available permissions, and the Radio buttons to select the level of access the user should have (see System Permissions).

Click on Save once you have finished entering the user’s account details.
If adding the user will require you to purchase a new Activ User Licence (i.e. will take you over your inclusive user allowance), Activ will take you to a new page outlining your updated billing levels and asking you to confirm the addition. Once you have confirmed, you will be taken to the new user’s Login Permissions tab and will be able to complete the setup of their account.
