If you want to allow an individual to access and/or contribute to your Activ system, you will need to add them to your system as a user (i.e. Employee with login). Once set up, these users will have their own login details and Activ User Licences, allowing them to access any part of the system for which they have the appropriate permissions. If their permissions are high enough (see System Permissions) they will also be able to add, modify, and delete your system’s records (e.g. files, Processes, Improvement Logs, etc), allowing them to assist you with your system’s maintenance.
There are three types of user within Activ, and all are chargeable. They are:
- Employee – these are individuals who are directly employed by your organisation. They can have any combination of system permissions, and their permissions can be raised/lowered freely.
- Third Party User – these individuals are typically consultants or supporting users from outside of your organisation. See Add a Third Party User for more information.
- Extranet User – these individuals are customers and suppliers who have been given access to their own company’s file to allow them to manage some of their company’s data. They access your system through a dedicated portal, and can only view and modify their own company’s information. See Extranet Login and Add an Extranet User for more information.
This article walks through the process of adding the ‘employee’ user type.
Adding an employee with their own Activ login is a simple and secure three step process. These steps are:
- 1 – Account Setup
- 2 – Generate Validation Link
- 3 – Validate Account
The first two stages are completed by a System Administrator, and the third is completed by the employee themselves.
This article focuses on the initial account setup (step one). See Send an Account Validation Link to a User and Validate your Account for guidance on steps two and three.
*****
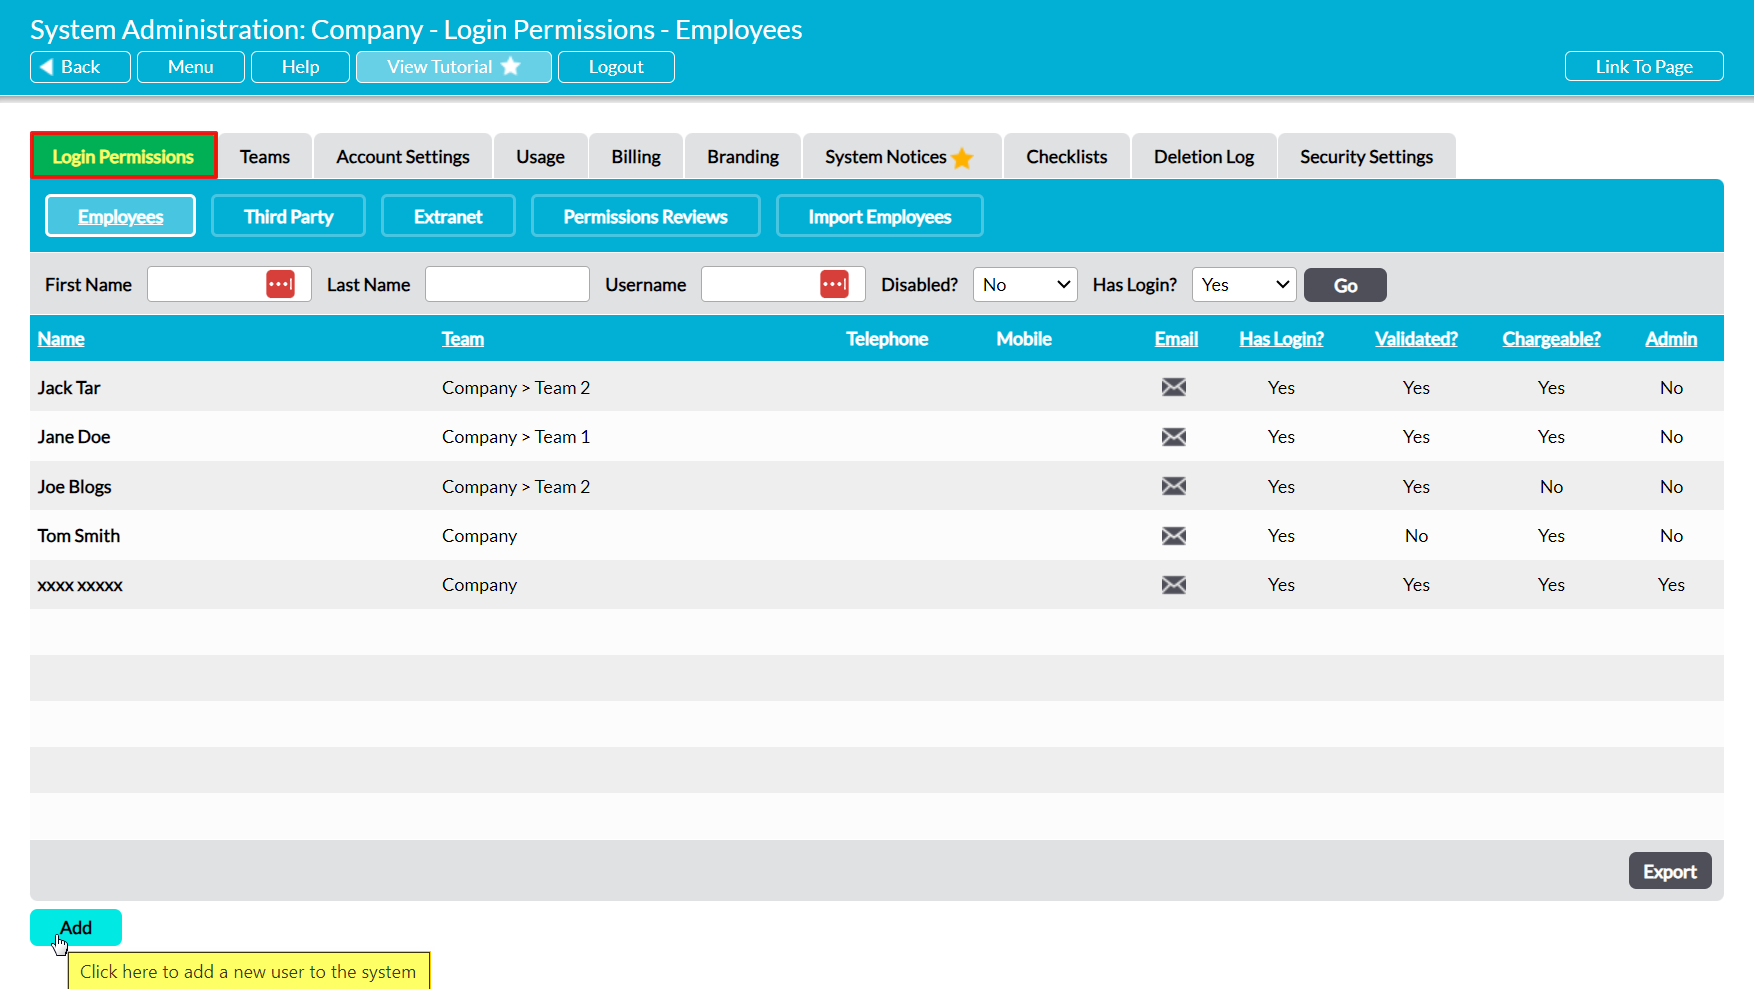
To add an employee to your system, open the System Administration module on its Login Permissions tab and click on the Add button.
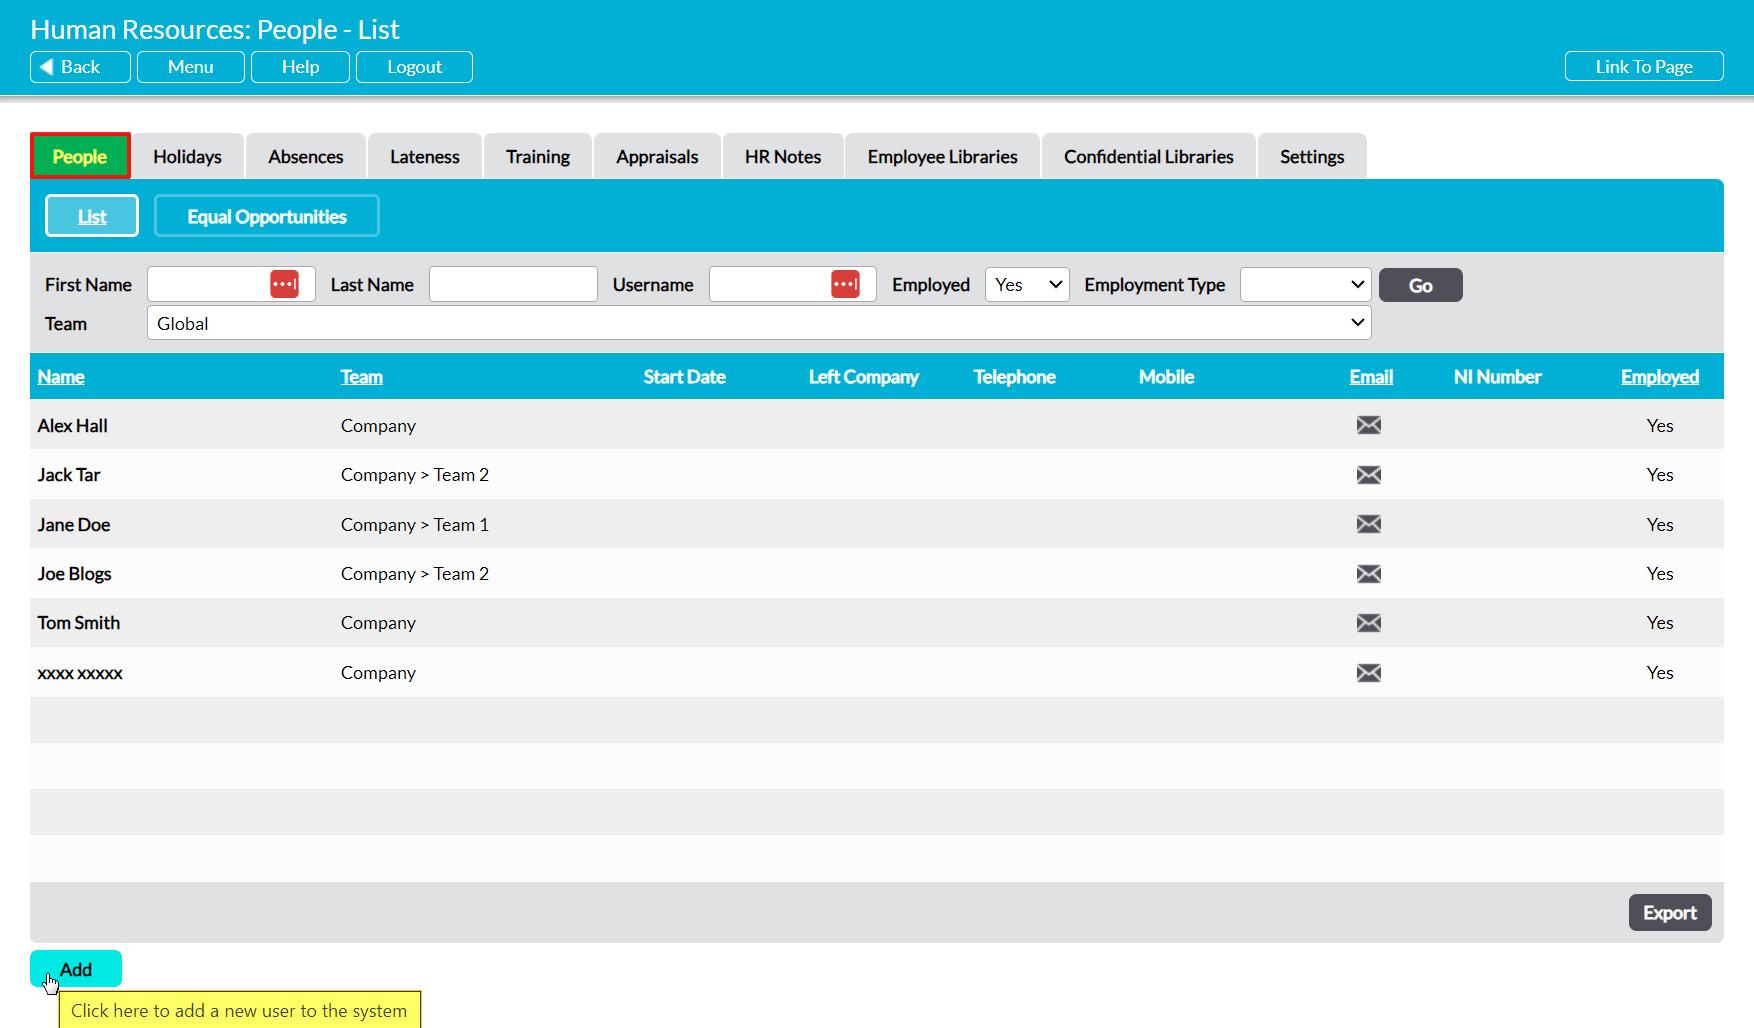
Alternatively, if you have the Human Resources manager, open the module on its People tab and click on the Add button.
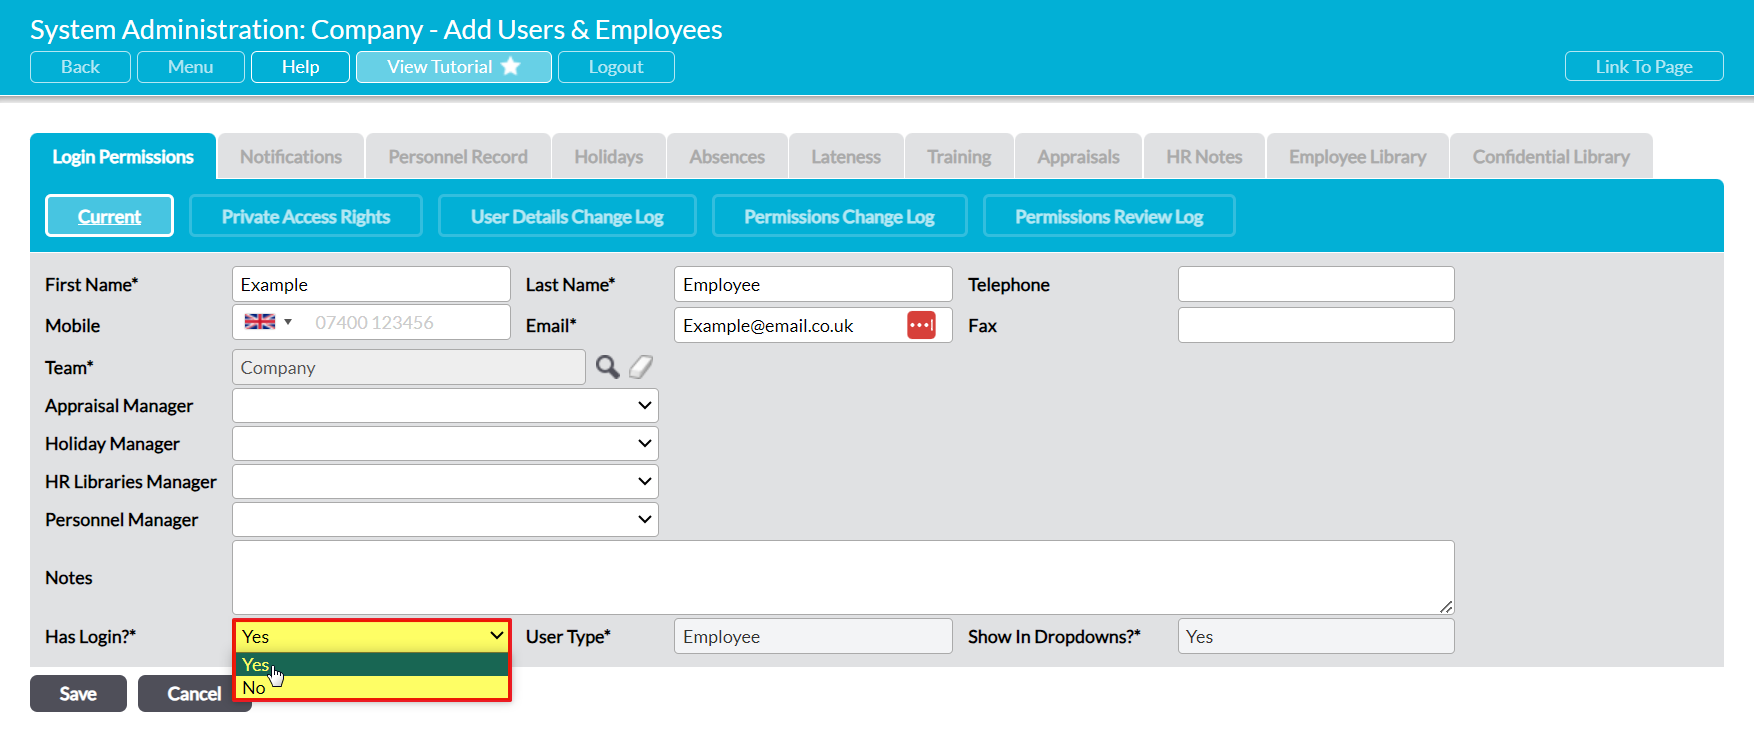
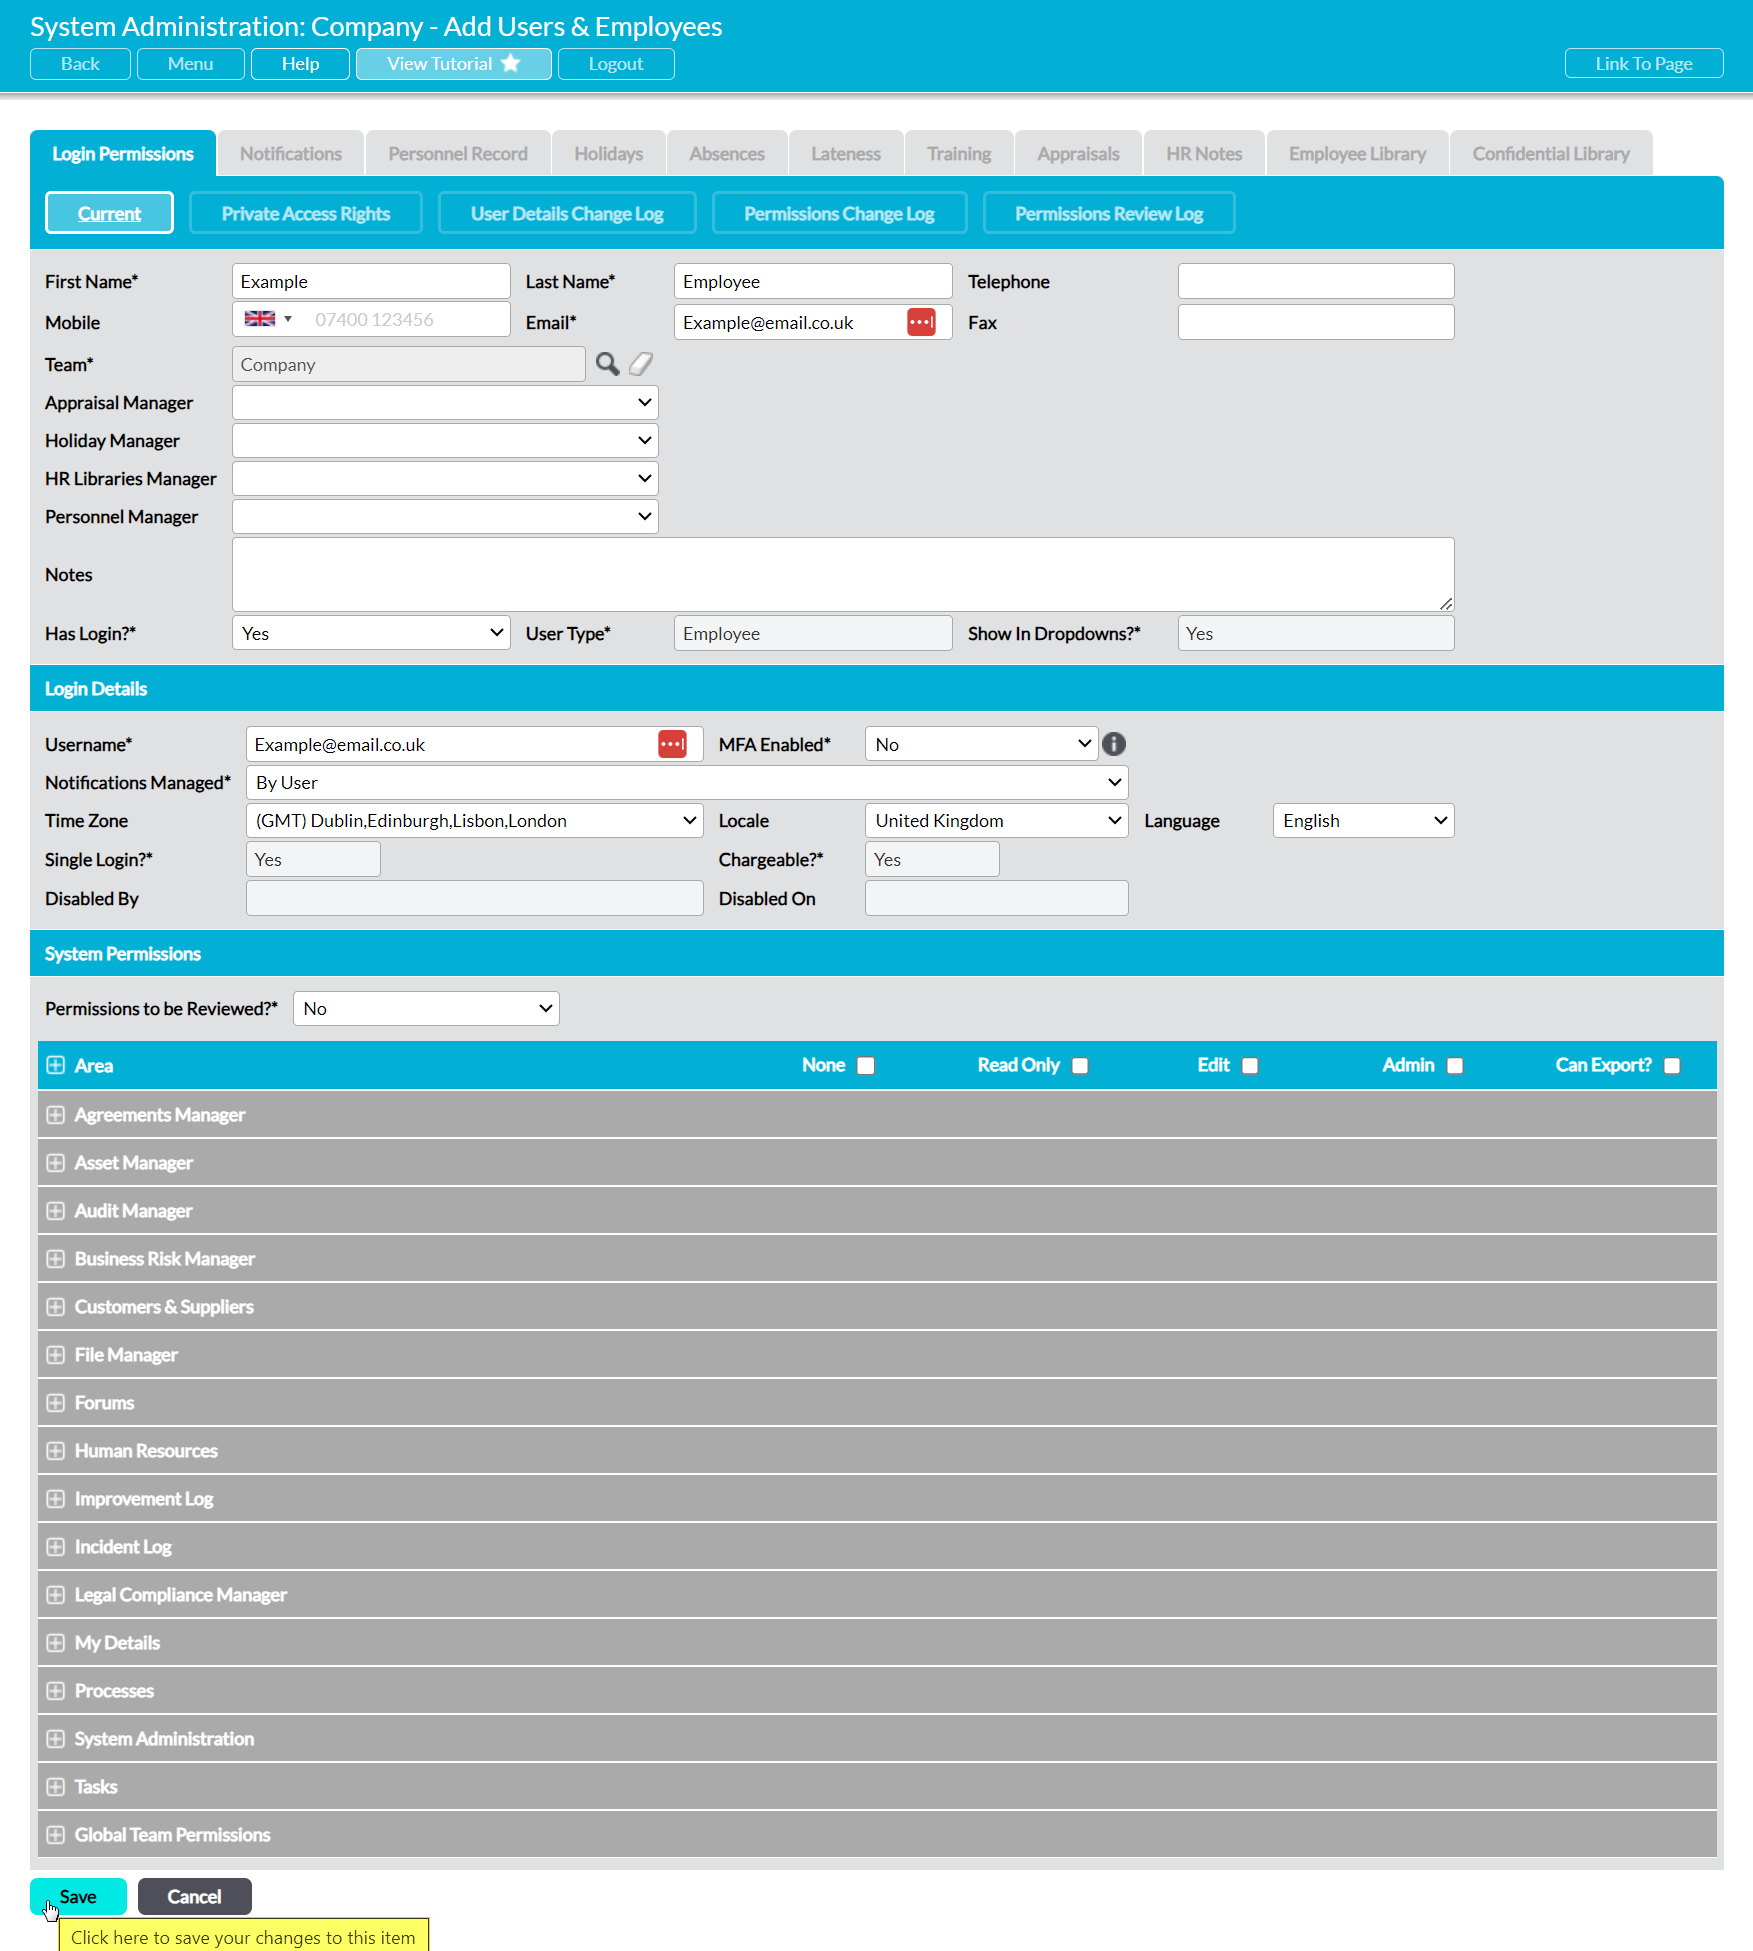
In both cases this will open a blank Add Users and Employees tab for you to populate. Up to fifteen fields will initially be available for you to complete:
First Name / Last Name* – enter the employee’s first and last names.
Telephone / Mobile / Fax – enter the employee’s main contact numbers.
Email* – enter the employee’s main contact email.
Team* – only available if Teams is enabled within your system. Use the magnifying glass icon to select the Team that the employee belongs to.
Appraisal Manager – only available if the Human Resources module is enabled within your system. Use the dropdown menu to identify who will be responsible for conducting the employee’s appraisals. Note that only the nominated Appraisal Manager can complete the manager sections of an appraisal, so this must be selected if you intend to use the Appraisals feature. Also note that Appraisal Managers can elect to receive notifications of the employee’s booked and expiring training (see Appraisal Managers and the Human Resources: Training user guide for more information).
Holiday Manager – only available if the Human Resources module is enabled within your system. Use the dropdown menu to identify the person who will be responsible for approving the employee’s holiday requests. Note that only the named user will be able to approve requests if this field is filled. Leave it blank to allow all users with ‘Admin’ permissions for Human Resources – Holidays to approve/reject the employee’s holiday requests.
HR Libraries Manager – only available if the Human Resources module is enabled within your system. Use the dropdown menu to give an appropriate user access to the individual’s Employee and Confidential Libraries. Note that this user does not need to have any Human Resources permissions, and will be able to add, edit, and delete folders and files from both Libraries. They will not be able to access any other HR tab, or any Libraries belonging to employees that they do not manage. In addition, all users with HR permissions will be able to access and manage the employee’s Libraries as normal even if a HR Library Manager has been set. Leave this field blank to limit access to the Employee/Confidential Library to those with permissions for Human Resources: Employee Libraries and Human Resources: Confidential Libraries. See HR Library Managers for more information.
Personnel Manager – only available if the Human Resources module is enabled within your system. Use the dropdown menu to give an appropriate user Read Only access to the individual’s Personnel Record. Note that this user does not need to have any Human Resources permissions, and will not be able to access any other HR tab or the Personnel Records of employees that they do not manage. In addition, all users with HR permissions will be able to access and manage the employee’s Personnel Record as normal even if a Personnel Manager has been set. See Personnel Managers – Give Shift Manager’s Access to their Employee’s Personnel Records for more information.
Notes – use this field to enter any applicable notes against the employee.
Has Login?* – use the dropdown to specify whether the employee will have their own login (chargeable user licence) to Activ. This field defaults to ‘No’, meaning that the employee will appear in dropdowns and their record can be managed in Activ, but that they will not be able to log into the system.
User Type* – automatically populated with ‘Employee’ and cannot be changed.
Show in Dropdowns?* – automatically populated with ‘Yes’ to confirm that the new employee will be listed in drop-down menus throughout Activ’s other modules. This field cannot be changed.
Enter the necessary basic details, and change the Has Login?* field to ‘Yes’.
Two further sections will become available:
- The Login Details panel, which allows you to configure the account’s basic settings.
- The System Permissions panel, which allows you to set module permissions for the employee (see System Permissions).
*****
Login Details
The Login Details panel records the user’s key system details, and consists of nine fields:
Username – enter a provisional Username for the employee. Note that this must be unique, and that the user will be able to change it when they validate their account. It is typically recommended that you enter the individual’s work email address as their username.
Notifications Managed* – use the dropdown to specify whether the user’s notifications will be configured by a System Administrator, or whether they can be controlled by the employee themselves. Note that the employee will not be able to edit their own notification settings if you select ‘By Administrator’.
Time Zone / Locale / Language – use these fields to set the employee’s time, locale, and language.
Single Login?* – automatically set to ‘yes’, meaning that only one login session can be active at any one time (i.e. only one user can be logged into the account at any time). This field cannot be changed.
Chargeable?* – automatically set to ‘yes’, meaning that you will be charged for the user. This field cannot be changed.
Disable On – an optional field that can be used to specify when the user account should automatically be disabled (preventing the user from logging in), if the user account has been created to provide temporary access. See Expiring User Logins: Automatically Disable a User on a Specified Date for more information.
Disabled On / Disabled By – automatically records who disabled the user (if they are disabled) and when the user was disabled.

*****
System Permissions
The System Permissions panel records the user’s permissions to each module within your system, and determines what areas of the system they will be able to view and modify. Each Area shown within the panel relates to a module within your system, and the Areas displayed will depend on the modules that are included within your package. Use the plus icon next to each Area to view the available permissions, and the Radio buttons to select the level of access the user should have (see System Permissions).
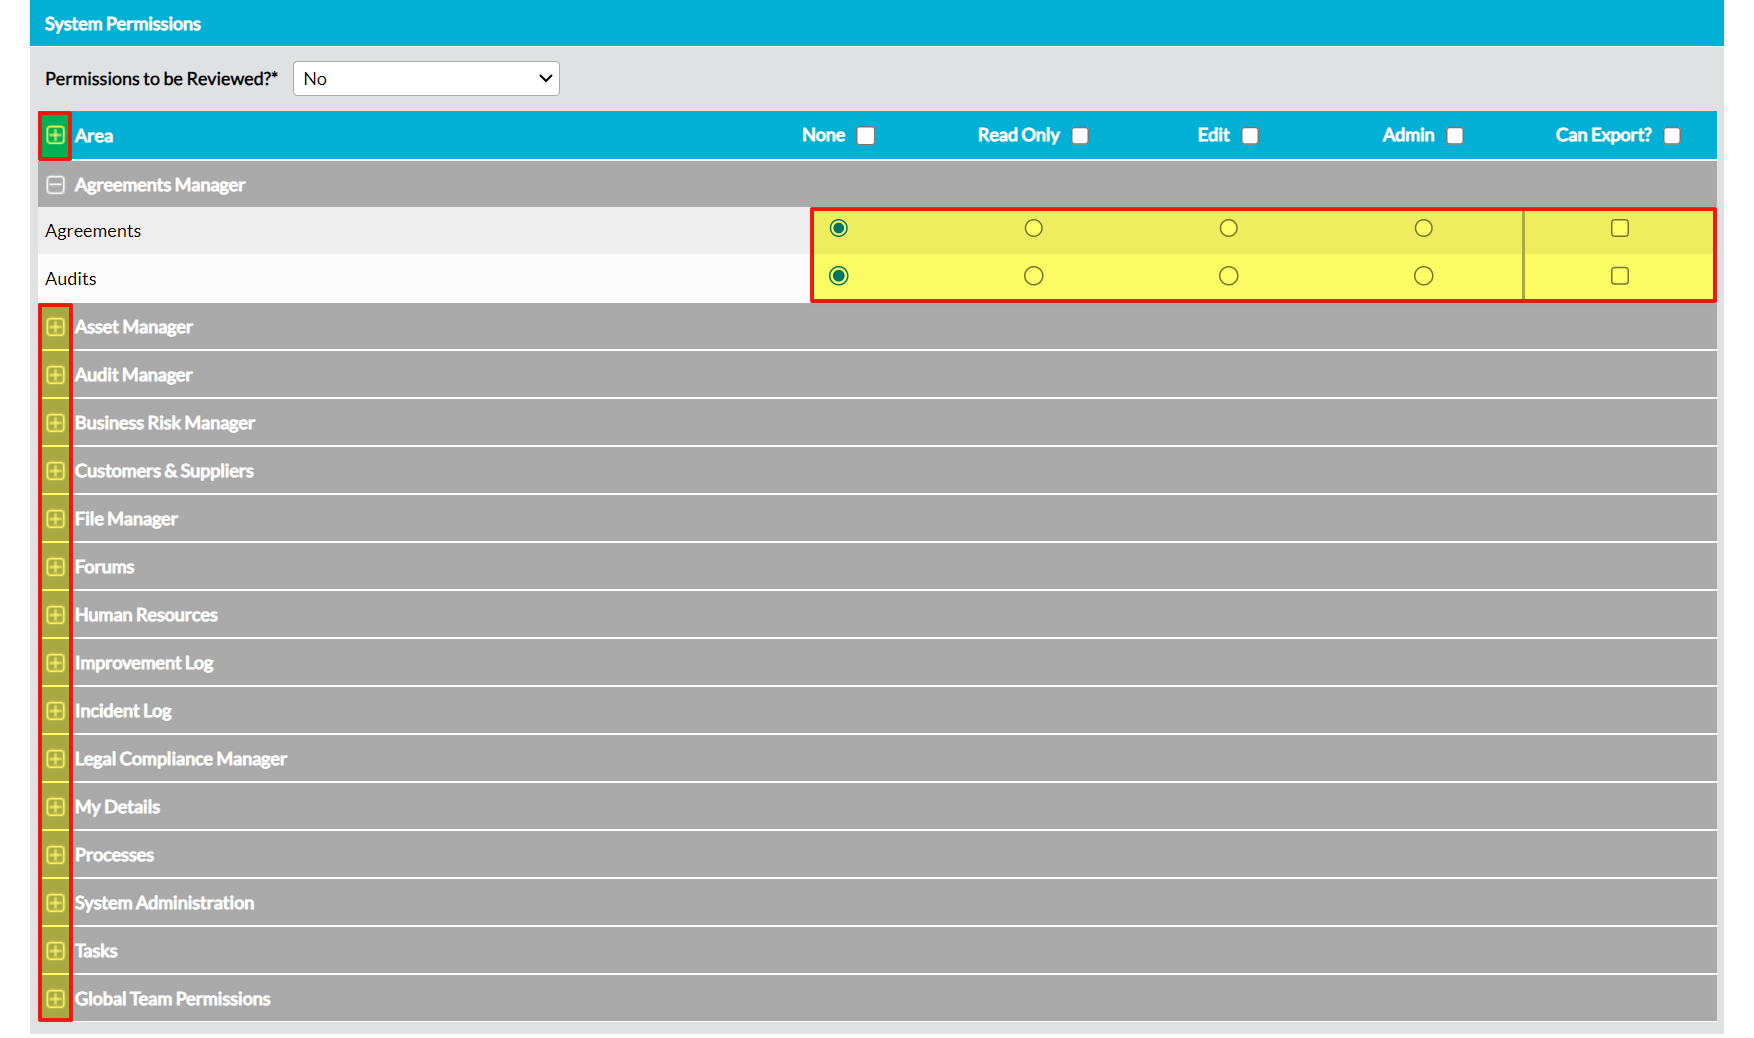
Activ also provides you with the option to schedule a one-off or repeating formal review of the user’s system permissions. This can be set up now, or at a later date (see Schedule a Formal Permissions Review).
Click on Save once you have finished entering the user’s account details.
If adding the user will require you to purchase a new Activ User Licence (i.e. take you over your inclusive user allowance), Activ will take you to a new page outlining your updated billing levels and asking you to confirm the addition. Once you have confirmed, you will be taken to the new user’s Login Permissions tab and will be able to complete the setup of their account.
