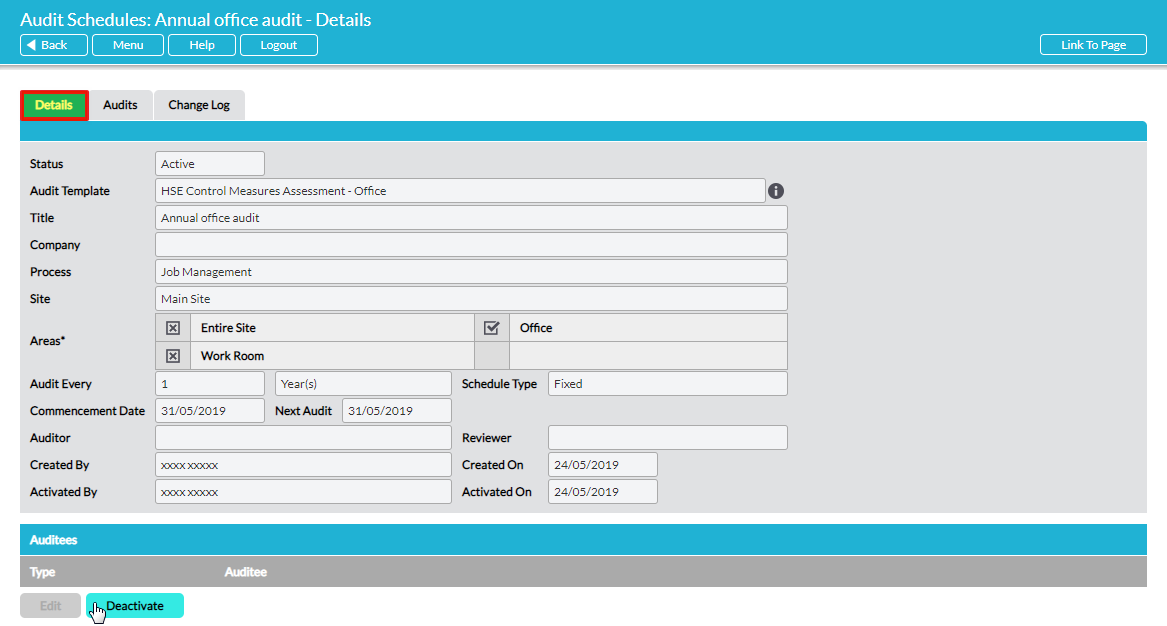
Audit schedules are listed on the Audit Manager – Schedules tab. To open a schedule, click on its Title in the list. The administrative properties of the schedule are displayed on its Details tab.
If the audit schedule is ‘Active’, you cannot change any of the schedule’s properties. If you wish to make any changes to an active audit schedule you must first deactivate the schedule. Click on Deactivate to do this:
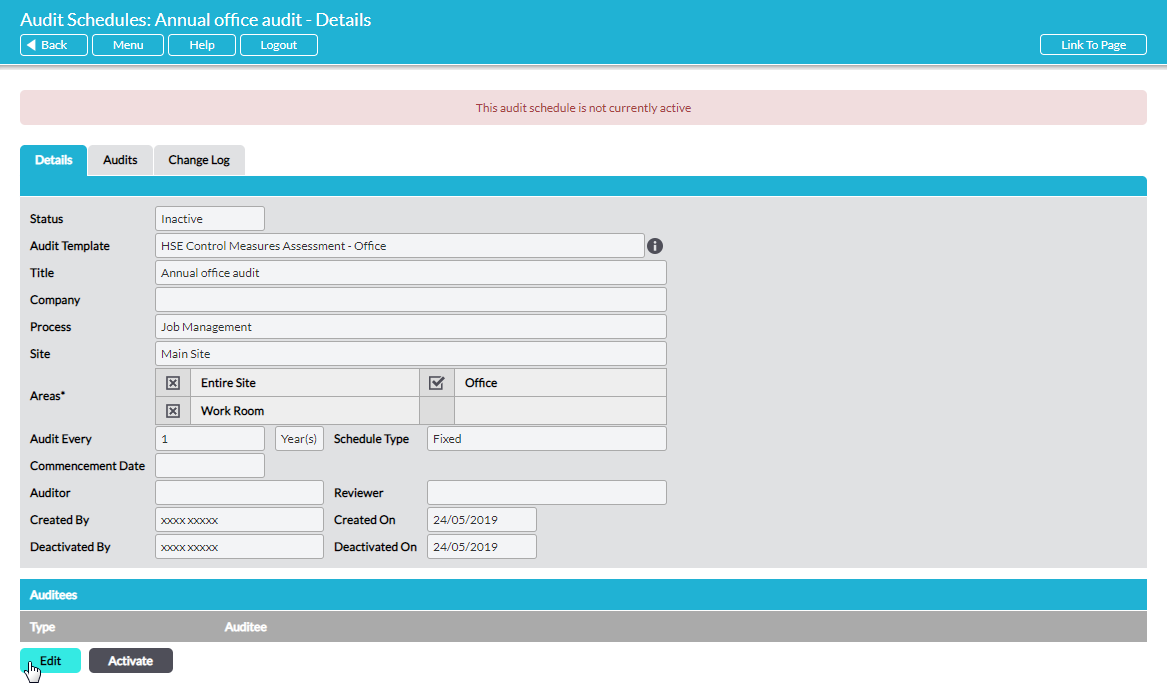
When you deactivate an audit schedule, all individual audits in the series that have not yet been started (i.e. are at status ‘Scheduled’) will be withdrawn and deleted from the Register (and will no longer be listed on the schedule’s Audits tab). Any audits in the series that are ‘In Progress’, ‘Awaiting Review’ or have been ‘Reviewed’ will be unaffected and will remain on the Register (and the schedule’s Audits tab).
When an audit schedule is ‘Inactive’ you can click on Edit to make changes to it:
Make the necessary changes and, optionally, enter any Update Notes as an accompanying commentary to the changes that you have made. The notes you enter here will be recorded on the audit schedule’s Change Log tab.
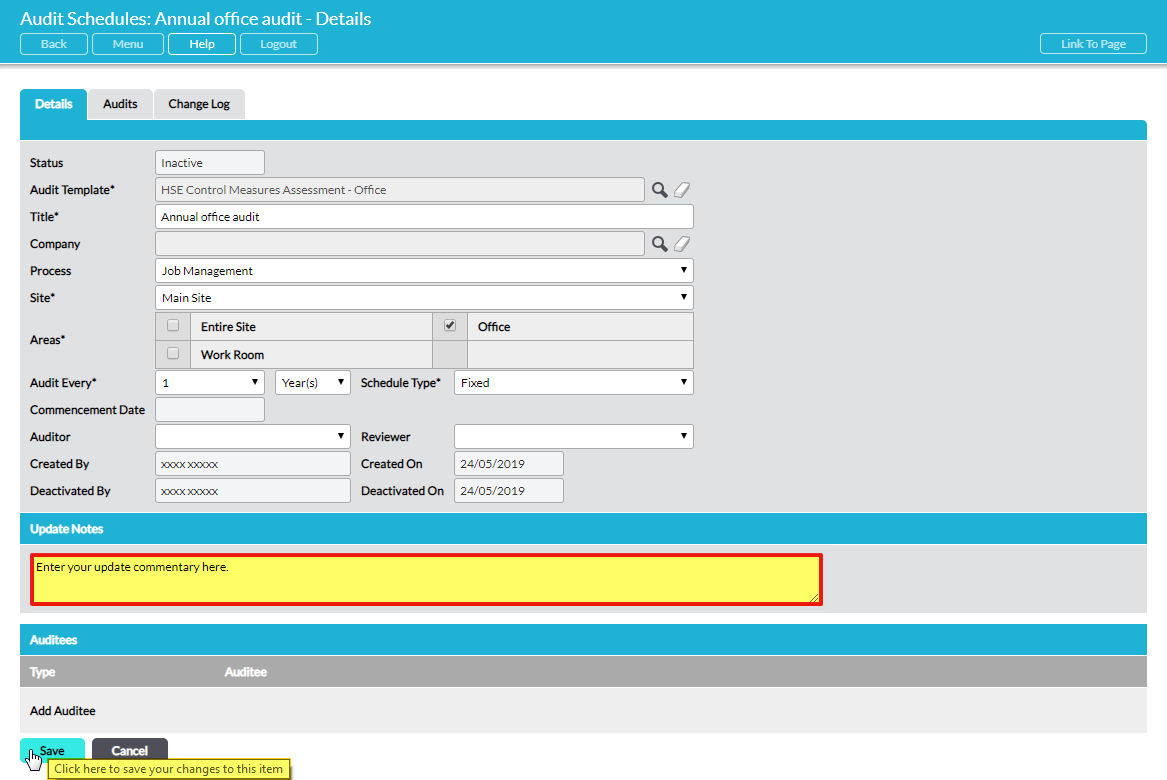
Click on Save to complete the editing process.
To (re-)activate an audit schedule click on the Activate button:

Select the Commencement Date and then click on Save.
When an audit schedule is activated (or reactivated), Activ automatically generates the series of audits over a three-year horizon, with reminders to the auditor as each audit’s scheduled date approaches. The audits are listed individually on the Register tab and can also be viewed on the schedule’s Audits tab (see View the Details of an Audit Schedule)
