The audit workflow is a 3-step process: 1 – Schedule, 2 – Conduct, 3 – Review. This article deals with Step 2.
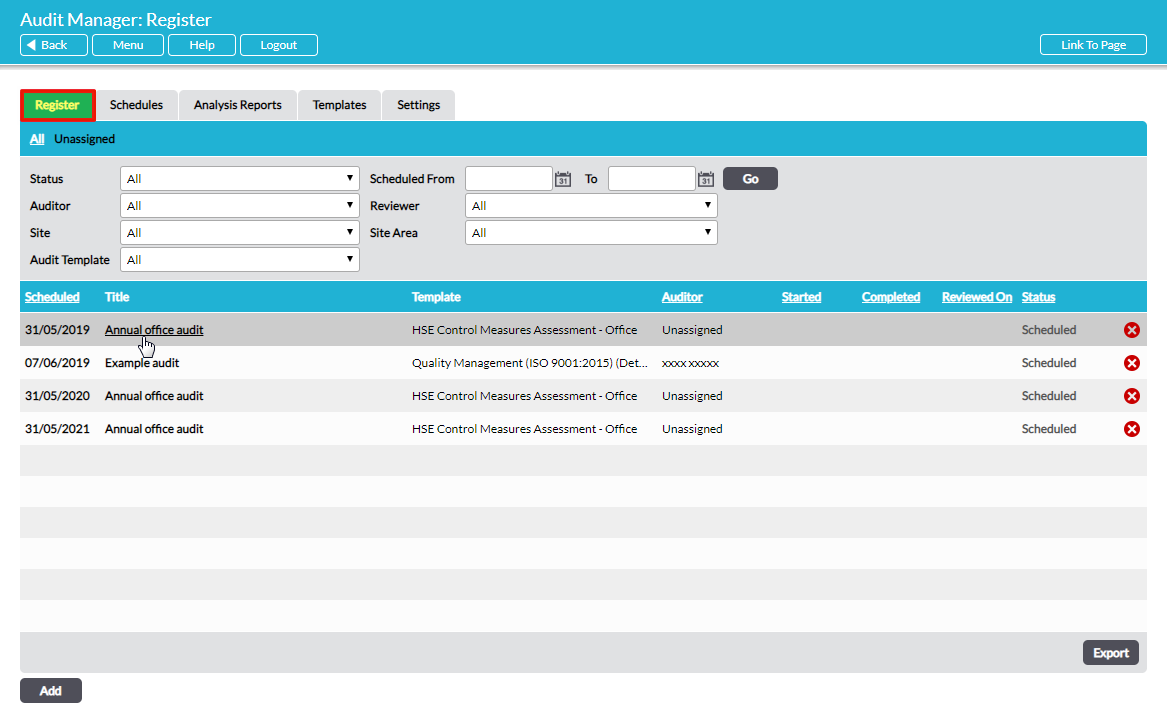
All audits, past, present and future, are listed on the Register tab within Audit Manager. If necessary, you can filter the Register using one or more of the criteria at the top of the tab. Open an audit by clicking on its name in the Title column:
The audit opens with information housed on two tabs: Properties and Change Log. The Properties tab displays the key properties of the audit with the current status showing as ‘Scheduled’. If necessary, you can amend any of the properties by clicking on Edit, making the changes, and then clicking Save. See Edit / Modify an Audit’s Properties for guidance. The Change Log tab displays the automatically-maintained record of events associated with this particular audit since it was created (scheduled). See View an Audit’s Change Log.
On the Properties tab, if you would like to preview the audit questions ahead of starting the audit, you can click on Preview Audit, which generates a PDF of the key audit properties and the list of questions:
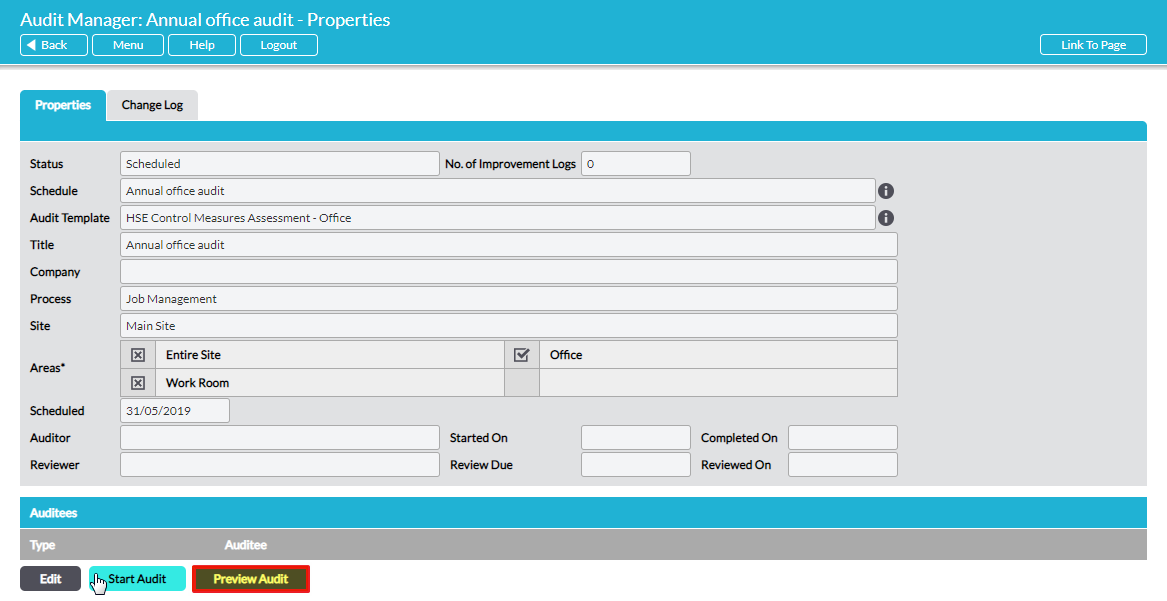
The audit is started by clicking on Start Audit. This triggers the system to call up the current version of the specified audit template to create the audit form for this audit. If the audit template includes links to reference material stored within Activ, such as relevant files or processes, Activ’s automatic version control ensures that the current version of the file/process is drawn into the audit form at the point that the audit is Started.
The audit’s status is now ‘In Progress’ and only the named Auditor can edit it.
Several new tabs are added to the audit to automatically record associated information that may be generated as you conduct the audit. The Checklist and Findings tab opens, displaying the list of questions. The workflow for the audit depends on the format of the audit template used: ‘Simple’ or ‘Advanced’. Each is covered in turn below.
Conduct an Audit – Simple Audit Formats
At the top of the audit form, the Audit Summary field provides the option to enter a free-text commentary on the audit, at any point. Some auditors like to provide an executive summary of the audit report in this field.
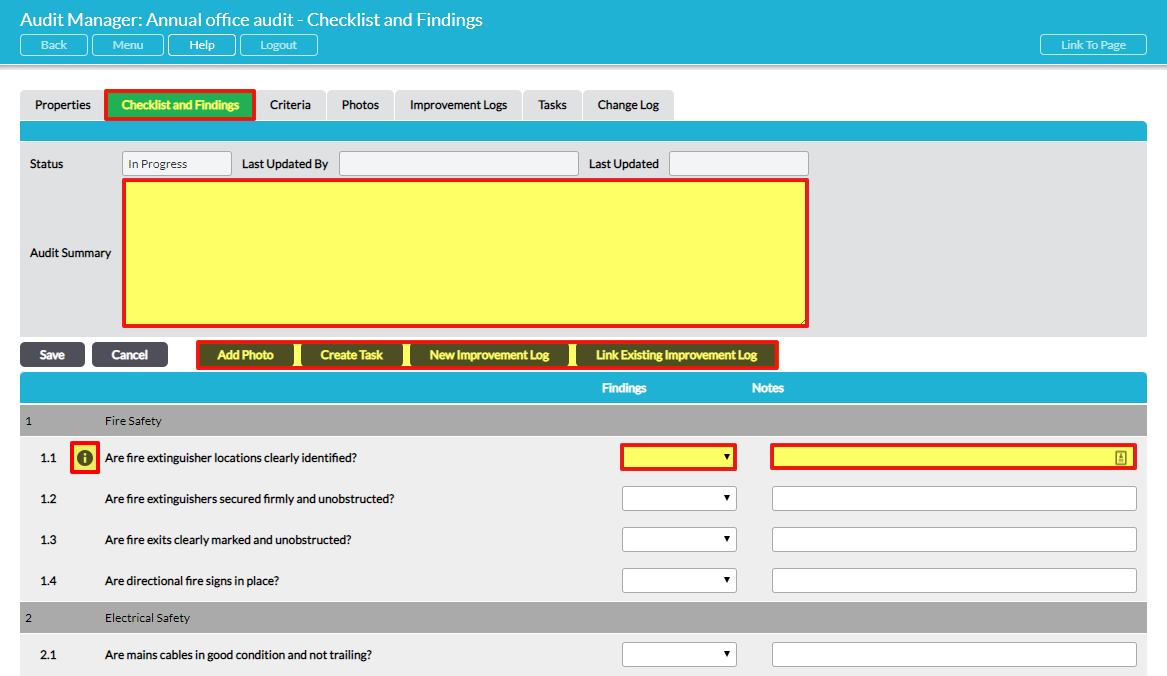
If there is an “i” icon to the left of any question, this indicates that there are accompanying guidance notes for the auditor which can be viewed by hovering your mouse over the icon.
For each question, select the appropriate Finding from the drop-down menu and record any Notes in the field to the right.
Four action buttons at the top and bottom of the form allow you to quickly take action as you conduct the audit and record your findings:
Add Photo – click on this to upload photos (in batches of up to 5 at a time) as evidence against the audit
Create Task – as you conduct the audit you may wish to create a Task for yourself or somebody else. Click on the Create Task button to do this. If you create a Task for somebody else, they will receive an immediate alert e-mail and the Task will appear on their Dashboard/To Do List on the Activ Home screen. See Create a Task from an Audit.
New Improvement Log – raise a new Improvement Log associated with any audit. Clicking on New Improvement Log opens a new window where you can enter the relevant details and when you Save you will be returned to the audit so you can continue. See Raise a New Improvement Log Associated with an Audit.
Link Existing Improvement Log – efficiently link an audit to an existing Improvement Log without having to leave the audit. Clicking on Link Existing Improvement Log opens a new window where you can select the relevant Improvement Log and when you Save you will be returned to the audit so you can continue. See Link an Audit to an Existing Improvement Log.
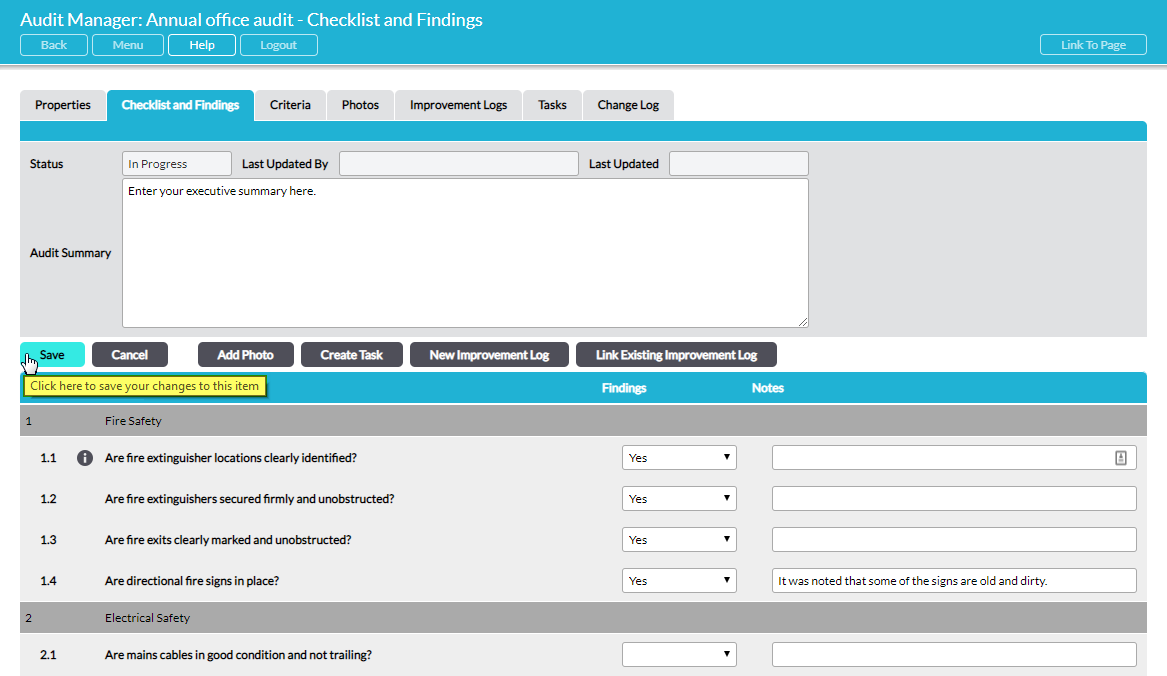
You can click on Save at any point to save your responses (findings) so far:
*****
When you have completed all the questions that you intend to assess against in this audit, you may wish to enter a commentary into the Audit Summary field at the top of the form.
The saved audit’s Status remains at ‘In Progress’ until you request the audit to be reviewed. Review is the next step in the audit workflow. See Step 3 – Review / Sign Off an Audit.
Conduct an Audit – Advanced Audit Formats
At the top of the advanced audit’s Checklist and Findings page, the Audit Summary field provides the option to enter a free-text commentary on the audit. Some auditors like to provide an executive summary of the audit report in this field. Click the Edit Audit Summary button at any point to use this field.
To access any question, click on it:

The full question is displayed on its own page alongside any reference information. Click on Edit. The question opens so you can record your findings and any supporting evidence:
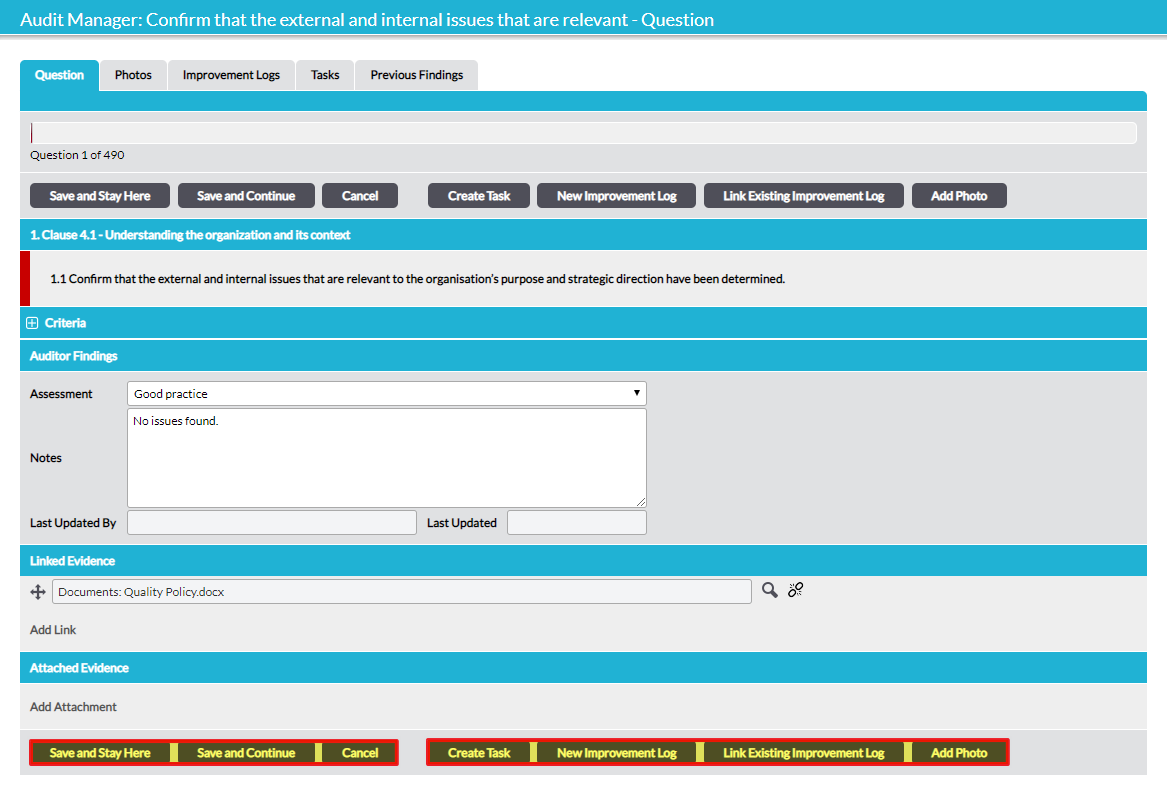
A brief guide to each of the fields follows:
Criteria – (only present if the audit template has specified criteria for this particular question). Click on the heading to view the assessment criteria associated with this question.
Guidance Notes – (only present if the audit template has specified guidance notes for this particular question). Click on the heading to view the guidance notes provided for this question.
Reference Material – (only present if the audit template has specified reference material for this particular question). Click on the heading to view links to any relevant reference material that is associated with this question, such as files and processes. Remember that Activ’s automatic version control ensures that any file or process that you see is the current version at the moment in time that the audit was “Started”. This ensures integrity of data for any given audit.
Auditor Findings – in this section, select your response (finding) from the options in Assessment. If required, Notes can be entered too.
Linked Evidence – use this section to link to evidence to support your findings. Create hyperlinks to items in other Activ modules (including files, processes, legal compliance assessments, companies, improvement logs, etc) or to any external URL. Simply click on Add Link to create a new hyperlink. You can re-order the links by dragging and dropping (hover over the cross to the left of the linked items, click and drag). IMPORTANT: when you link to files, processes and improvement logs within Activ, the link will be maintained to the version that was current at the time the link was created. If you subsequently edit a linked file, process or improvement log (and thereby generate a newer version of it in Activ), the audit form will maintain the link to the version that was current at the time the link was created. This ensures that your audit report retains its integrity as a record of assessment at that moment in time.
Attached Evidence – click on Add Attachment to upload files from outside Activ to provide supporting evidence for your findings.
Add Photo button – if your evidence is a photograph or other image, you can use the Add Photo feature instead of Add Attachment. This will upload your photo(s) to a viewable gallery. Photos are also reproduced in full in the PDF audit report, whereas Linked/Attached Evidence is simply referenced as a hyperlink within the PDF report. Click on Add Photo to open a window where you can choose up to 5 image files at a time to upload, and give each a name in the Summary field. Remember to click on Save.
Buttons at the top and bottom of the page allow you to navigate:
Save and Stay Here – saves your work, closes the question for editing and displays the page in view-only mode.
Save and Continue – saves your work and navigates to the next question in the list, with the question ready and open in ‘edit’ mode.
Click Cancel at any time to close the question for editing without saving any changes and display the question in view-only mode.
Three further buttons at the top and bottom of the form allow you to quickly take action as you conduct the audit and record your findings:
Create Task – as you conduct the audit you may wish to create a Task for yourself or somebody else. Click on the Create Task button to do this. If you create a Task for somebody else, they will receive an immediate alert e-mail and the Task will appear on their Dashboard/To Do List on the Activ Home screen. See Create a Task from an Audit.
New Improvement Log – raise a new Improvement Log associated with any audit question without having to leave the question. Clicking on New Improvement Log opens a new window where you can enter the relevant details and when you Save you will be returned to the audit question so you can continue your audit. See Raise a New Improvement Log Associated with an Audit.
Link Existing Improvement Log – efficiently link an audit question to an existing Improvement Log without having to leave the question. Clicking on Link Existing Improvement Log opens a new window where you can select the relevant Improvement Log and when you Save you will be returned to the audit question so you can continue your audit. See Link an Audit to an Existing Improvement Log.
When in view-only mode, you can systematically navigate through the questions using the Next and Previous buttons at the top and bottom of the page. Return to the Checklist and Findings tab at any time using the Back to Checklist button.
*****
If your advanced format audit is very long and you wish to access specific questions only, rather than navigating systematically through the question pages to find your next desired question, you can use the Back To Checklist button to return to the list of questions. From here, select another question in the list either to view (click on the question), or edit (click on the Edit (pencil) icon to its right). See Efficiently Navigate Through an Advanced Format Audit.
*****
When you have completed all the questions that you intend to assess against in this audit, you may wish to enter a commentary into the Audit Summary field on the Checklist and Findings tab. If so click on Edit Audit Summary, make any changes and then Save.
The audit’s Status remains at ‘In Progress’ until you request the audit to be reviewed. Review is the next step in the audit workflow. See Step 3 – Review / Sign Off an Audit.
