The audit workflow is a 3-step process:
- Schedule – set up either a one-off audit or create a scheduled series of audits
- Conduct – work through the audit, record your findings and evidence
- Review – review the completed audit and sign it off
Set Up a One-Off Audit
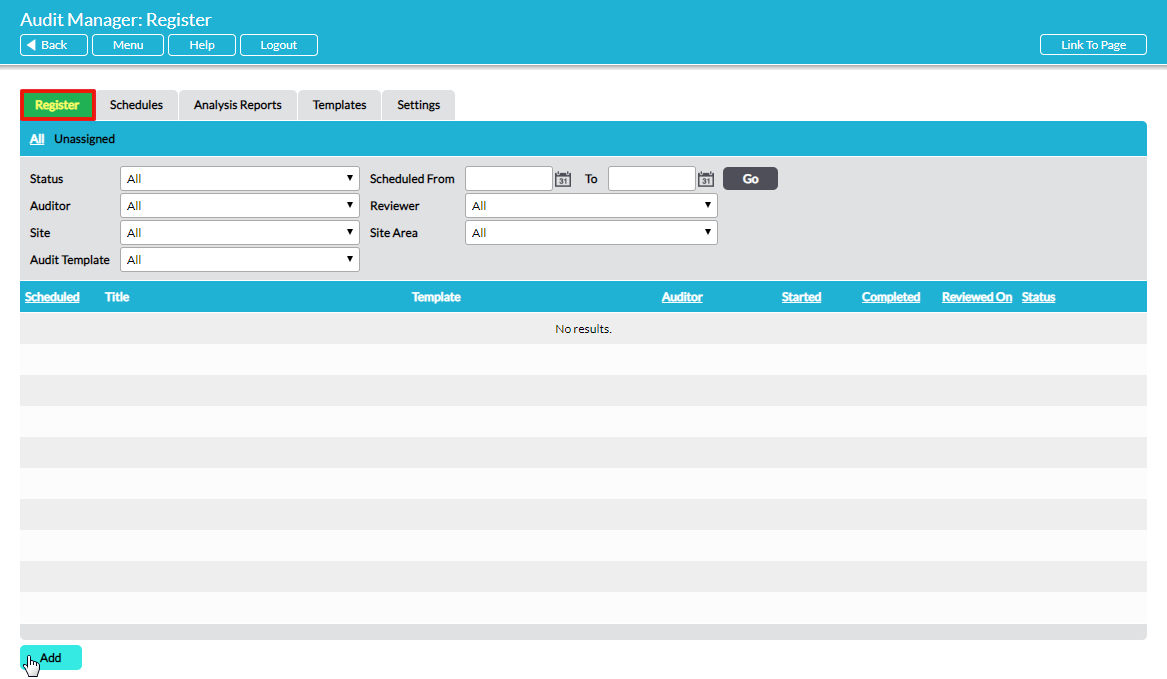
To set up a new one-off audit, go to the Register tab of Audit Manager where all audits, past, present and future, are listed. Click on Add:
A new blank audit Properties form opens. Complete the available fields:
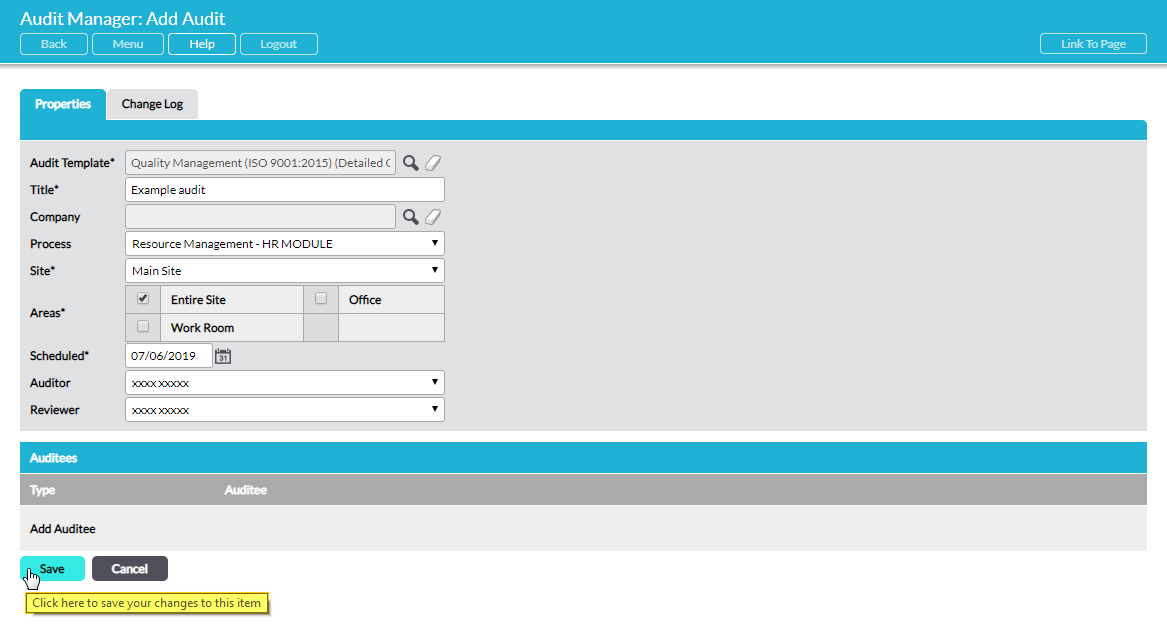
Fields marked with an asterix * are mandatory.
Audit Template* – click on the magnifying glass to the right of this field to open a new window listing available audit templates. Select the template by clicking the radio button next to it.
Title* – this is pre-populated with the name of the audit template that you have selected, but you can edit this to something more suitable by over-typing it.
Company – (only present if you have Activ’s Customers & Suppliers module) If your audit pertains to a company in your Customers & Suppliers database you can use the magnifying glass here to select the relevant company. This audit will be linked to the individual company’s file within your Activ system and can be viewed from there as well as in Audit Manager.
Process – the option to specify the Process that the audit will be conducted on. The options available in this drop-down list are configurable via the Settings tab within Audit Manager. See Audit Manager Settings – Configure Drop-Down Menus in Audit Manager.
Site* – select the Site that the audit will be conducted on. The options available in this drop-down list are configurable via the Settings tab within Audit Manager. See Audit Manager Settings – Configure Drop-Down Menus in Audit Manager.
Areas* – select the area(s) of the site that will be audited. The options available for selection are configurable via the Settings tab within Audit Manager. See Audit Manager Settings – Configure Drop-Down Menus in Audit Manager.
Scheduled* – select the scheduled date for the audit
Auditor – the option to assign a named individual to conduct the audit. If you select a person other than yourself to be the auditor they will be automatically alerted by e-mail, provided they have selected the appropriate options in My Details – Notifications (see Audit Manager Alerts and Reminders). You can add the auditor’s name later on if required. If the field is blank at the point that the audit is started, it will be automatically populated with the name of the person conducting the audit.
Reviewer – the option to assign a named individual to review the audit. If you select a person other than yourself to be the reviewer they will be automatically alerted by e-mail, provided they have selected the appropriate options in My Details – Notifications. (see Audit Manager Alerts and Reminders). You can add the reviewer’s name later on if required.
Started On, Completed On, Review Due, Reviewed On – (not visible when audit is initially being set up) automatically populated with the event dates as they occur.
Auditees – the option to list the auditee(s) for the audit. Click on Add Auditee to select or enter auditee names. You can add the auditees later on, when the audit is started, if required.
Click on Save. Your audit has been set up and the current status of the audit is shown at the top of the form: ‘Scheduled’. This completes step 1 of the audit workflow.
Set Up a Scheduled Series of Audits
If you have an audit plan with regular audits of a particular kind, you can efficiently set up a series of regular audits. You specify the audit template and frequency and Activ will automatically generate the series of audits over a 3-year horizon, with reminders to the auditor as each audit’s scheduled date approaches.
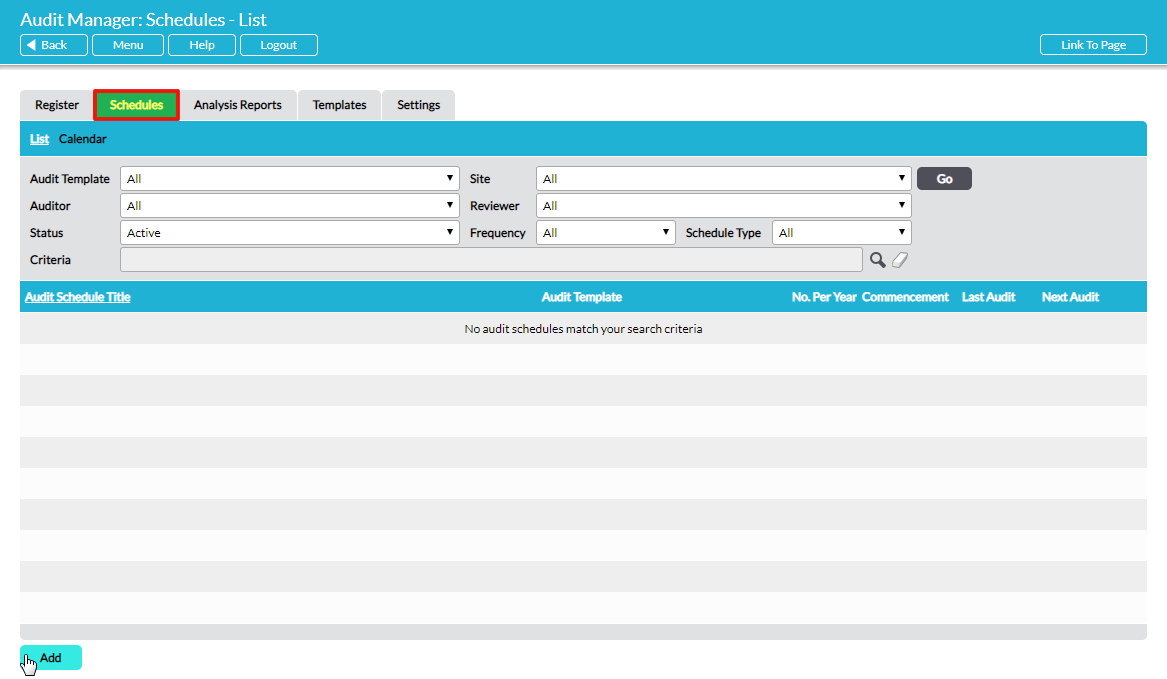
To set up a new scheduled series of audits, go to the Schedules tab of Audit Manager where all audit schedules are listed. Click on Add:
A new blank audit schedule Details form opens:
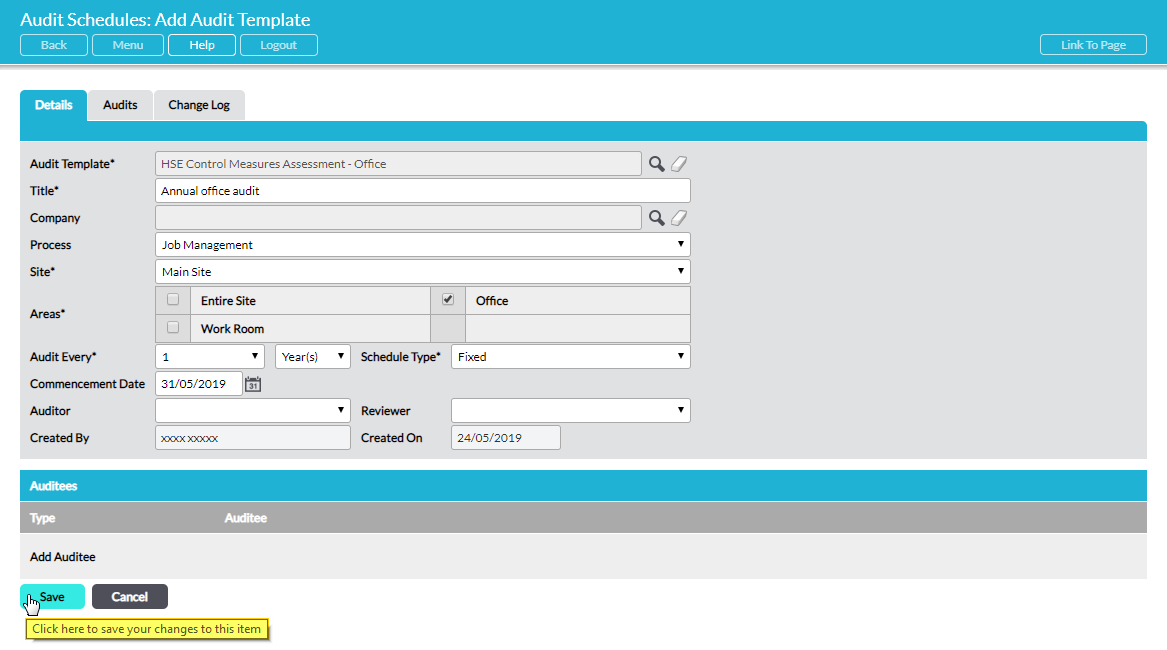
Fields marked with an asterix * are mandatory.
Audit Template* – click on the magnifying glass to the right of this field to open a new window listing available audit templates. Select the template by clicking the radio button next to it.
Title* – this is pre-populated with the name of the audit template that you have selected for this schedule, but you can edit this to something more suitably descriptive of the schedule by over-typing it.
Company – (only present if you have Activ’s Customers & Suppliers module) If your audit schedule pertains to a company in your Customers & Suppliers database you can use the drop-down menu to select the relevant company. Audits in this schedule will be linked to the individual company’s file within your Activ system and can be viewed from there as well as in Audit Manager.
Process – the option to specify the Process that this schedule’s audits will be conducted on. The options available in this drop-down list are configurable via the Settings tab within Audit Manager. See Audit Manager Settings – Configure Drop-Down Menus in Audit Manager.
Site* – select the Site that this schedule’s audits will be conducted on. The options available in this drop-down list are configurable via the Settings tab within Audit Manager. If the audits in the schedule pertain to a number of different sites, it is advisable to create a catch-all Site in Settings called “Unassigned” which can be used when setting up such a schedule. Then, once the audit schedule has been created and the series of associated audits have been generated, each audit can subsequently be individually edited to specify the correct site. See Audit Manager Settings – Configure Drop-Down Menus in Audit Manager.
Areas* – select the area(s) of the site that will be audited. The options available for selection are configurable via the Settings tab within Audit Manager. If the audits in the schedule pertain to a number of different site areas, it is advisable to create a catch-all Area in Settings called “Unassigned” which can be used when setting up such a schedule. Then, once the audit schedule has been created and the series of associated audits have been generated, each audit can subsequently be individually edited to specify the correct site area. See Audit Manager Settings – Configure Drop-Down Menus in Audit Manager.
Audit Every* – specify the desired audit frequency using the two fields here: numeric plus ‘Week(s)’, ‘Month(s)’ or ‘Year(s)’.
Schedule Type* – select ‘Fixed’ or ‘Flexible’. If ‘Fixed’ is selected, next audits will be scheduled at fixed intervals regardless of when the previous audit in this series actually took place. If ‘Flexible’ is selected, whenever an audit in this series is conducted, a next audit will be scheduled based on the actual completed date and the interval given in Audit Every. For example, if Audit Every were set to 3 Months, when an audit in this schedule is completed (review requested) a next audit will be scheduled 3 months from that date (the date the review was requested).
Commencement Date – select the date that you wish the scheduled series of audits to commence on. The first audit in the series will be scheduled for this date, with subsequent audits in the series being scheduled according to your specified intervals. If you do not enter a date here, the audit schedule will not be activated and no audits will be scheduled. You can activate it later on by entering a date in this field. See Edit / Modify / Activate / Deactivate a Scheduled Series of Audits (Audit Schedule).
Next Audit – (not visible when audit is initially being set up) once a Commencement Date has been entered and saved, this field shows the date of the next audit according to the schedule.
Auditor – the option to assign a named individual to conduct all the audits in this series. If you select a person other than yourself to be the auditor they will be automatically alerted by e-mail, provided they have selected the appropriate options in My Details – Notifications. See Audit Manager Alerts and Reminders. You can edit the properties of any individual audit that is generated from this series to specify an auditor for that particular audit if you wish.
Reviewer – the option to assign a named individual to review all the audits in this series. If you select a person other than yourself to be the reviewer they will be automatically alerted by e-mail, provided they have selected the appropriate options in My Details – Notifications. See Audit Manager Alerts and Reminders. You can edit the properties of any individual audit that is generated from this series to specify a reviewer for that particular audit if you wish.
Created By, Created On, Activated By, Activated On – (not visible when audit is initially being set up) automatically populated with the event details as they occur.
Auditees – the option to list the auditee(s) for the scheduled series of audits. Click on Add Auditee to select or enter auditee names. You can add the auditees to individual audits generated from this series later on if required.
Click on Save. Your audit schedule has been created and the current status of the schedule is shown at the top of the form in Status: ‘Active’ if a Commencement Date has been entered, or ‘Inactive’ if no Commencement Date has been entered.
If the audit schedule is ‘Active’, the series of audits will be automatically scheduled over a three-year horizon and are now listed individually on the Register tab. You can also see all audits associated with this schedule on the schedule’s Audits tab:
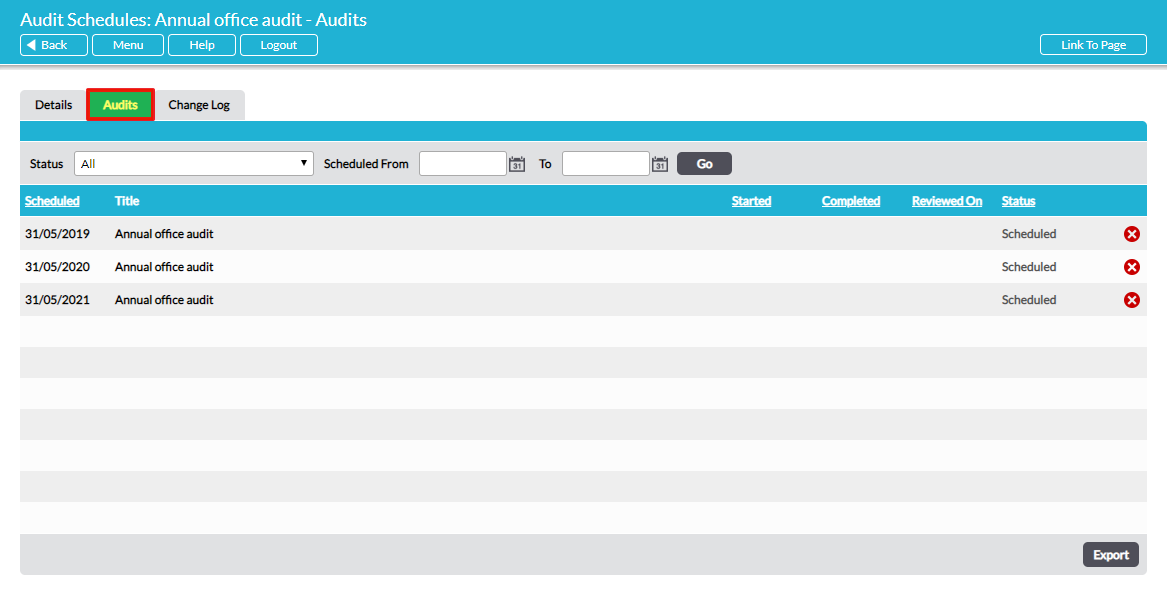
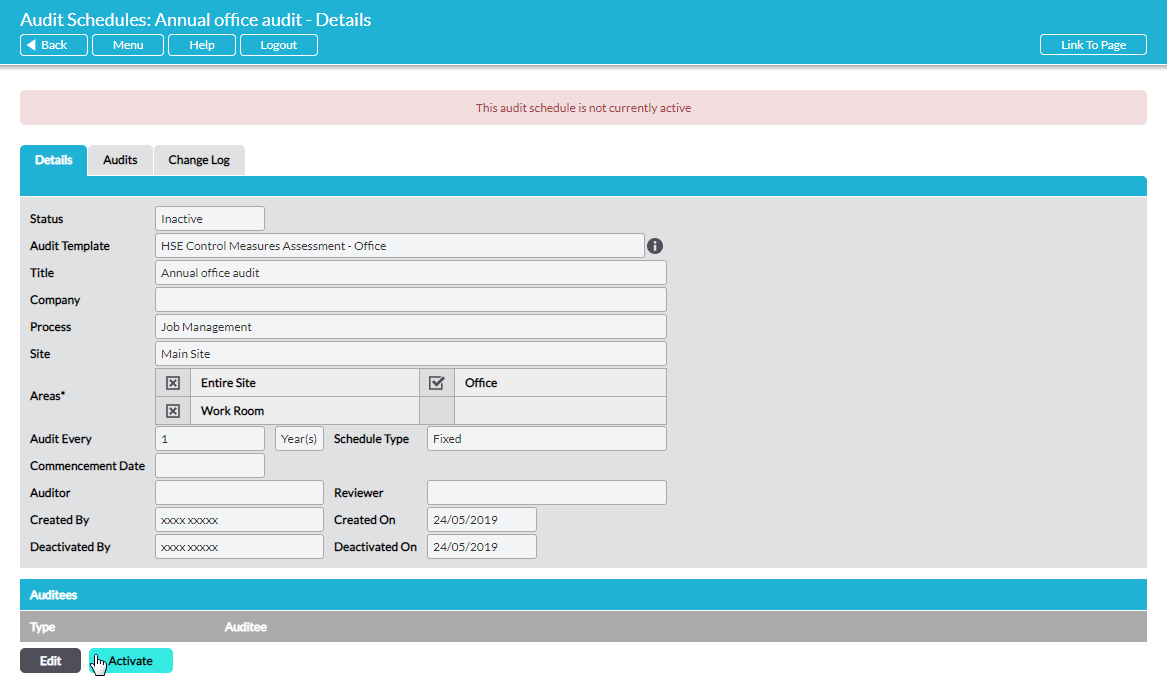
If the audit schedule is ‘Inactive’, the schedule is dormant and no audits are automatically scheduled. To activate the series of audits, a Commencement Date must be entered. The Activate button provides a shortcut to the Commencement Date field:
Enter the Commencement Date and Save. The audit schedule is now ‘Active’. The series of audits will be automatically scheduled over a three-year horizon and are now listed individually on the main Register tab and also on the audit schedule’s Audits tab. For example, if you have specified 1 audit every year, 3 audits will be added to the Register. If you have specified 1 audit every month, 36 audits will be added to the Register, etc.
This completes the process of setting up a new scheduled series of audits. Next is Step 2 – Conduct an Audit.
