There are seven sets of parameters in Audit Manager that you configure for your own organisation via the Settings tab.
Three parameters are used when setting up (scheduling) an audit. These are:
- the Site to be audited e.g. Head Office;
- the Area within the Site to be audited e.g. Entire Site; and
- the Process to be audited.
Three parameters are used in designing audit templates. These are:
- the Criteria Categories that will be audited against e.g. a Standard;
- the individual Criteria that will be audited against e.g. a clause in the Standard; and
- the Response Types available for selection in the audit template e.g. Yes/No
In Review Timeframe, you specify the timeframe (number of days) within which an audit should be reviewed after it is completed.
Full instruction in configuring each of the seven items in Settings is given below.
SITES – used when scheduling audits
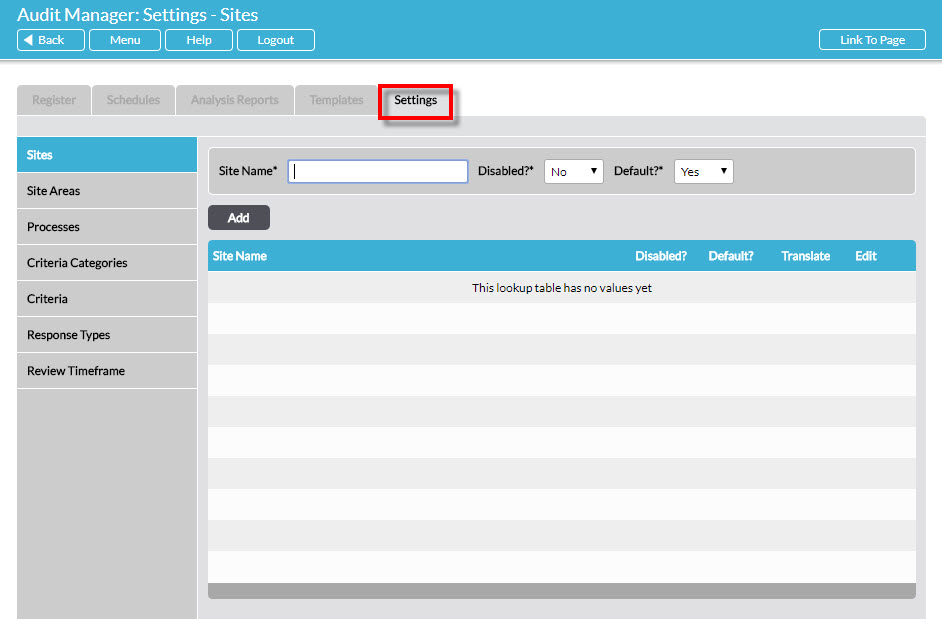
When a user sets up (schedules) a new audit, they must specify the Site that the audit will be conducted on. The Site is selected from a drop-down menu, configured by you in Settings.
To add a new Site, select the Sites item from the menu on the left. Type the new Site’s name in the Site Name* field at the top of the page. Also select whether the Site is to be Disabled?* (meaning it is not available for selection by users) and whether it is to be the Default?* (the Site that is selected by default when any new audit is scheduled).
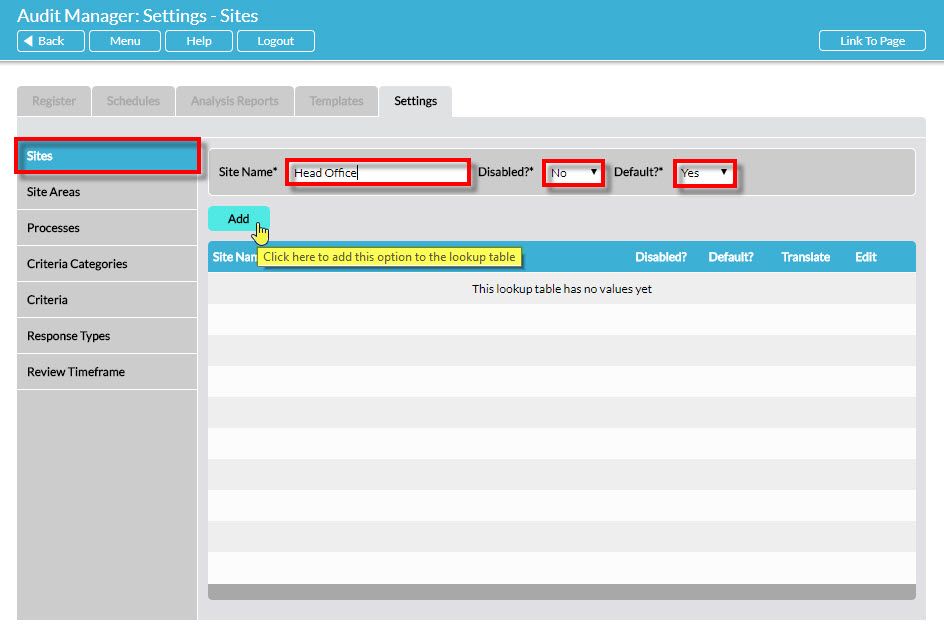
Click on Add to complete the addition of the Site. The newly-added Site is now displayed in the list.
To edit a Site in the list, click on the Edit (pencil) icon to its right:
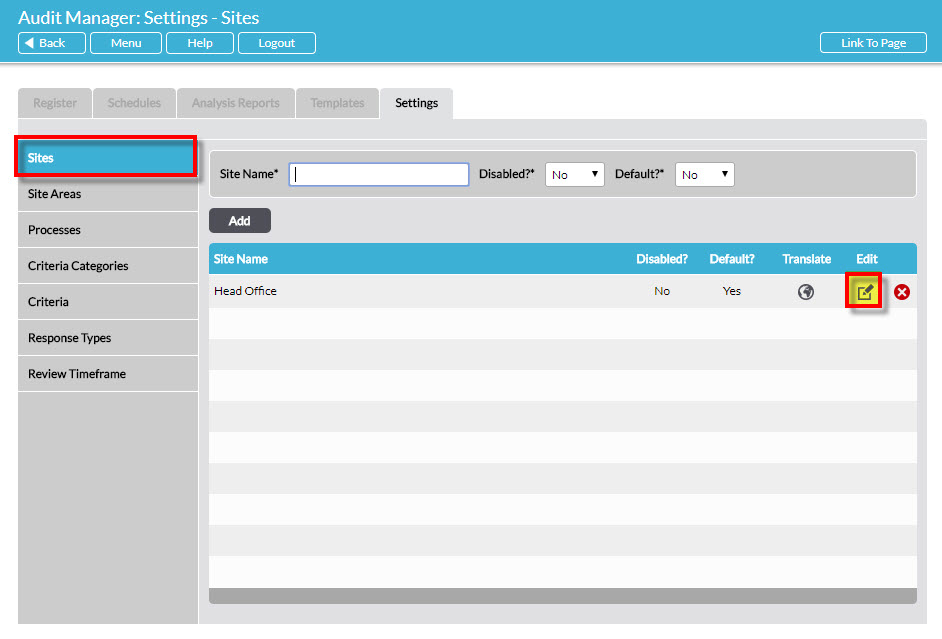
Make the changes in the fields at the top of the page, and click Save.
To delete a Site from the list, click on the Delete (red cross) icon to its right:
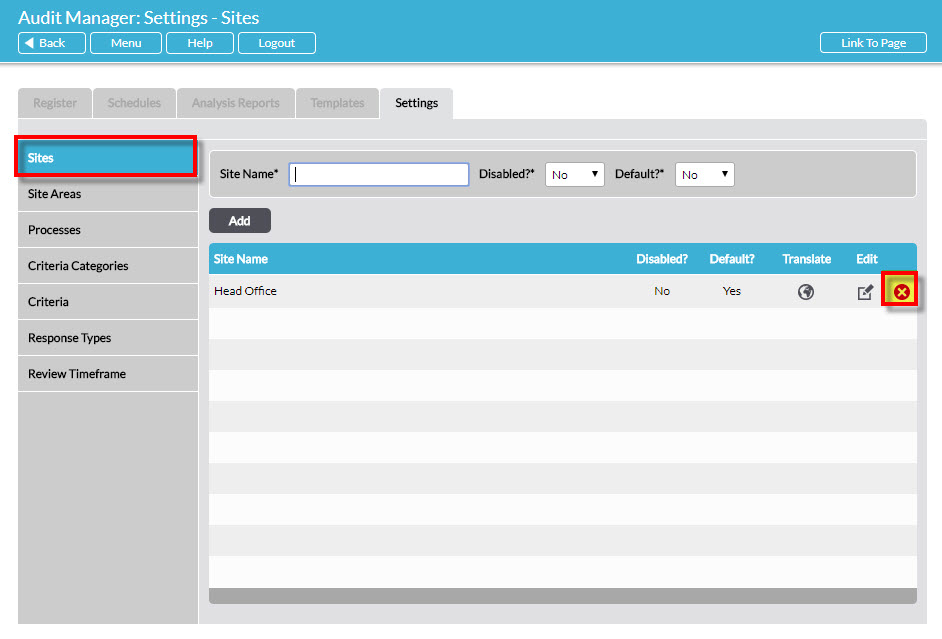
You will not be able to delete a Site that has already been used in an audit. If you wish to remove the Site from drop-down menus and prevent it being selected in future you can disable it instead.
SITE AREAS – used when scheduling audits
When a user sets up (schedules) a new audit, they must specify the Site that the audit will be conducted on and then select the relevant Area within that Site, e.g. Warehouse, Office, etc. The Site Area is selected from a drop-down menu, configured by you in Settings.
To add a new Site Area, select the Site Areas item from the menu on the left. At the top of the page select the relevant Site and then type the name of the new Site Area* below. Also select whether the Site Area is to be Disabled?* (meaning it is not available for selection by users) and whether it is to be the Default?* (the Site Area that is selected by default when any new audit is scheduled for that Site).
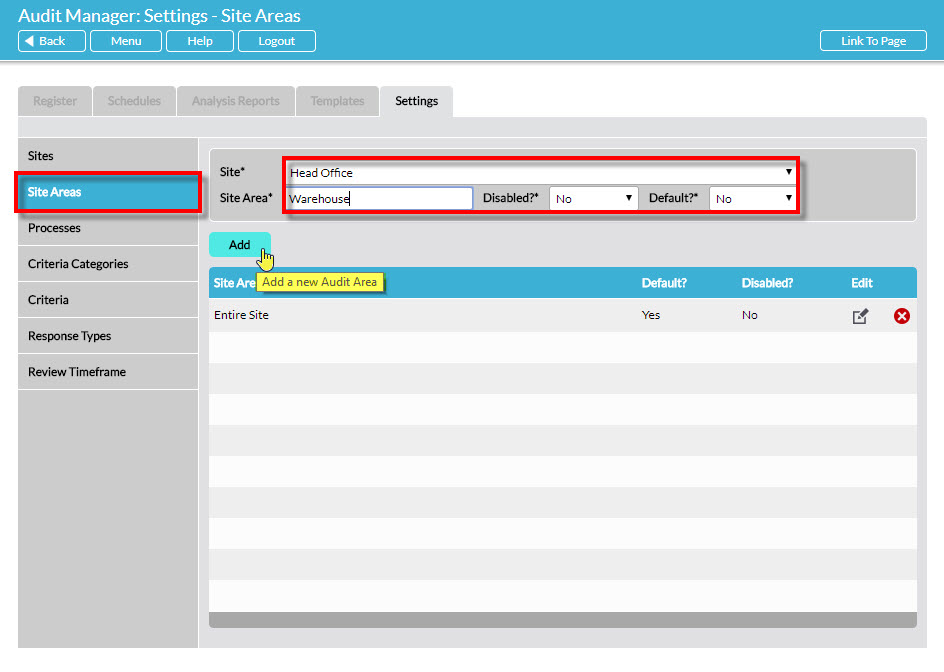
Click on Add to complete the addition of the Site Area. The newly-added Site Area is now displayed in the list.
To edit a Site Area in the list, click on the Edit (pencil) icon to its right:
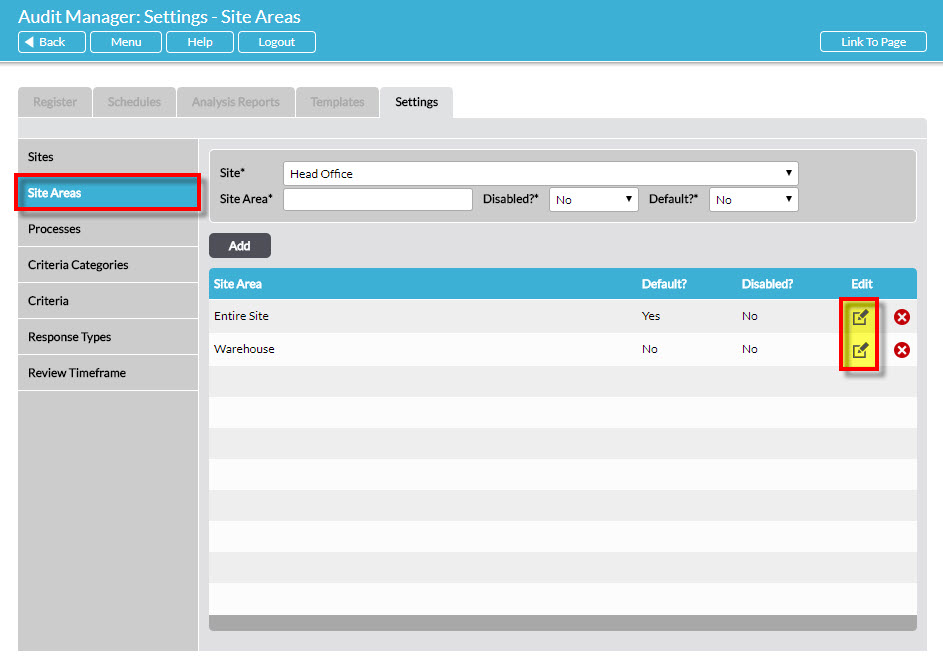
Make the changes in the fields at the top of the page, and click Save.
To delete a Site Area from the list, click on the Delete (red cross) icon to its right:
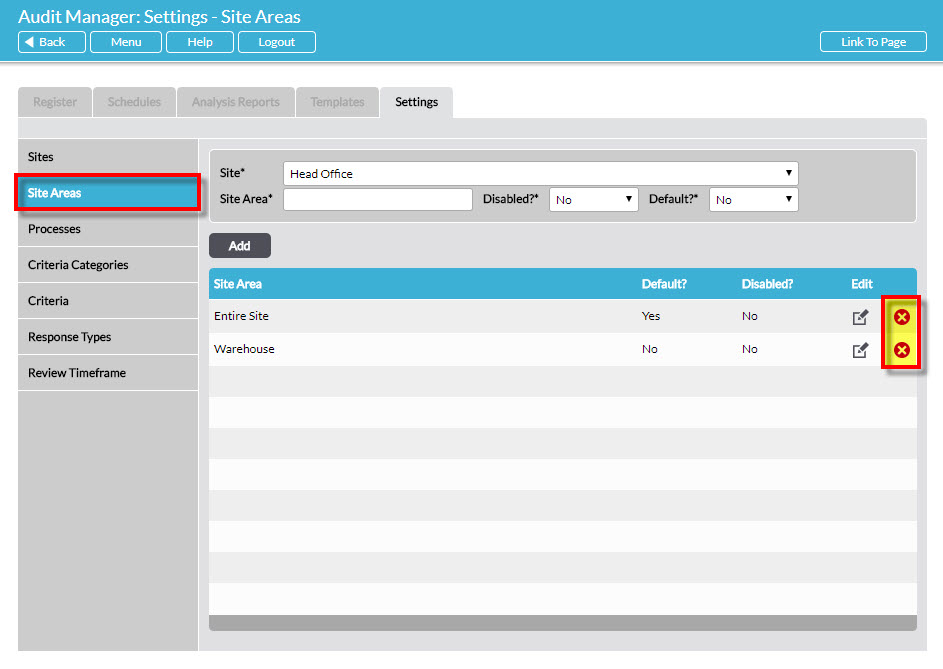
You will not be able to delete a Site Area that has already been used in an audit. If you wish to remove the Site Area from drop-down menus and prevent it being selected in future you can disable it instead.
PROCESSES – used when scheduling audits
When a user sets up (schedules) a new audit, optionally they can specify the Process that the audit will be conducted on. The Process is selected from a drop-down menu, configured by you in Settings.
If your Activ system has the Processes module, your processes will already be automatically shown as options here. (They are greyed out as they cannot be edited here, but any changes that you make within your Processes module will automatically feed through to your Settings in Audit Manager). If you do not have the Processes module of Activ, this list will be blank when your system is new and can be populated by you.
To add a new Process, select the Processes item from the menu on the left. Type the new Process’s name in the Process Name* field at the top of the page. Also select whether the Process is to be Disabled?* (meaning it is not available for selection by users).
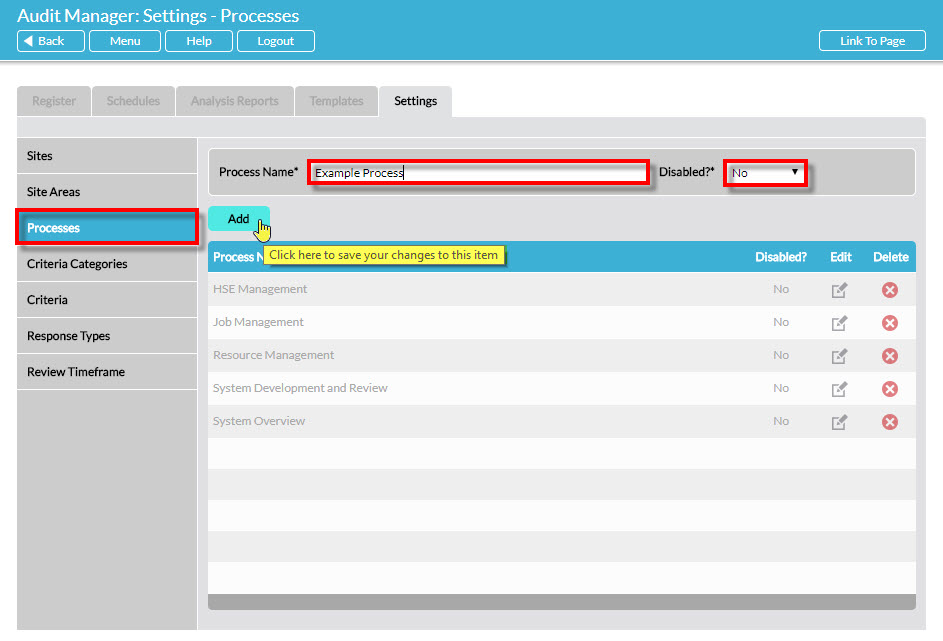
Click on Add to complete the addition of the Process. The newly-added Process is now displayed in the list.
To edit a Process in the list, click on the Edit (pencil) icon to its right:
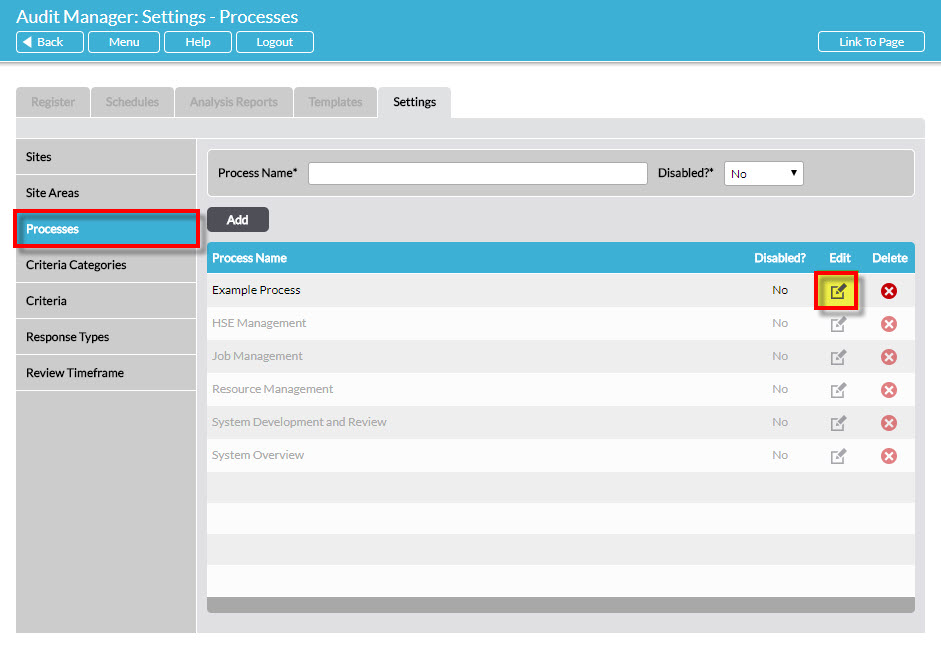
Make the changes in the fields at the top of the page, and click Save.
To delete a Process from the list, click on the Delete (red cross) icon to its right:
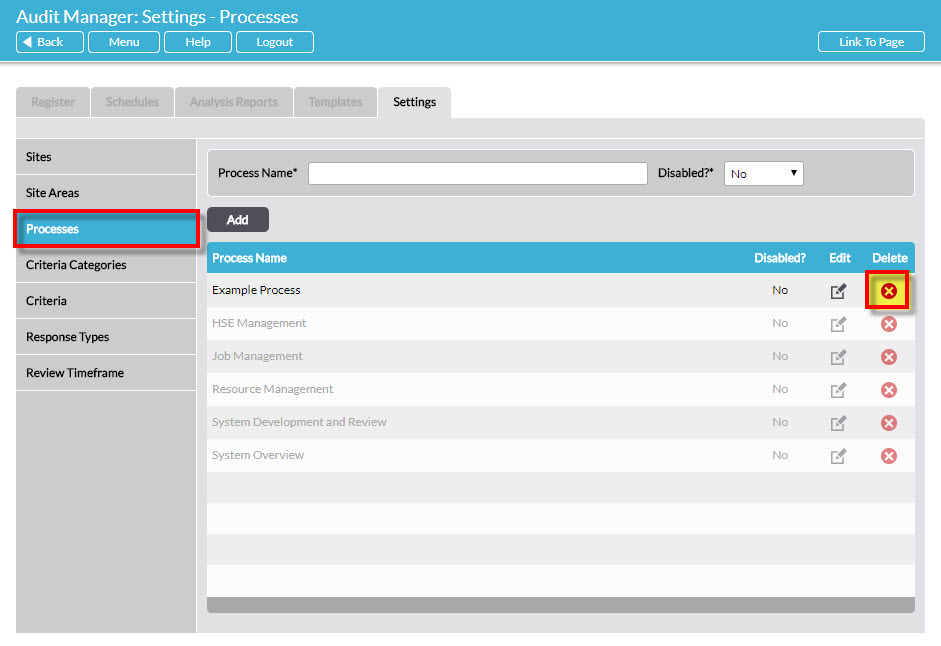
You will not be able to delete a Process that has already been used in an audit. If you wish to remove the Process from drop-down menus and prevent it being selected in future you can disable it instead.
CRITERIA CATEGORIES – e.g. a Standard; used when designing audit templates
When a new audit template is being designed, there is the option to specify the Criteria being audited against, e.g. a Clause in a Standard, Customer Contractual Requirements, etc. As the list of Criteria is potentially very long, you can group Criteria into Categories, e.g. by Standard. If Activ’s ready-made audit templates for any particular Standard are included in your Activ system, the name(s) of the Standard(s) will be automatically shown as options here, greyed-out as they cannot be edited or deleted.
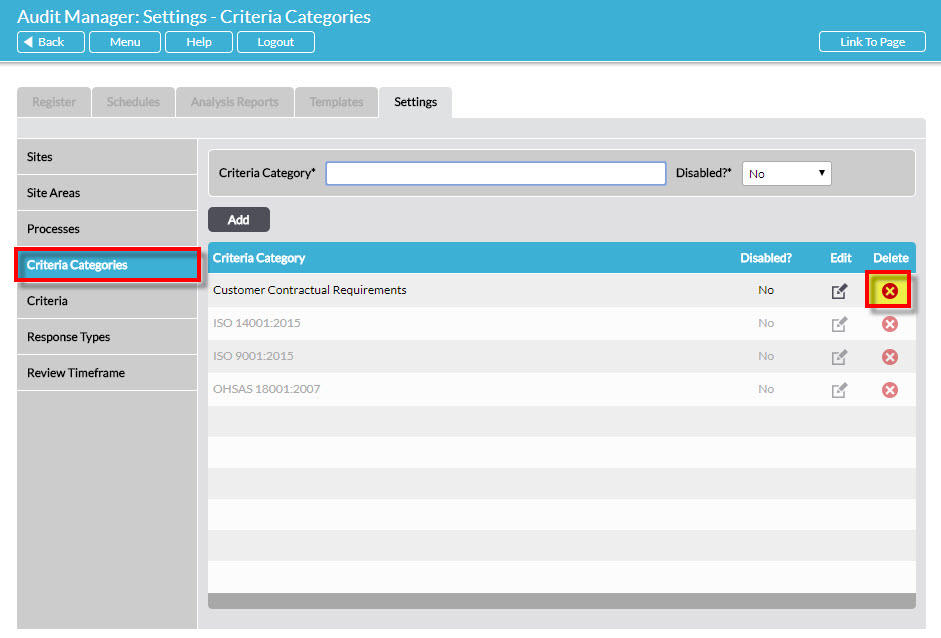
To add a new Criteria Category, select the Criteria Categories item from the menu on the left. Type the new Category’s name in the Criteria Category* field at the top of the page. Also select whether the Category is to be Disabled?* (meaning it is not available for selection by users).
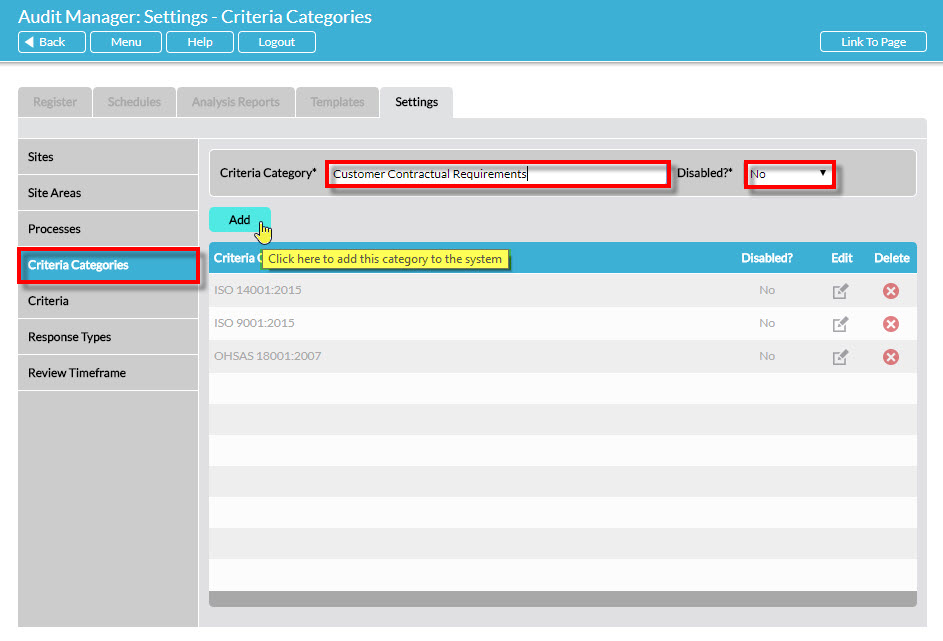
Click on Add to complete the addition of the Criteria Category. The newly-added Criteria Category is now displayed in the list.
To edit a Criteria Category in the list, click on the Edit (pencil) icon to its right:
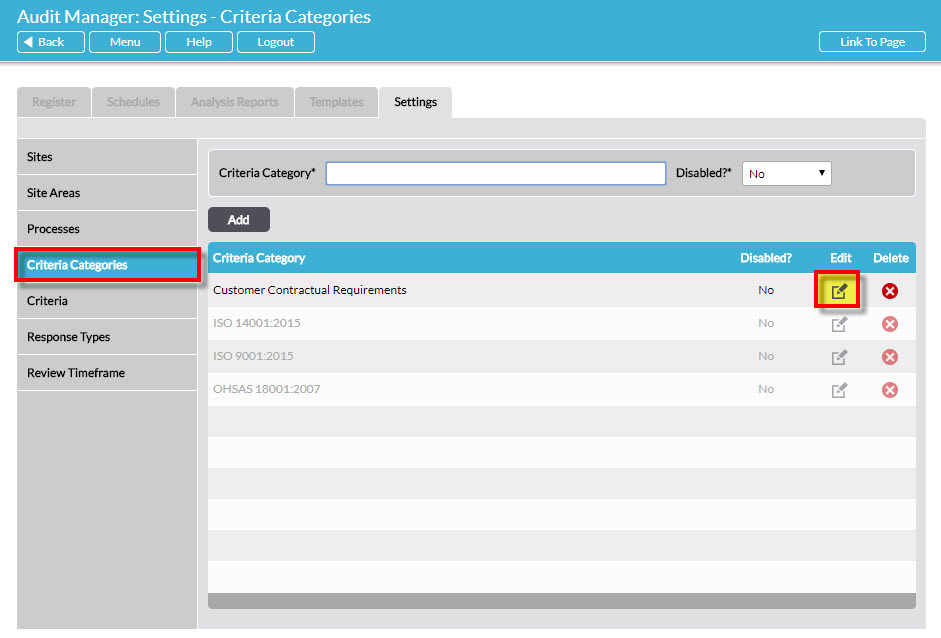
Make the changes in the fields at the top of the page, and click Save.
To delete a Criteria Category from the list, click on the Delete (red cross) icon to its right:
You will not be able to delete a Criteria Category that has already been used in an audit. If you wish to remove the Criteria Category from drop-down menus and prevent it being used in future audit template designs you can disable it instead.
CRITERIA – e.g. a Clause of a Standard; used when designing audit templates
When a new audit template is being designed, there is the option to specify the Criteria being audited against, e.g. ‘Provide monthly reports’. If Activ’s ready-made audit templates for any particular Standard are included in your Activ system, the clauses of the Standard(s) will be automatically shown as options here, greyed-out as they cannot be edited or deleted.
To add a new Criteria, select the Criteria item from the menu on the left. At the top of the page, select the relevant Category that the Criteria will belong to and then type the name of the new Criteria in Criteria Title*. Also select whether the Criteria is to be Disabled?* (meaning it is not available for selection by users). Optionally, you can also enter further explanatory detail on the new Criteria in Criteria Details.
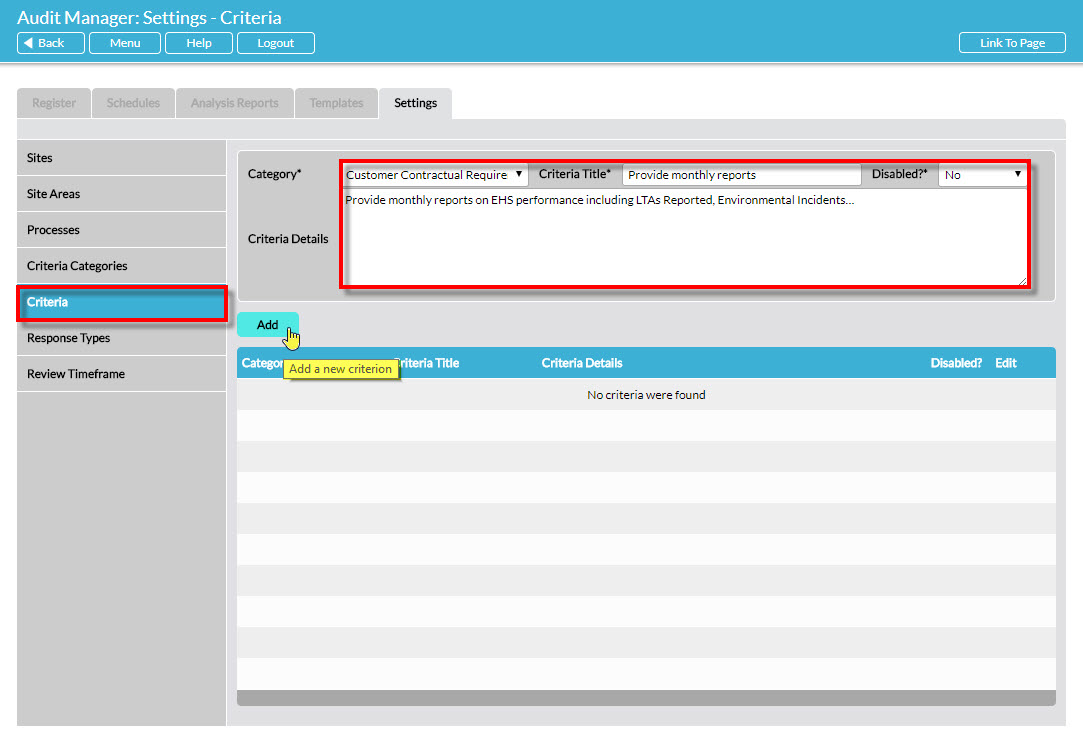
Click on Add to complete the addition of the Criteria. The newly-added Criteria is now displayed in the list.
To edit a Criteria in the list, click on the Edit (pencil) icon to its right:
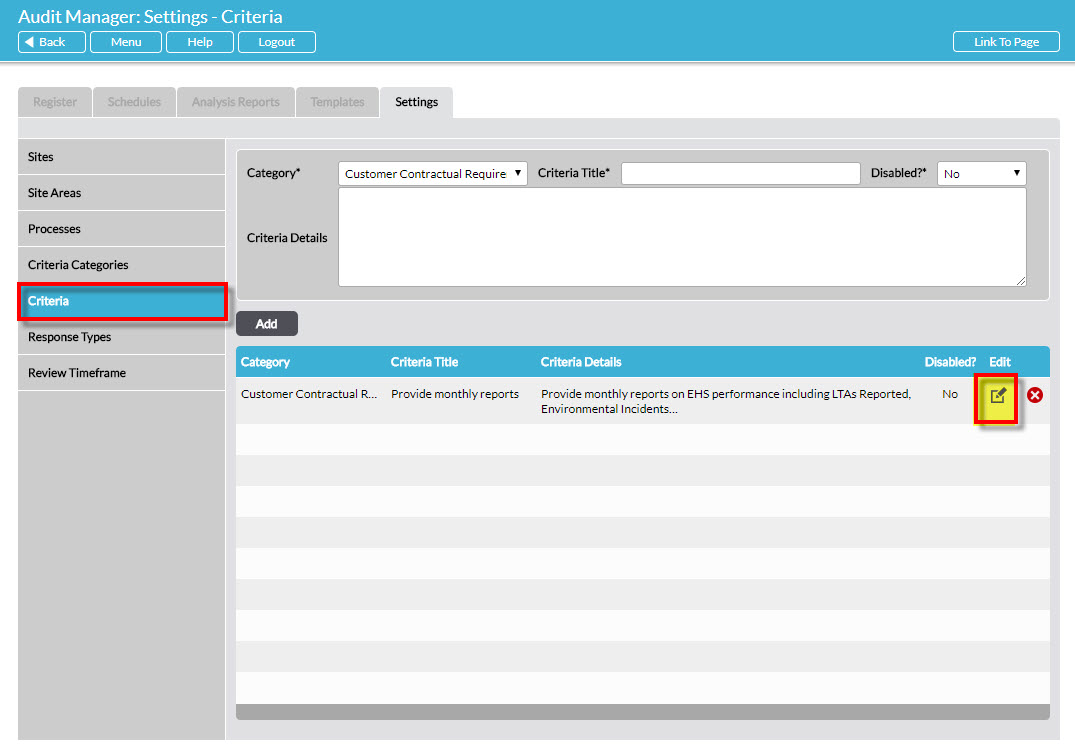
Make the changes at the top of the page, and click Save.
To delete a Criteria from the list, click on the Delete (red cross) icon to its right:
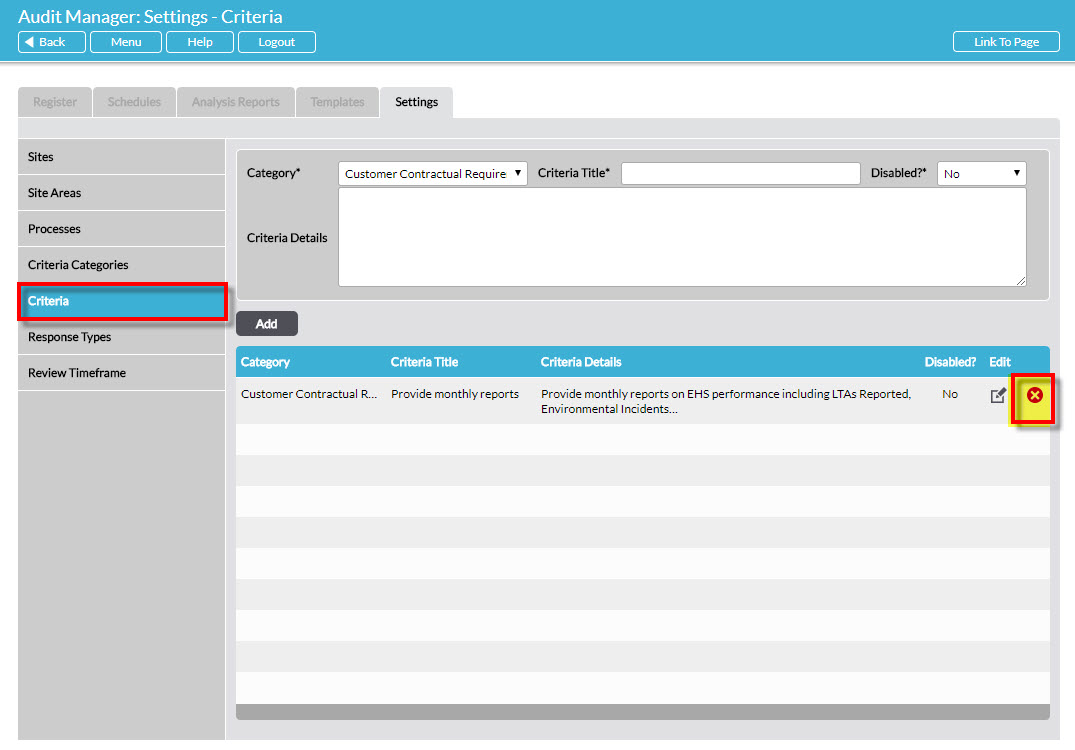
You will not be able to delete a Criteria that has already been used in an audit. If you wish to remove the Criteria from drop-down menus and prevent it being used in future audit template designs you can disable it instead.
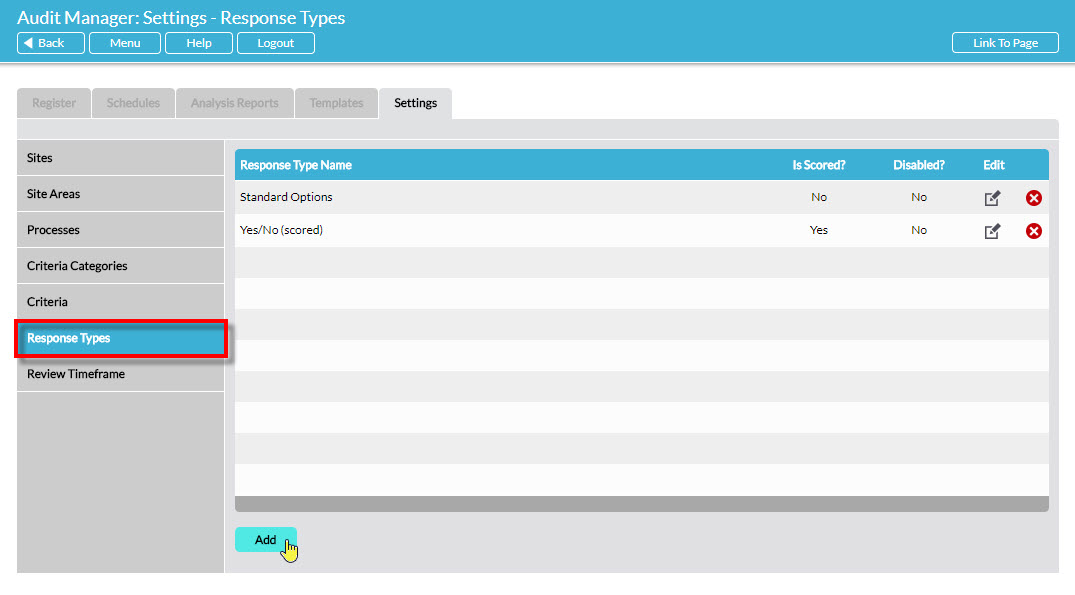
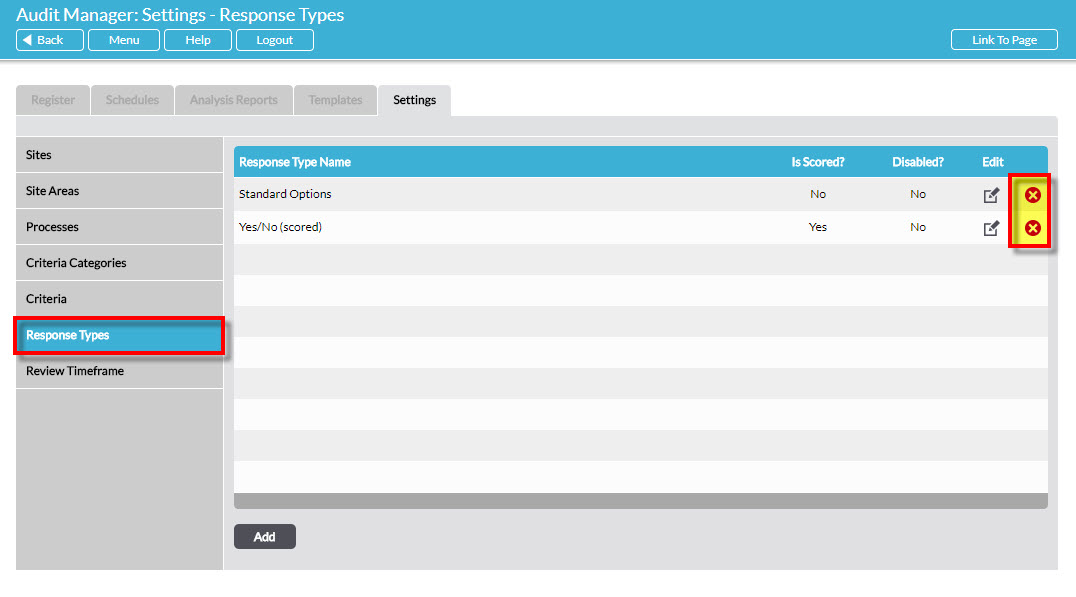
RESPONSE TYPES – used when designing audit templates
In audits that are conducted using Activ, responses to each question (i.e. auditor findings) are selected from a drop-down menu. When a new audit template is being designed, you specify the type of response that will be available for selection by the auditor when that template is used. This might be ‘Yes’/’No’, or some Standard Options such as ‘No issues identified’/‘Good practice’/‘Opportunity for improvement’/‘Nonconformity’. The Response Types available to you when designing new audit templates are configured by you in Settings.
To add a new Response Type, select the Response Types item from the menu on the left. Click on Add:
A new page opens, called Configure Response Type:
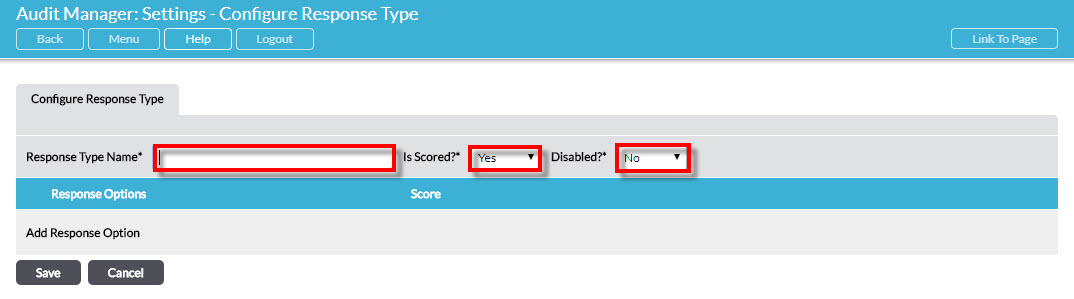
Use the three fields at the top to enter the properties of the new Response Type:
Response Type Name* – enter the name you are assigning to this type of response
Is Scored?* – if you select ‘Yes’ here, you can assign a score to each option in this Response Type. When you create an audit template that uses a Scored Response Type, you enter a Pass Mark so that the total score from the audit can determine whether the audit passed or failed. An example of an audit template that might use a Scored response type is a Site Condition Check, with an associated Pass Mark. Reporting on pass rates and scores is available via the Analysis Reports tab. See Analysis of Audit Activity – Analysis Reports.
Disabled?* – this field defaults to ‘No’, meaning that the Response Type will be available for selection when creating new audit templates. If you select ‘Yes’ here the Response Type will not be available for selection when creating new audit templates.
Use the Response Options section below to enter the options that will be available for this Response Type:
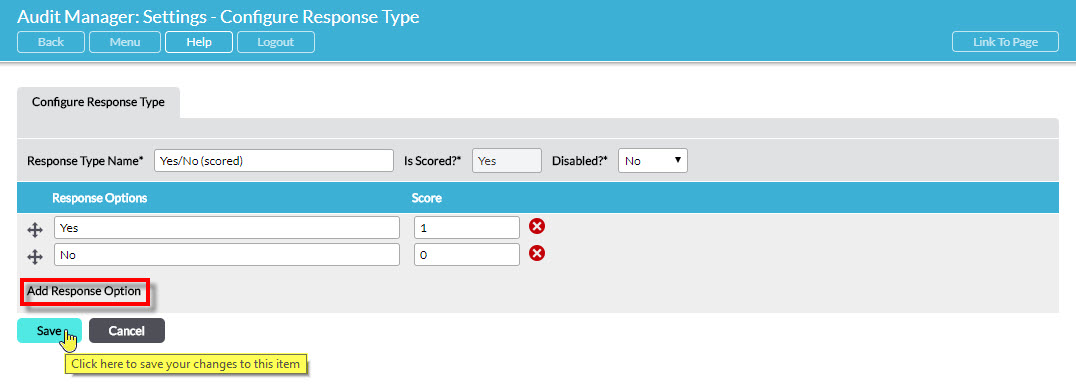
Click on Add Response Option to generate a blank field to populate with your first response option. Repeat as required.
When you have completed specifying your new Response Type, click on Save. Your new Response Type will now be displayed in the list.
To edit a Response Type in the list, click on the Edit (pencil) icon to its right:
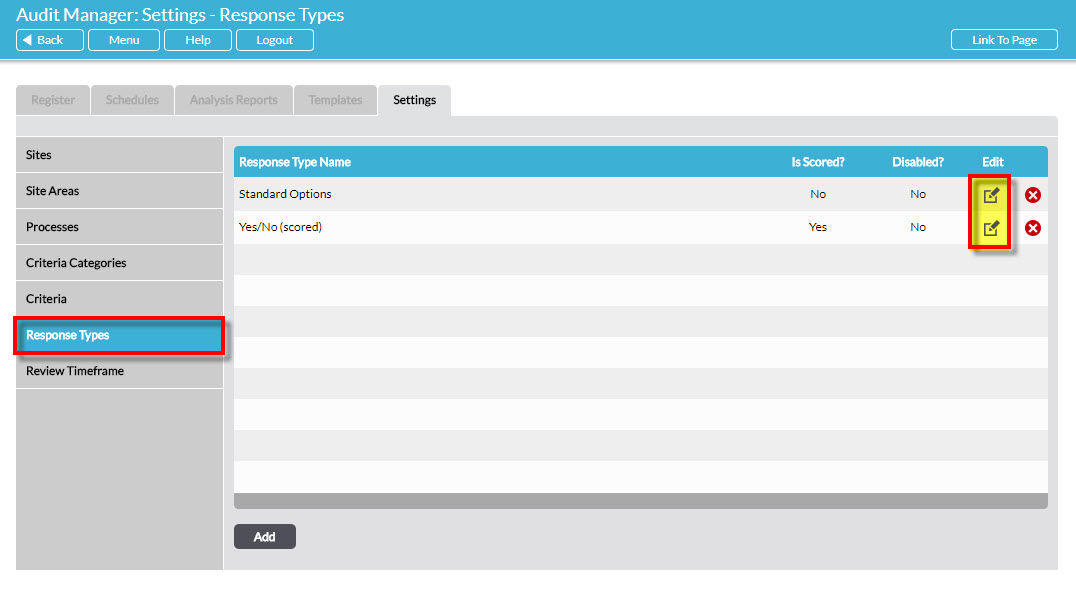
Make the required changes on the resulting Configure Response Type page, and click Save.
To delete a Response Type from the list, click on the Delete (red cross) icon to it right:
You will not be able to delete a Response Type that has already been used in an audit. If you wish to prevent the Response Type from being selected for use in any future audit templates that are created you can disable it instead.
REVIEW TIMEFRAME
When a review is requested for a completed audit, a due date is automatically set n days later. Specify the number of days, n, here.
